Create Standard Questions
| A “Standard” question requires students to type in their answer. | 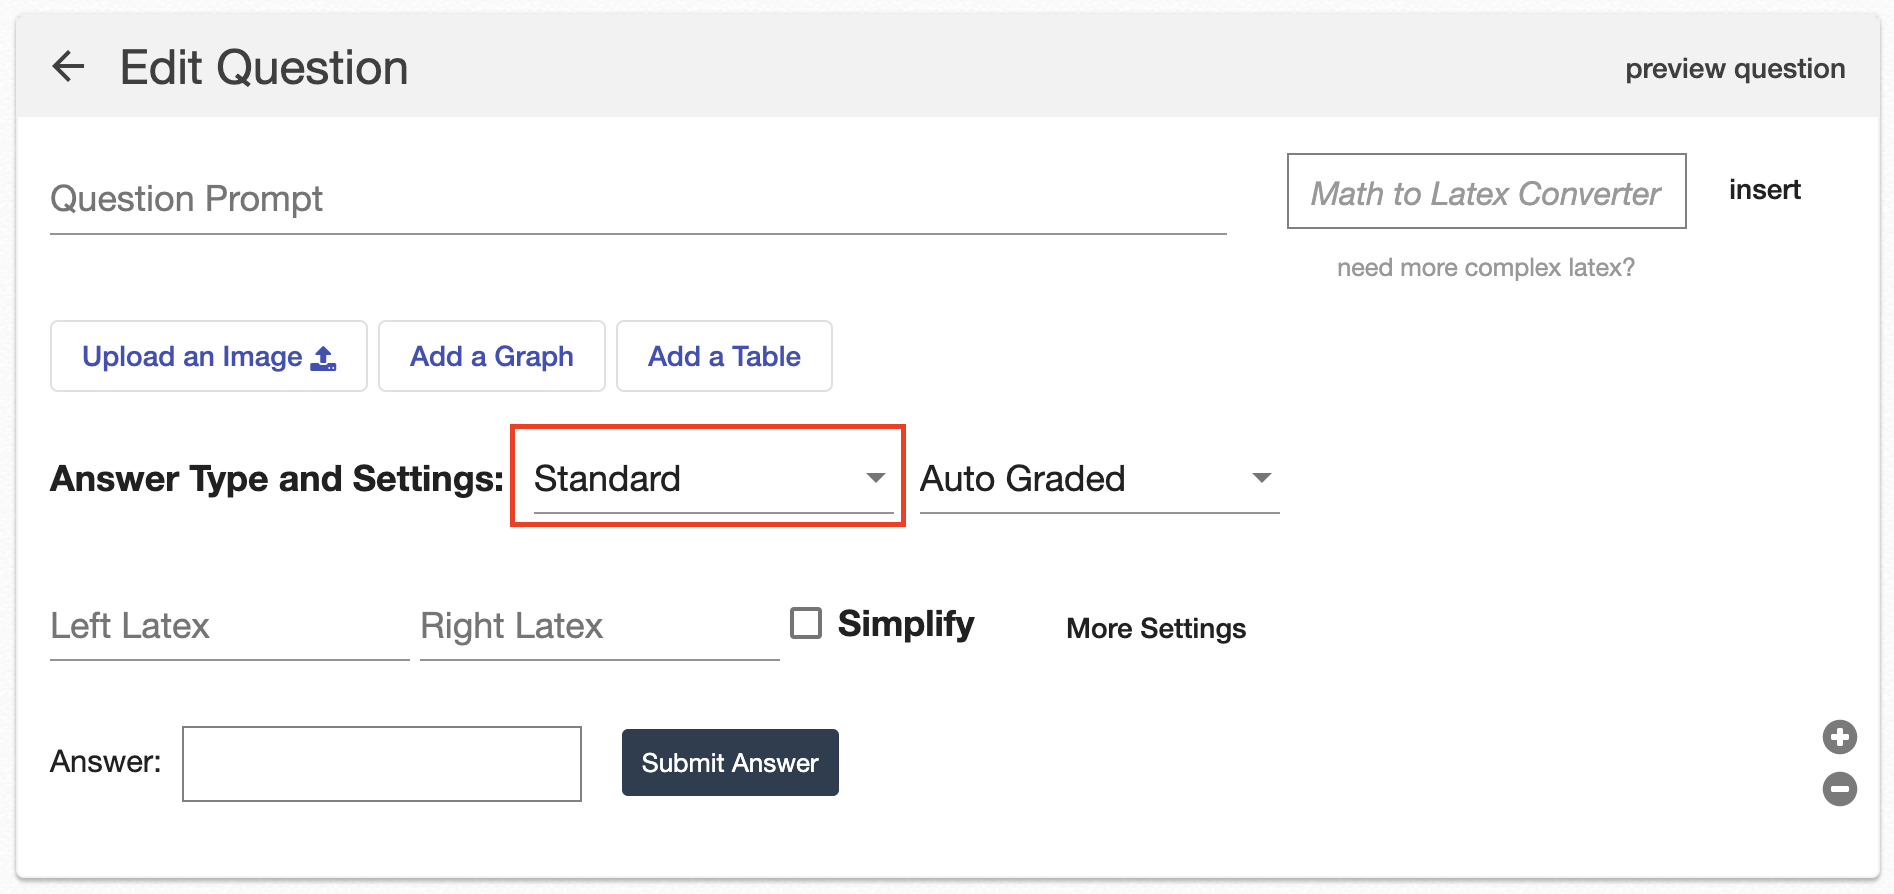 |
|
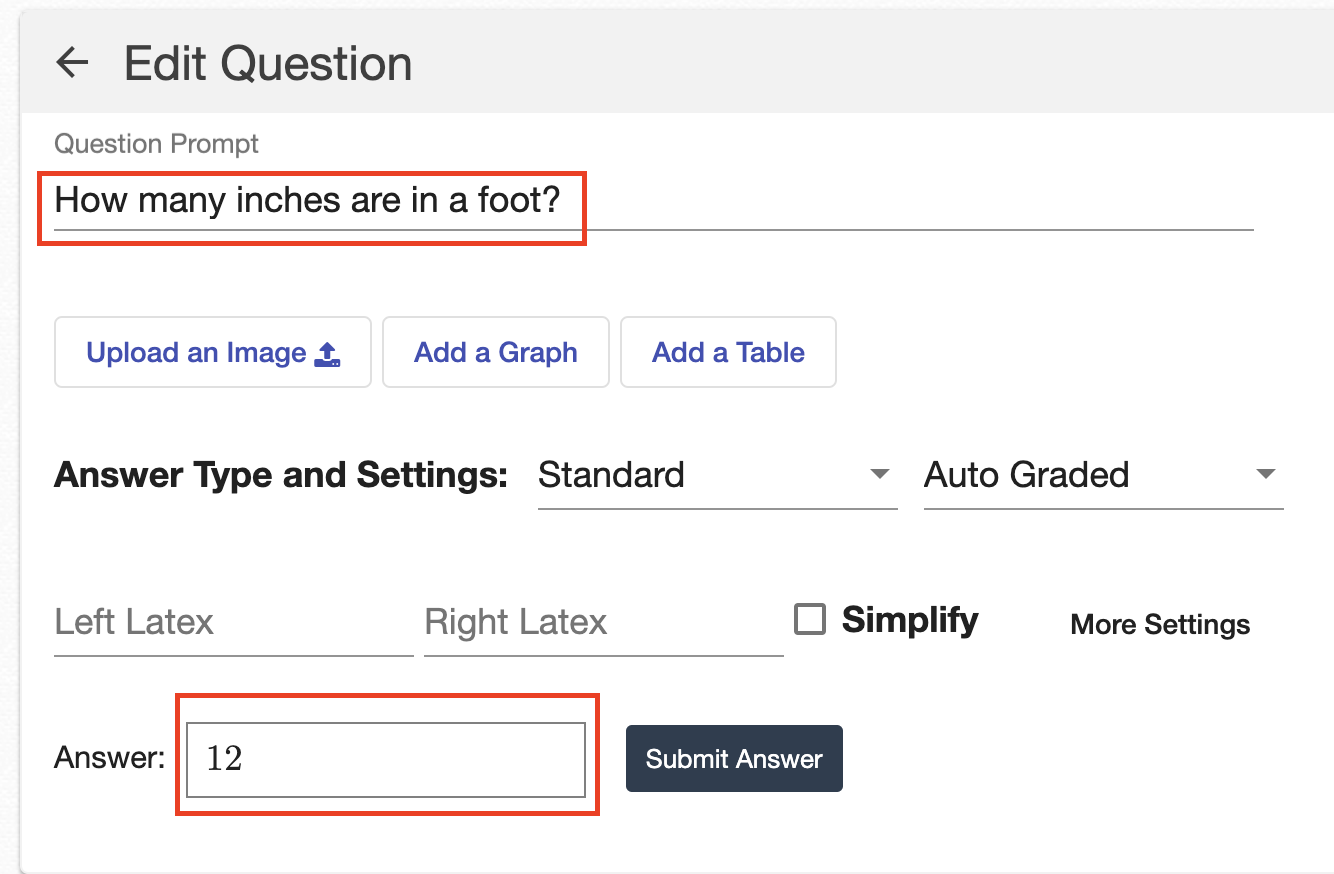
Type your question into the “Question Prompt” box, and then provide the correct answer in the “Answer” box. The answer should be either a numerical value or a mathematical expression/equation.
For more information on incorporating images, tables, graphs, or mathematical expressions, refer to this article. |
 |
|
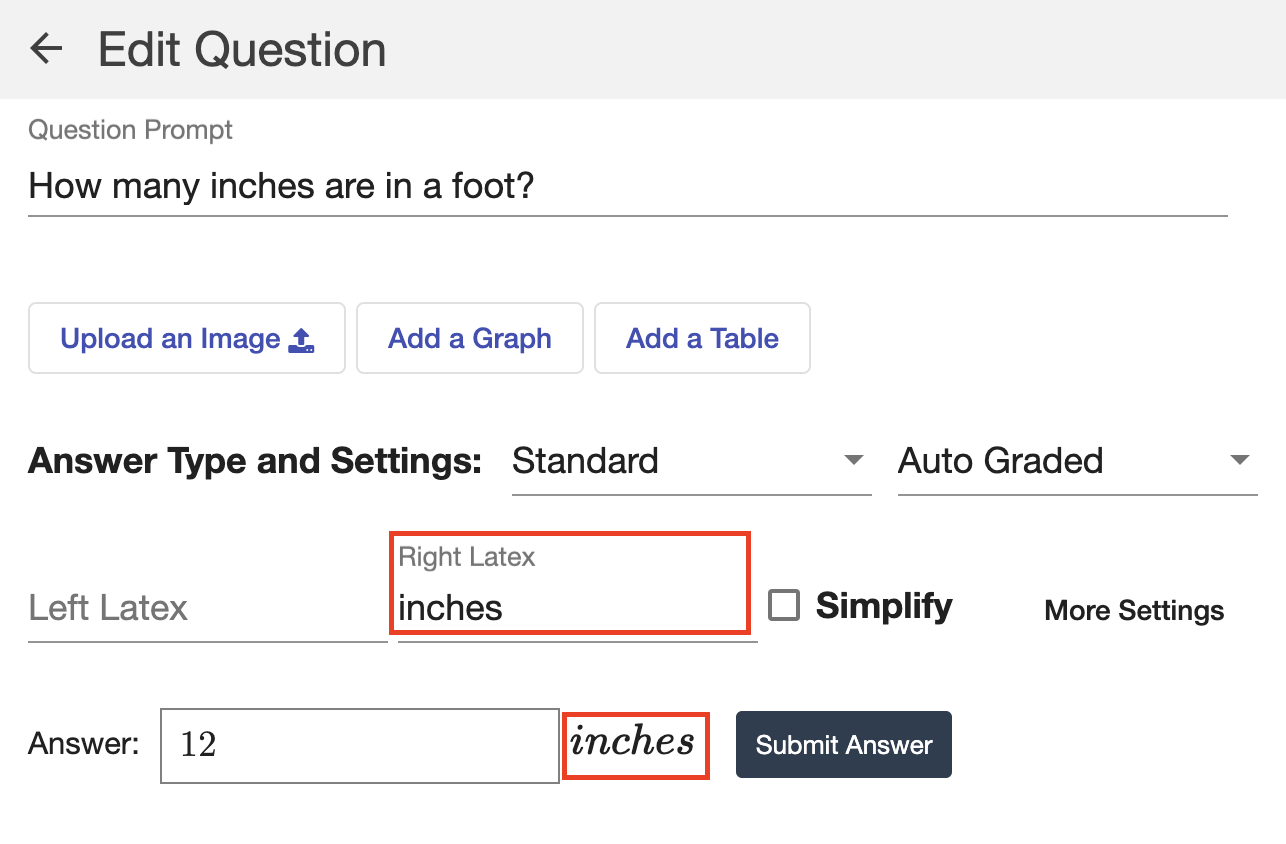
You can customize your answer by adding LaTeX (technical math text) to the left or right. This allows you to include math symbols and/or words within the answer.
For instance, you could include "x =" or "y =" on the left side of the answer, or units on the right side. |
 |
If students need to enter more than one answer, use the  and and  icons on the right to add additional answer boxes. icons on the right to add additional answer boxes. |
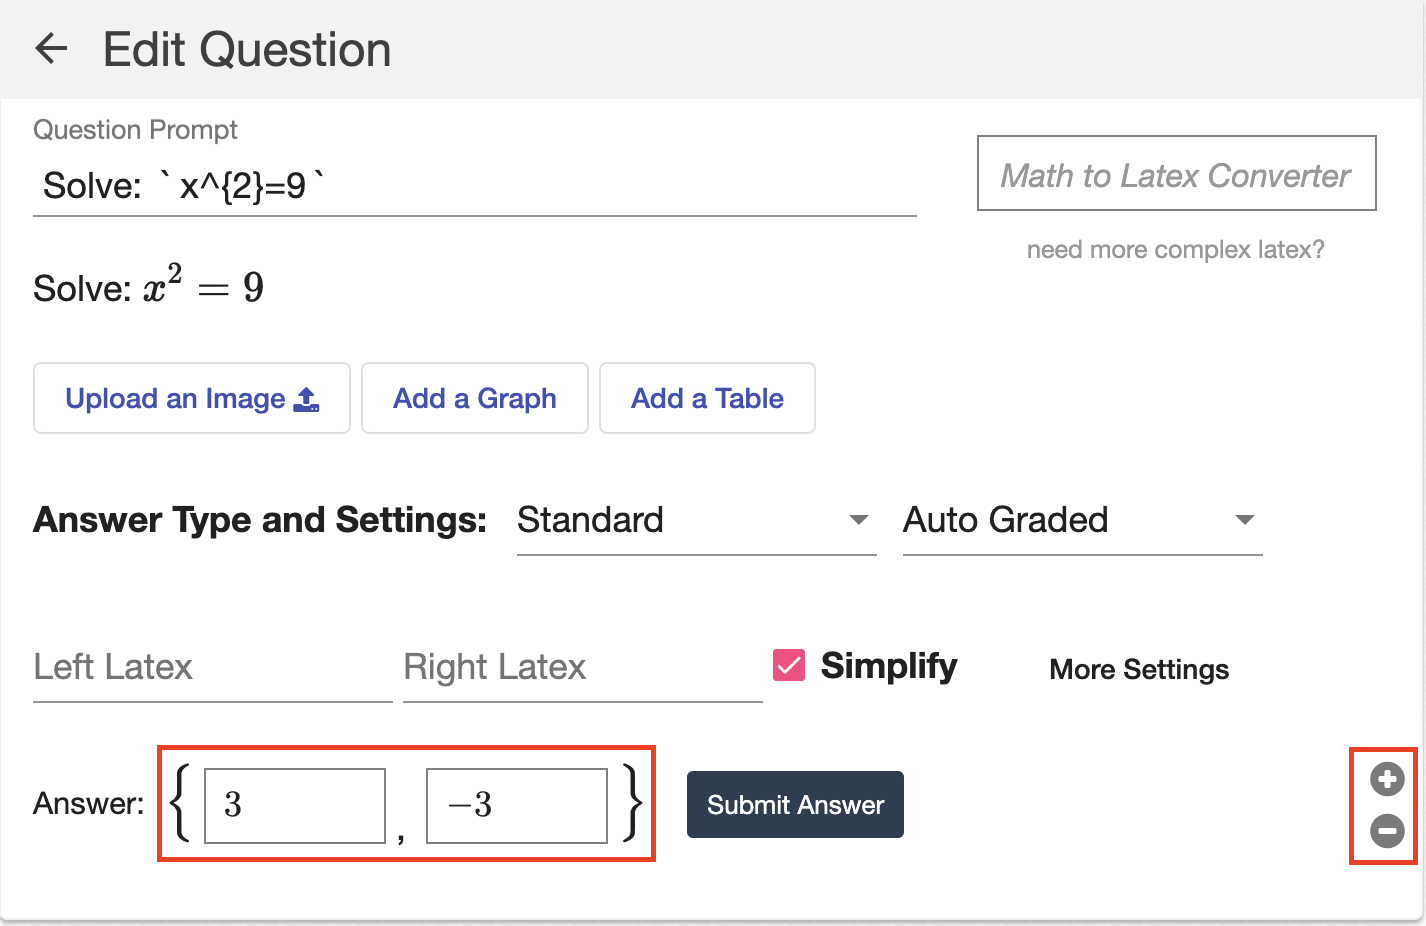 |
| Students can submit their answers in any order and still receive credit. | 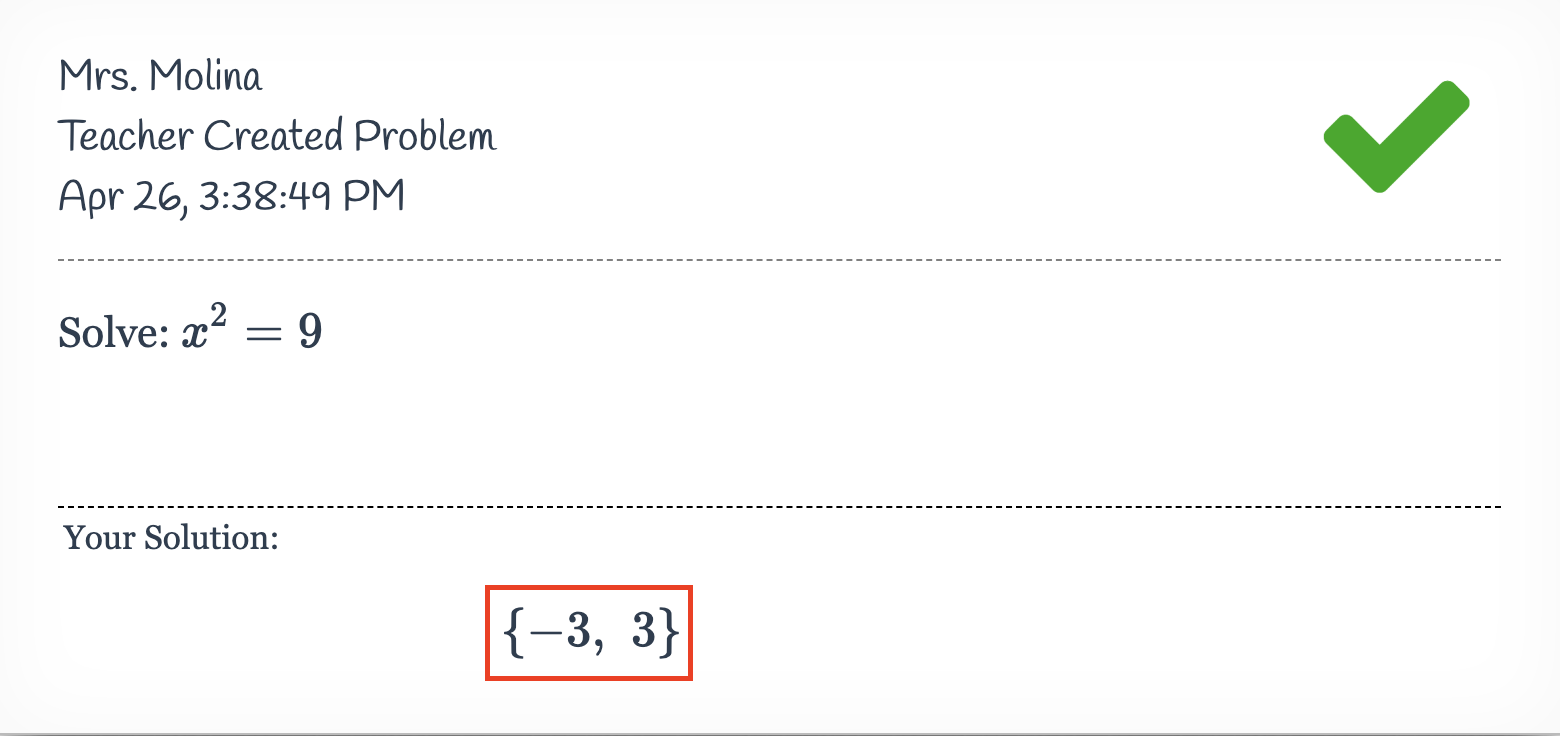 |
|
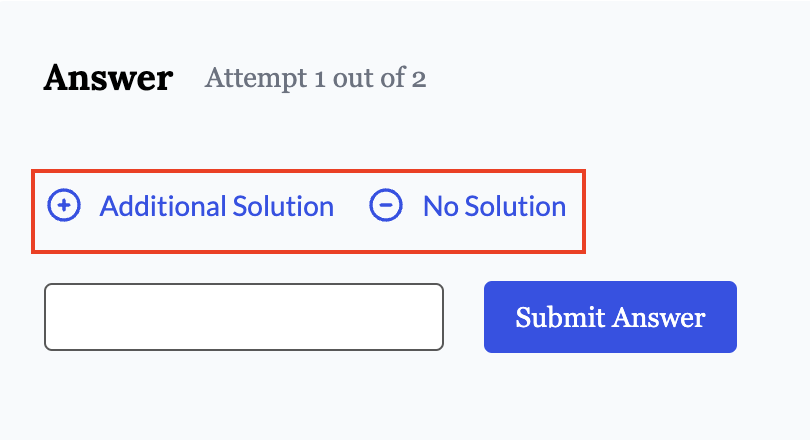
From the student's perspective, they will see two buttons above the answer box.
If they click on "Additional Solution," an extra answer box will appear. They can click this button as many times as necessary to add the correct number of answer boxes.
If the question has no solution, students can click on the "No Solution" button and submit it as their answer. |
 |
Simplify and More Settings
|
By default, if a student submits an answer equivalent to the value in your answer box, it will be marked as correct.
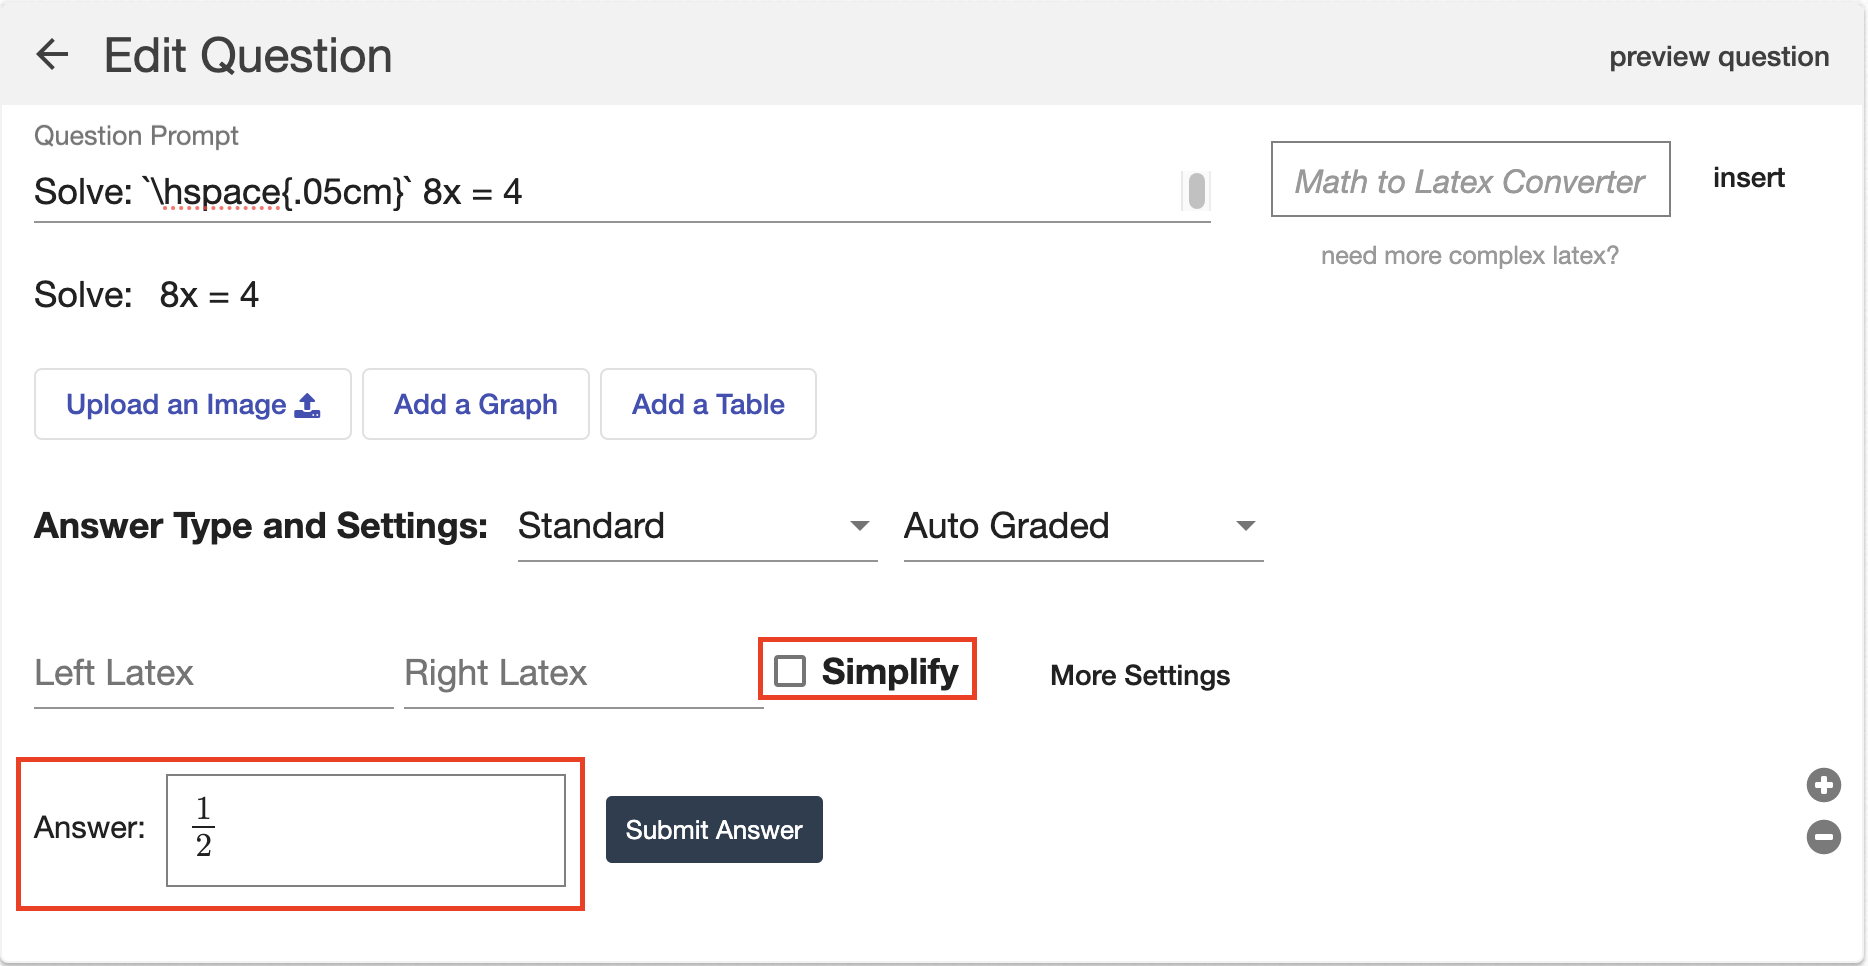
Using the example to the right, the correct answer is ½, and the simplify box is not checked. |
 |
| If a student enters an equivalent answer that is not simplified, they will still be marked correct. | 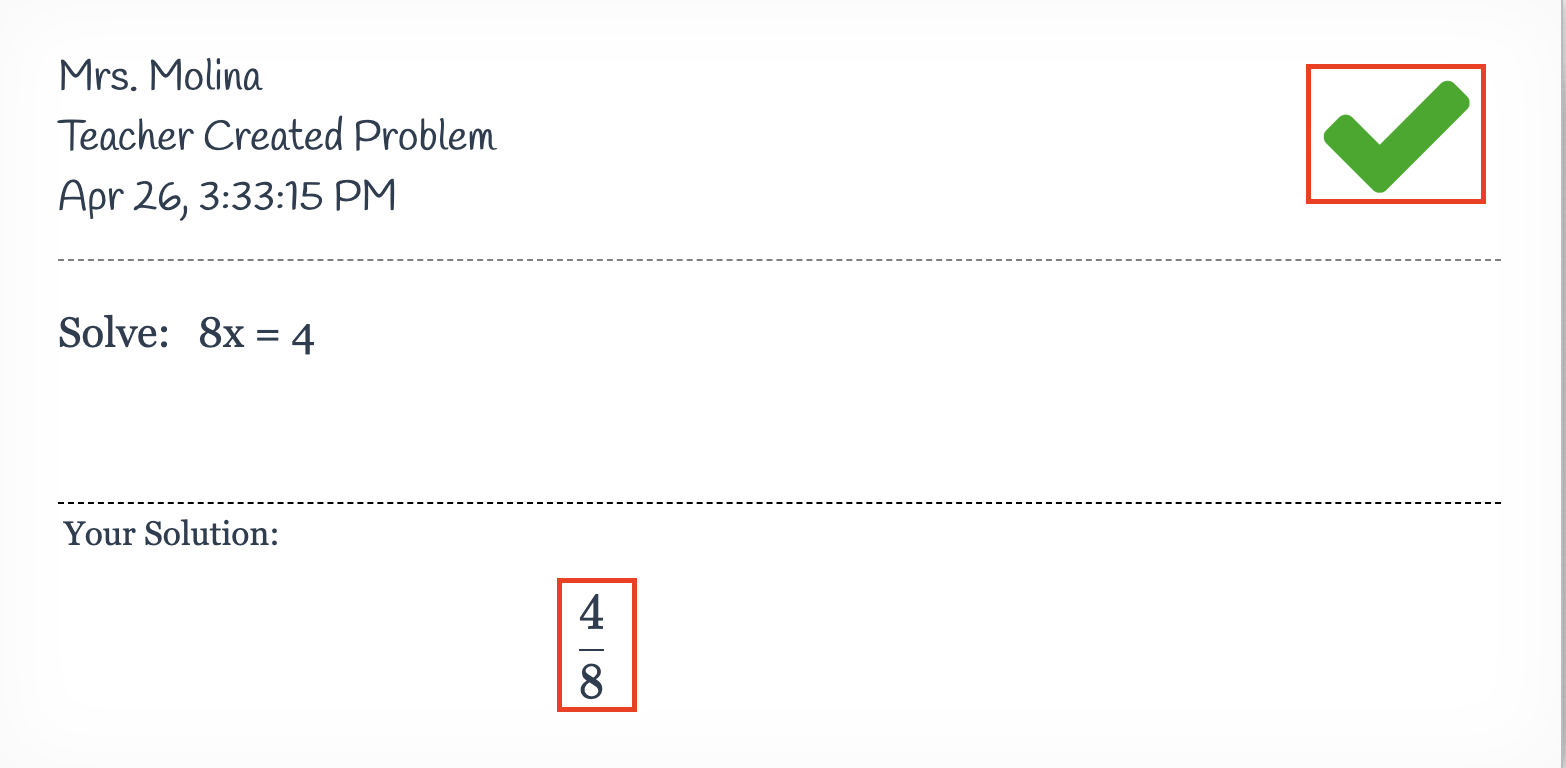 |
| However, if you only want simplified answers to be accepted, you can select the “Simplify” box. | 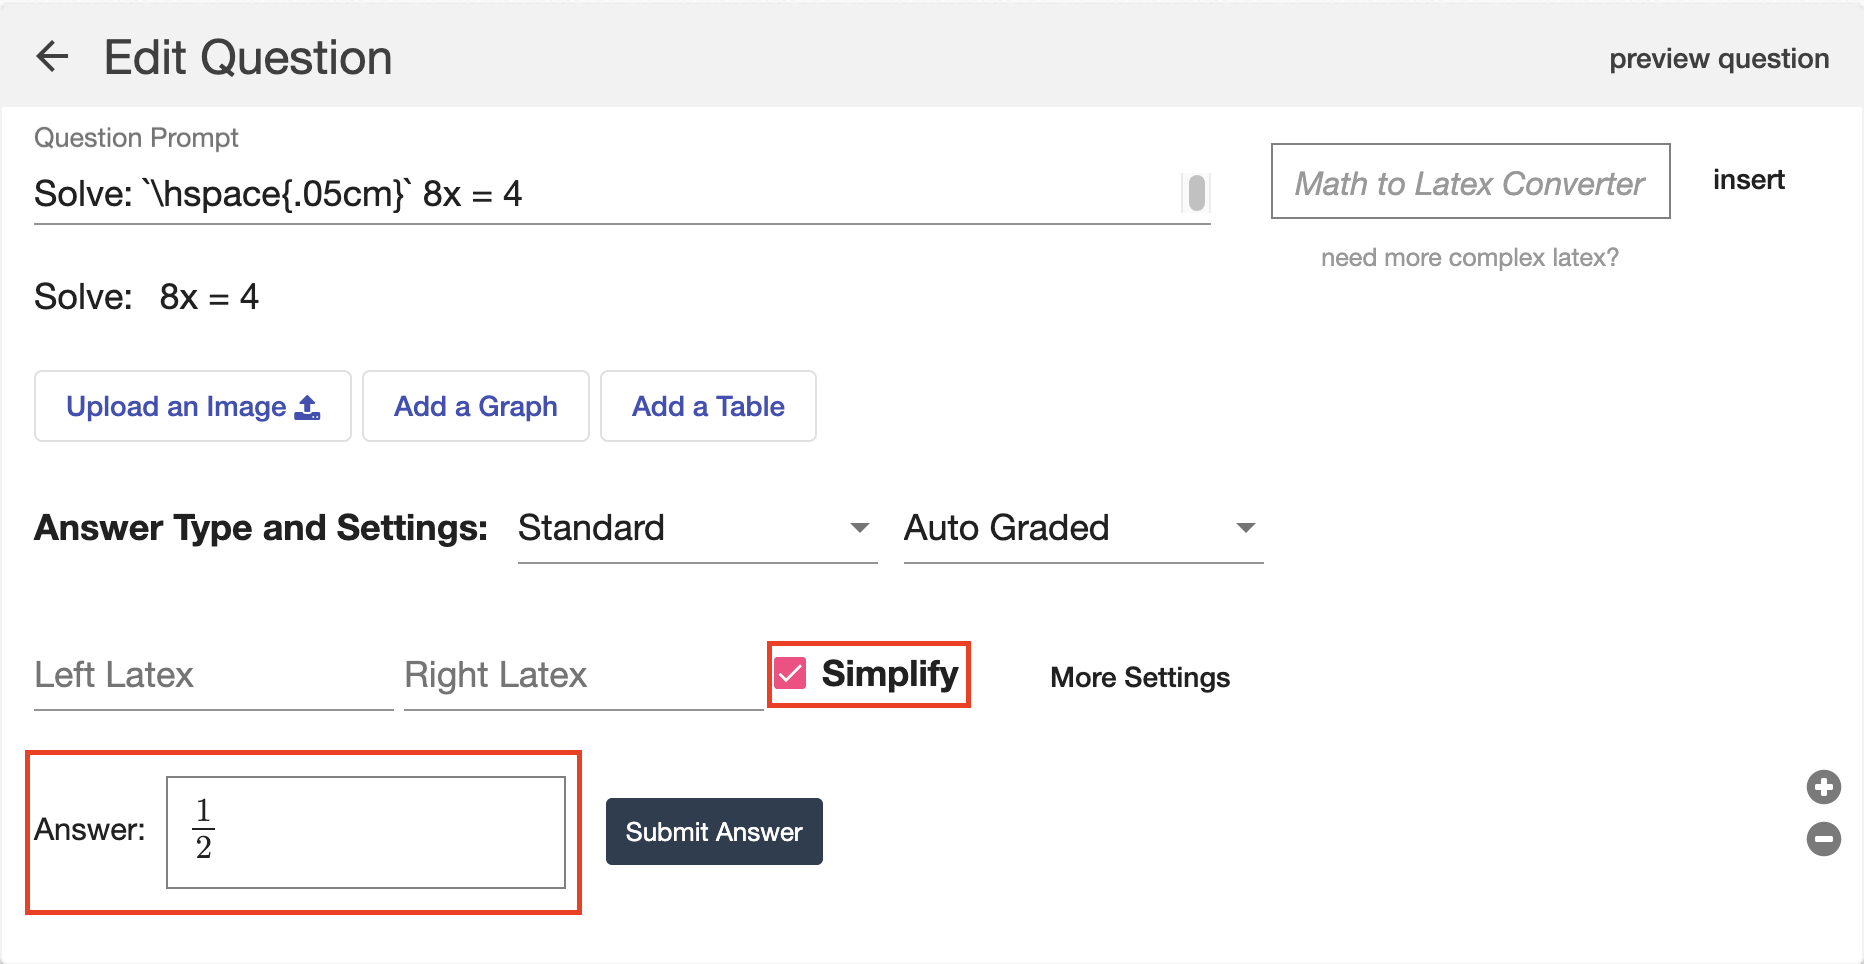 |
| This means that if a student enters an unsimplified answer, they will be marked incorrect. They will also receive a notice at the bottom of the screen indicating, “Your answer is not simplified.” | 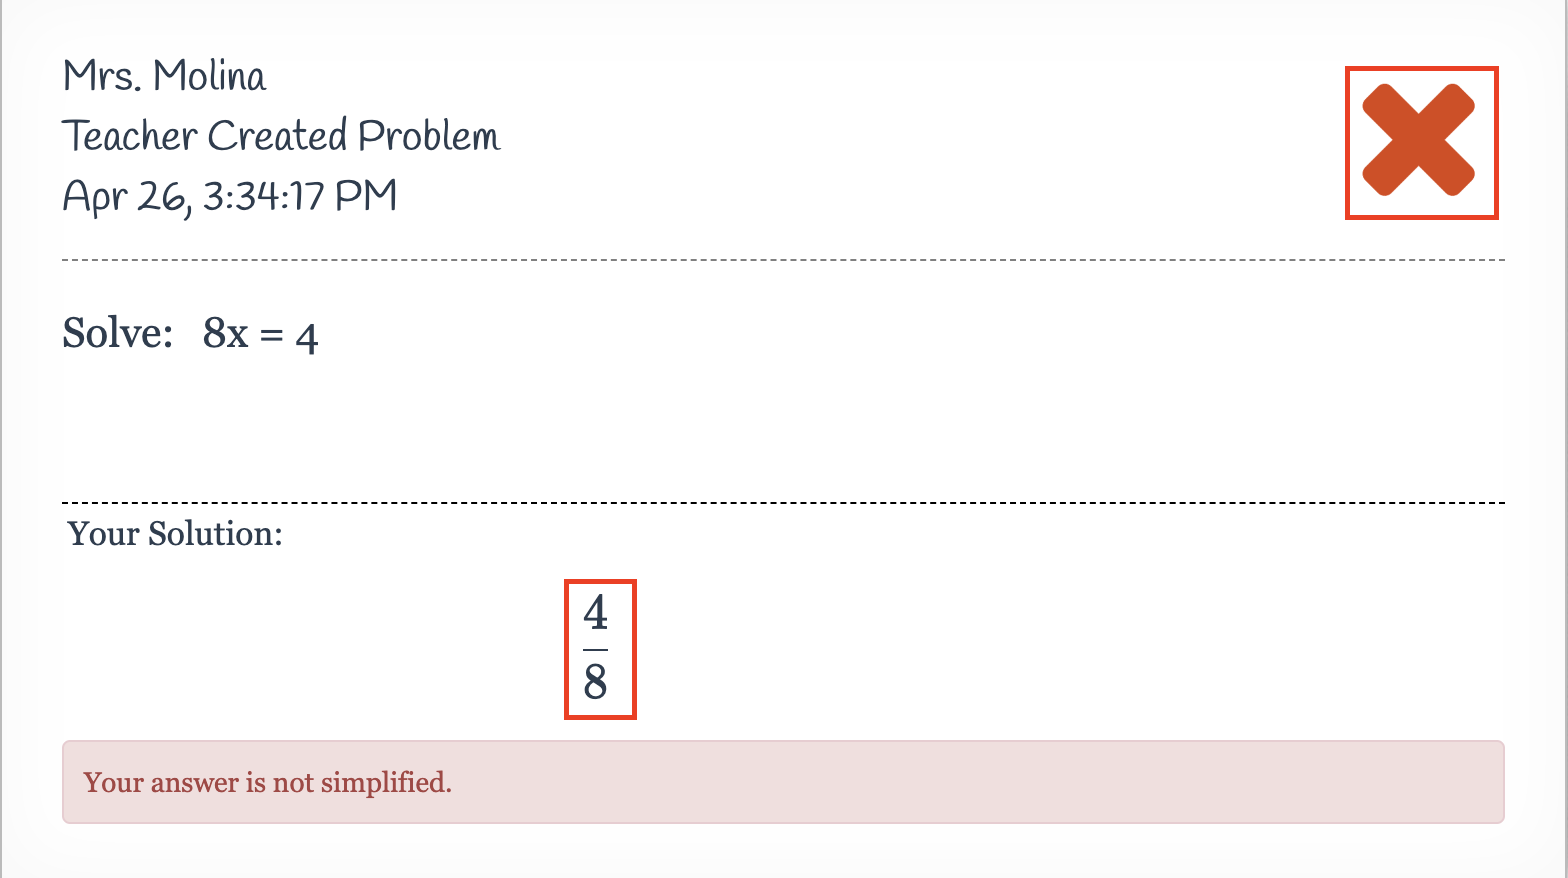 |
| If a student enters a simplified answer in a different form, they will still be marked correct. | 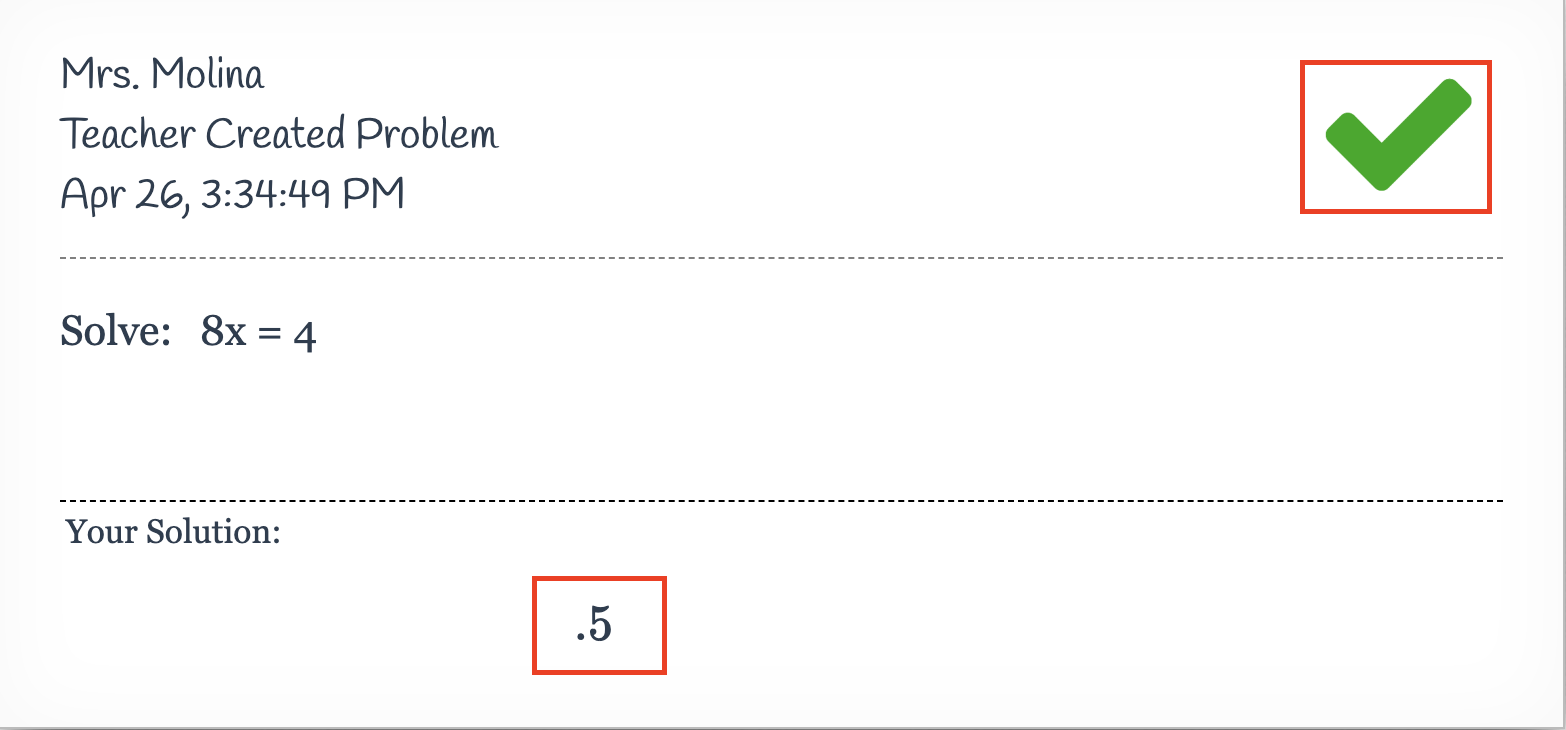 |
| You can adjust additional settings by selecting “More Settings." These settings allow you to control which equivalent answers will be accepted. | 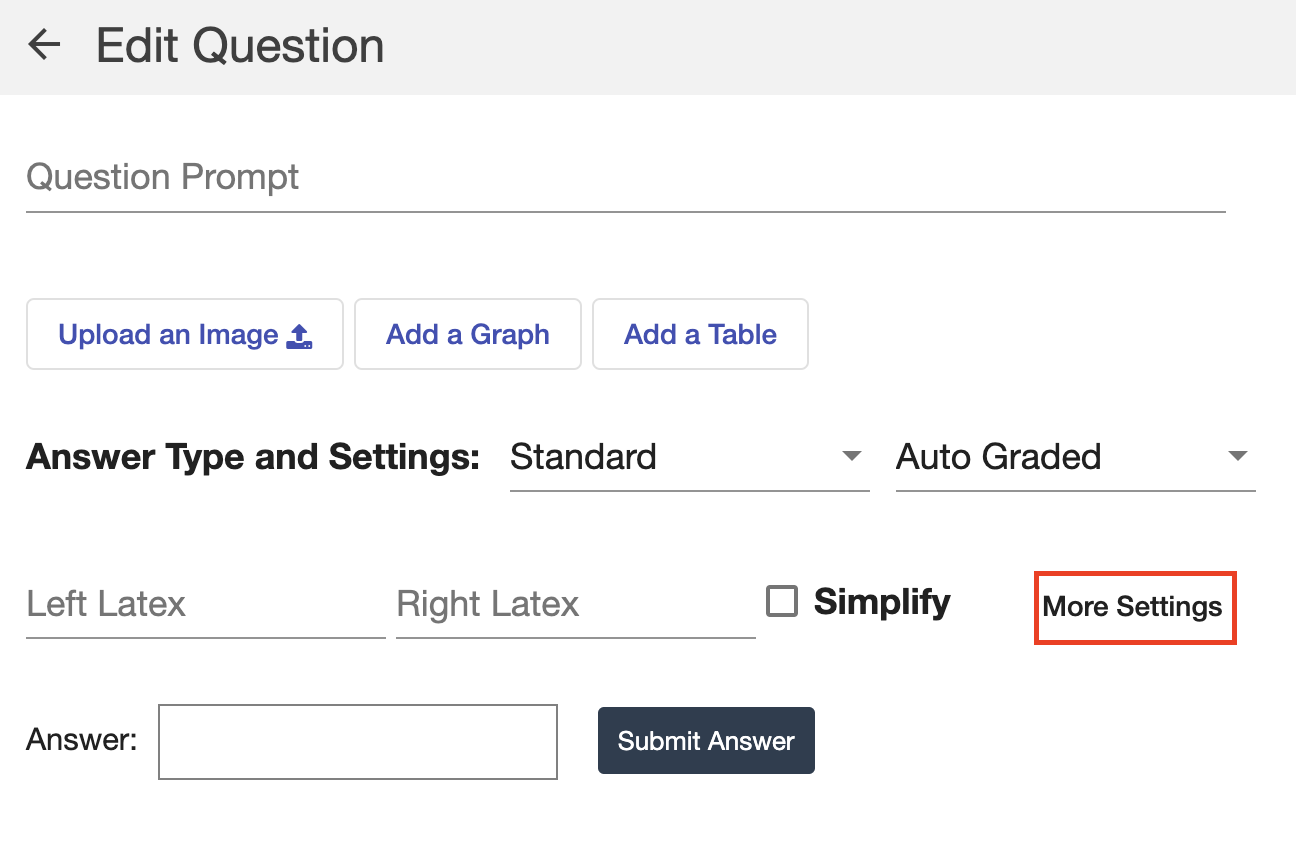 |
| Once selected, you will see several different settings. Expand the options below to see how you can further customize your standard question. | 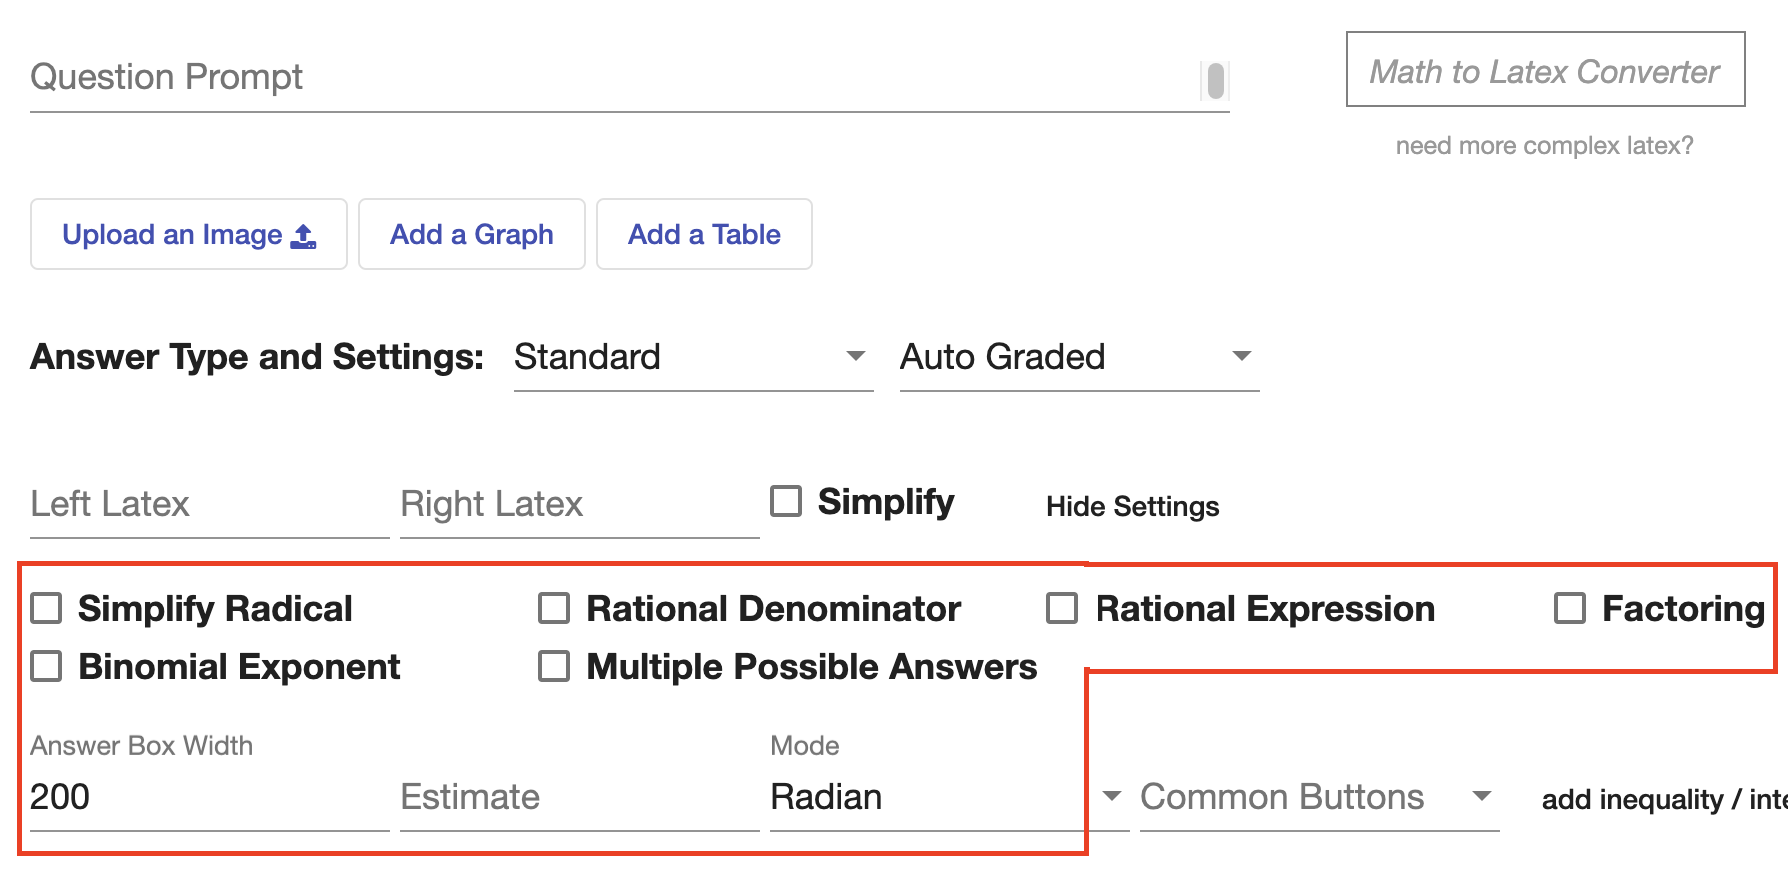 |
Simplified Radical
| When creating a standard question where the student must enter a radical, you can choose to accept answers whether the radical is simplified or not. | 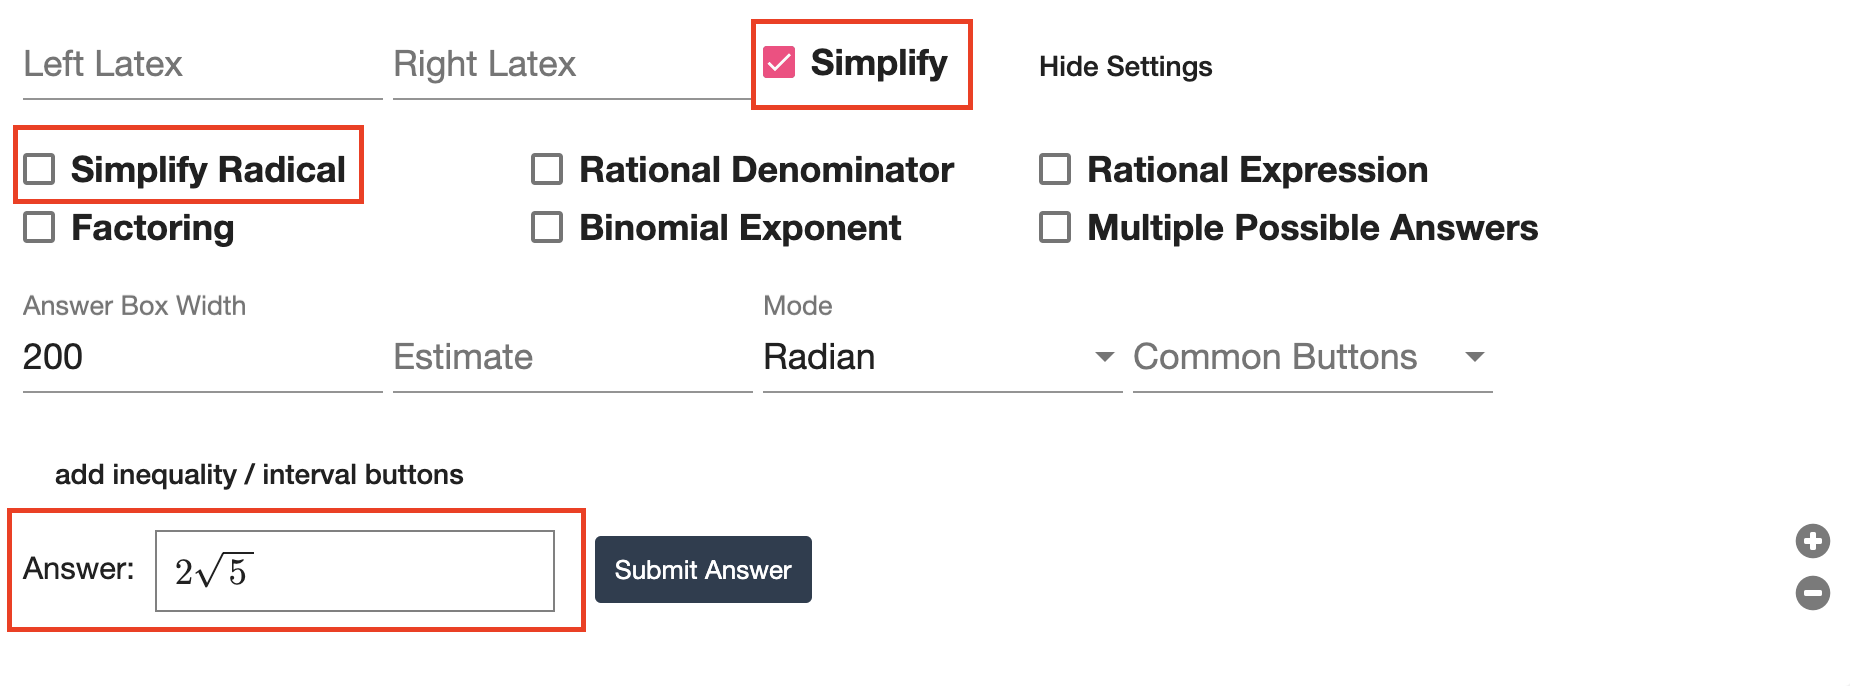 |
| If you don't select the “Simplify Radical” setting, even if the “Simplify” setting is selected, the student will be marked correct if they enter an equivalent, unsimplified root as their answer. | 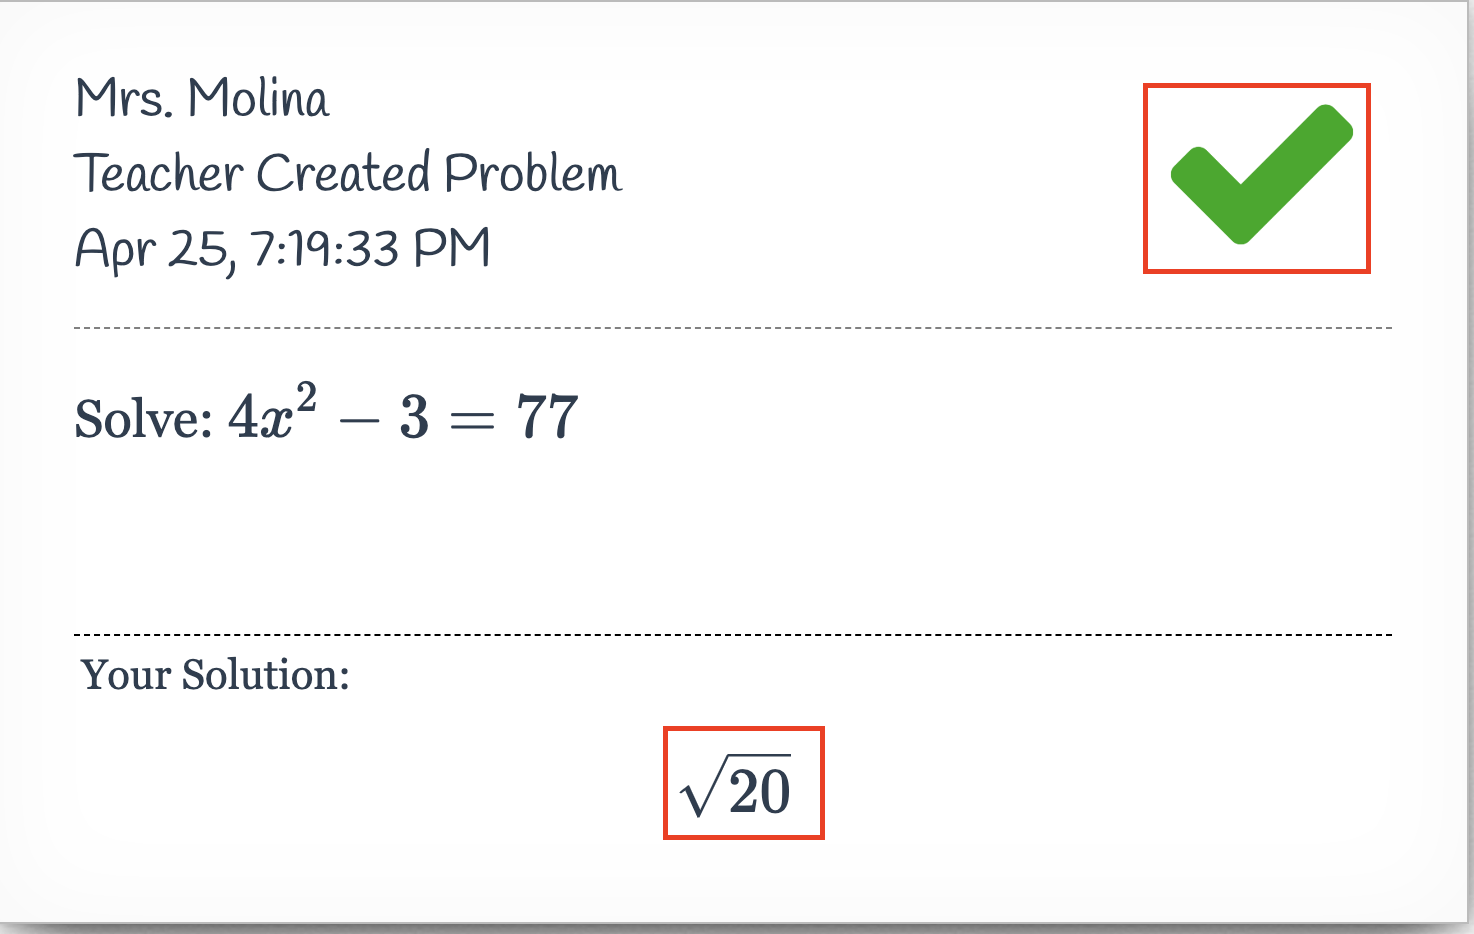 |
| If you select both “Simplify” and “Simplify Radical,” a student must enter a simplified radical to be marked correct. | 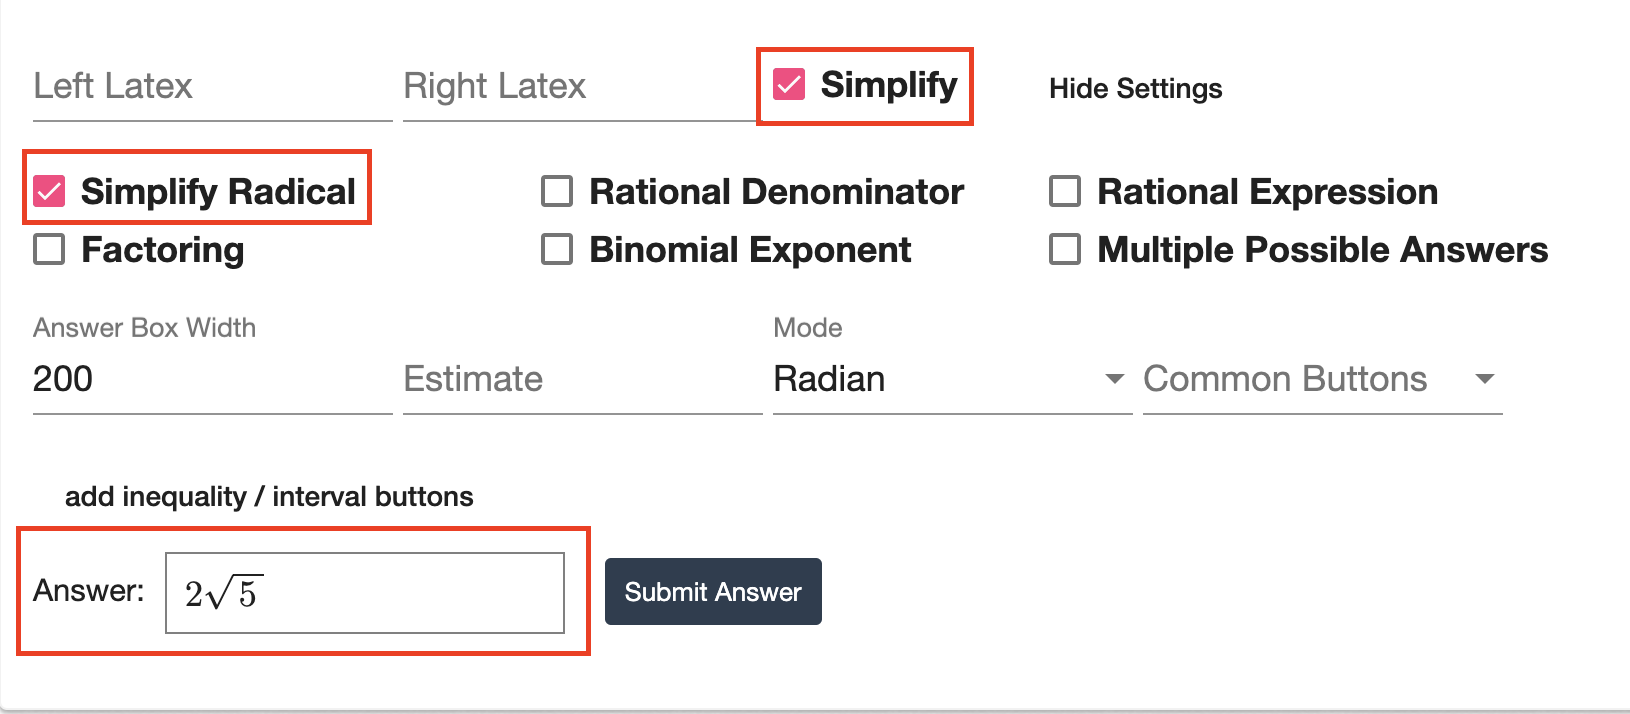 |
| Students will be marked incorrect if they provide an equivalent but unsimplified radical. | 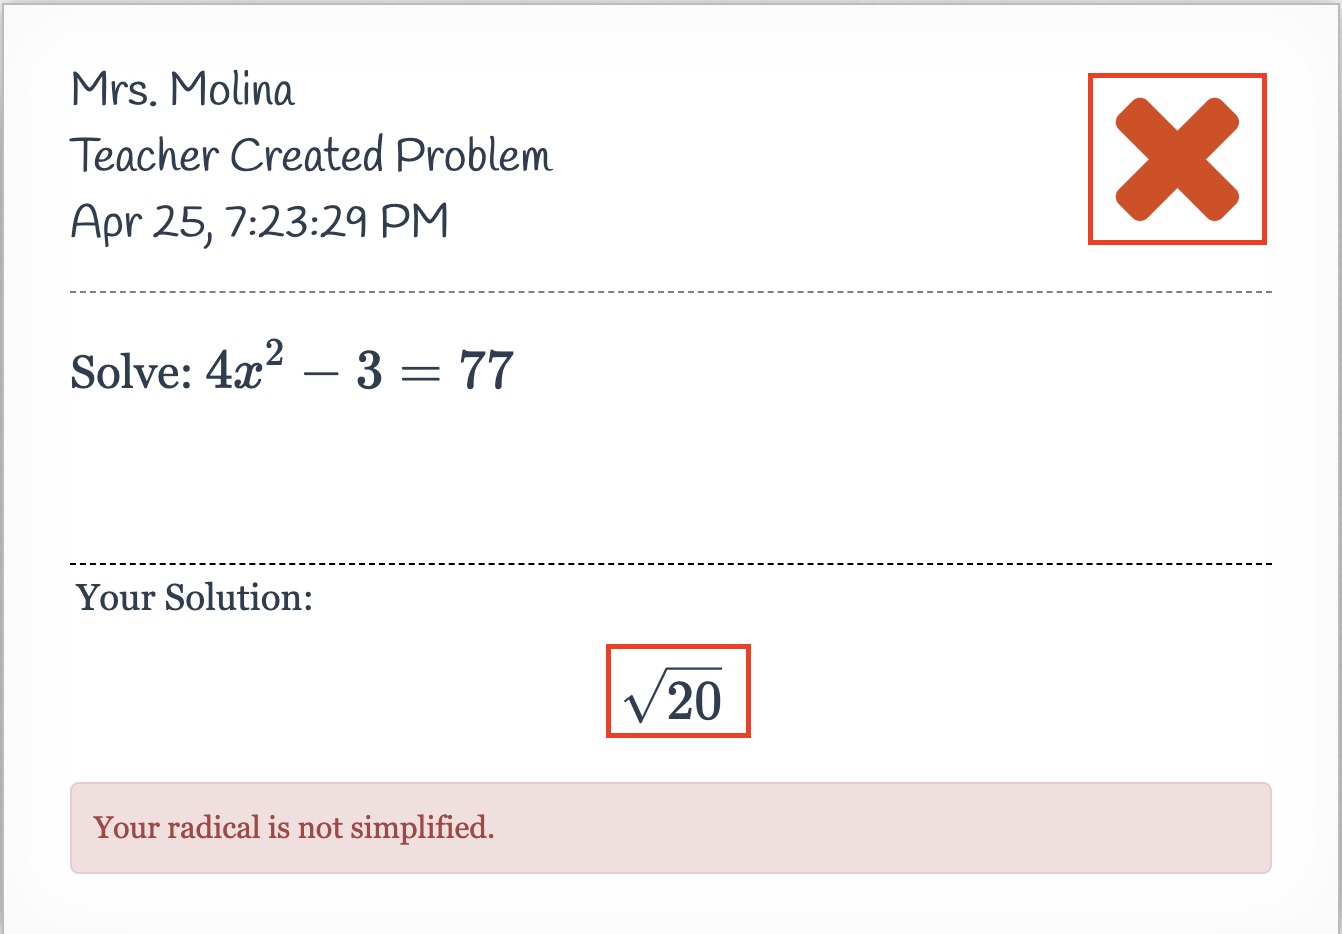 |
| In order to be marked correct, the student must provide a simplified radical as their answer. | 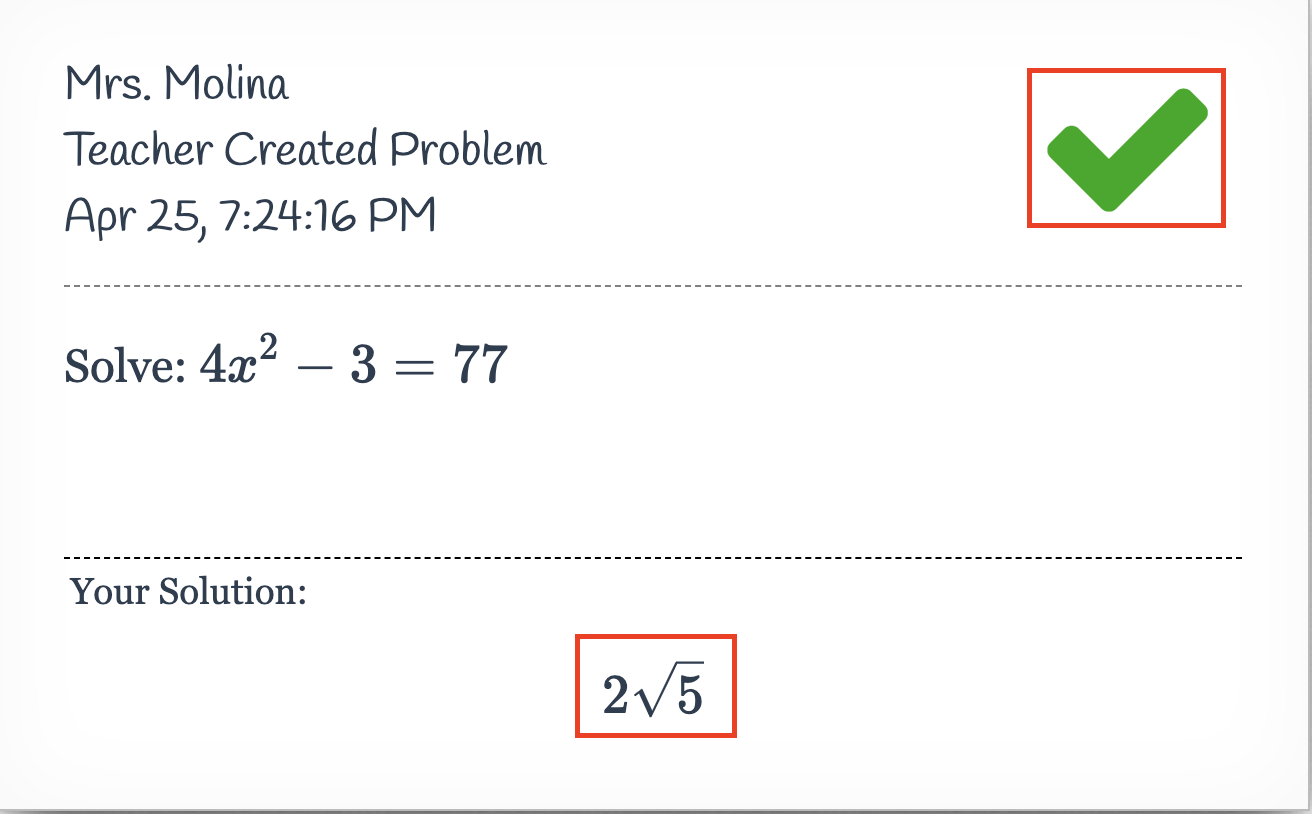 |
Rational Denominator
| When creating a standard question, you can choose to accept answers whether the student rationalizes the denominator or not. | 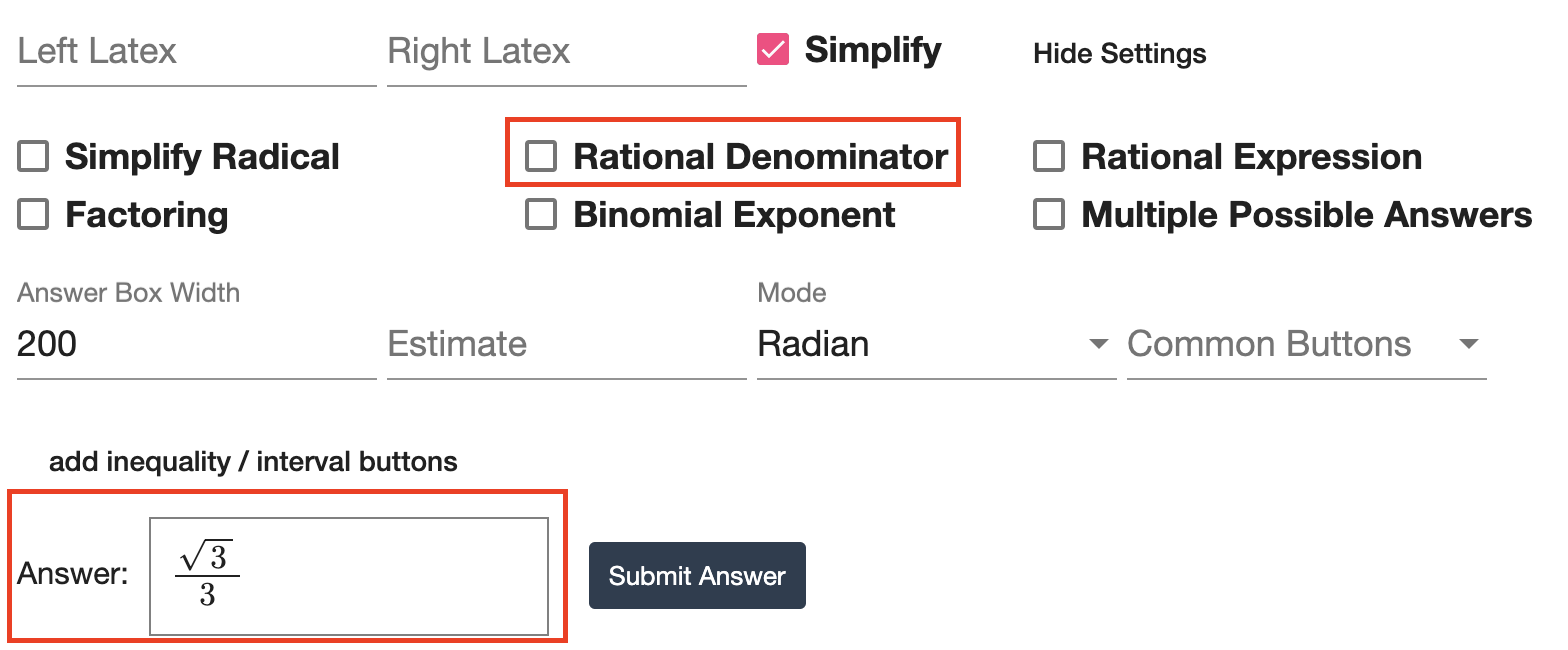 |
| If you don't select the “Rationalize Denominator” setting, even if the “Simplify” setting is selected, the student will be marked correct if they enter an equivalent answer that isn't rationalized. | 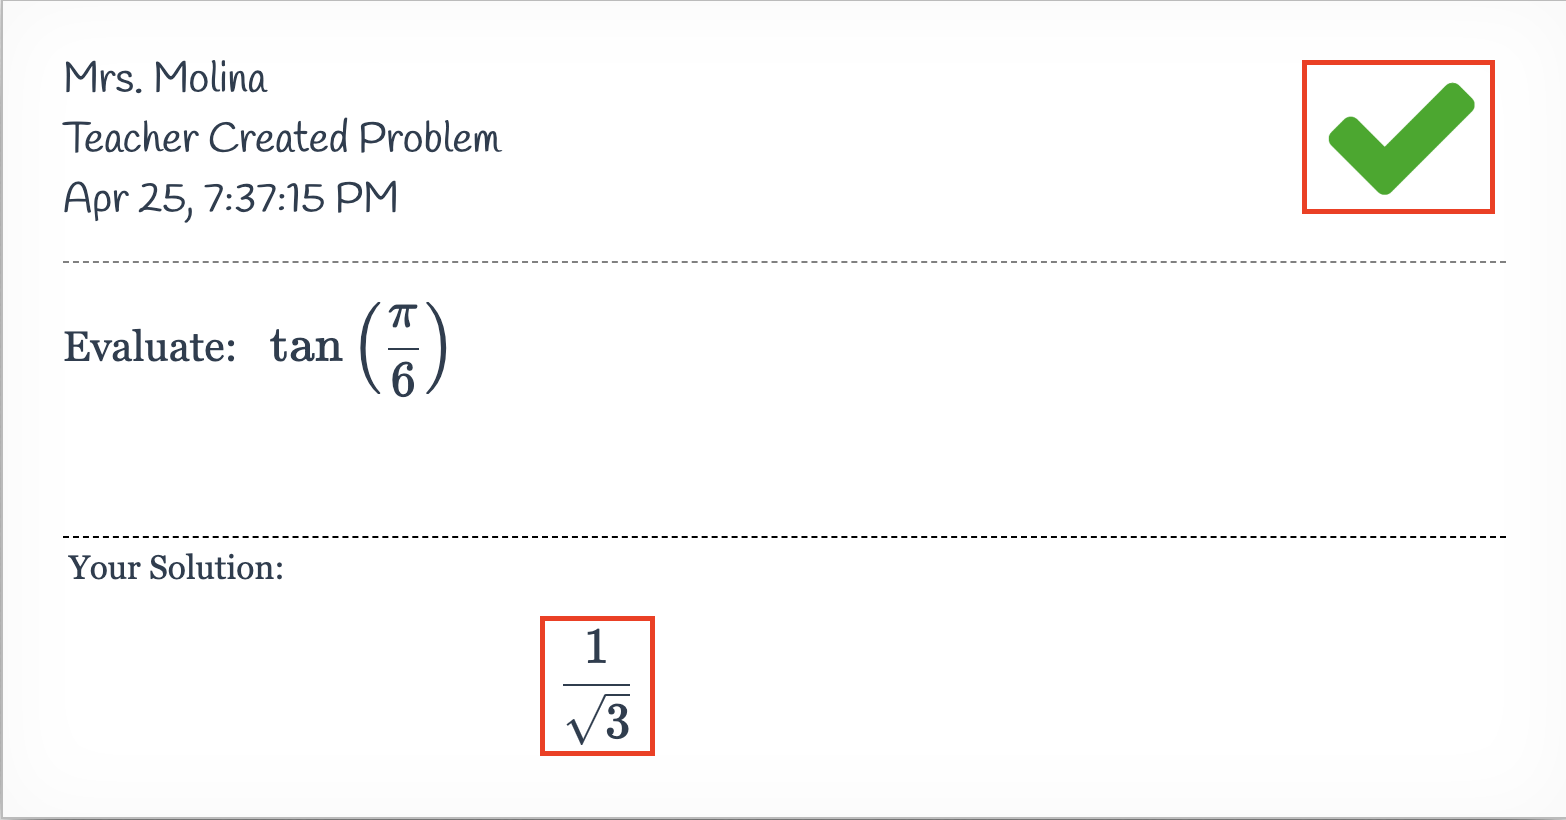 |
| If you select both “Simplify” and “Rational Denominator,” a student must submit an answer with a rationalized denominator to be marked correct. | 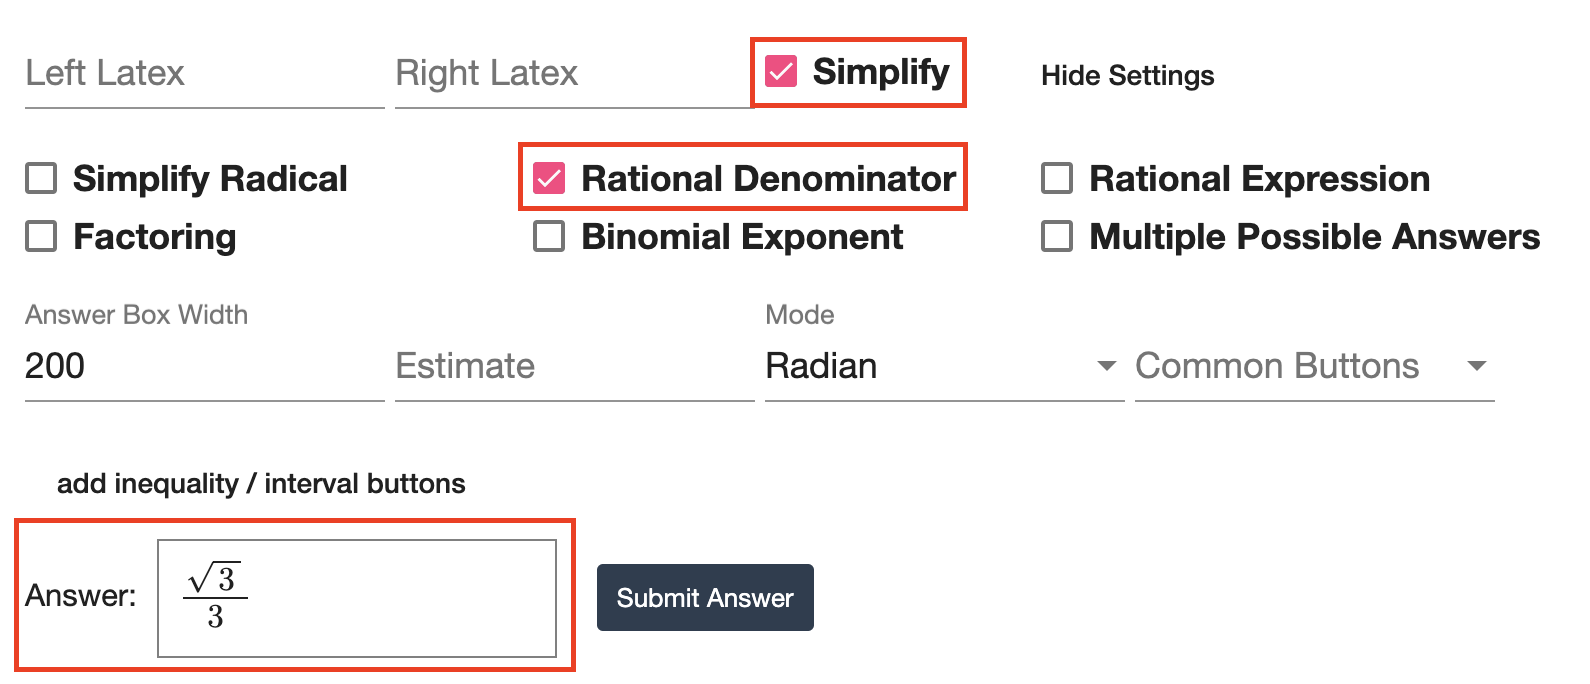 |
| Students will be marked incorrect if they provide an equivalent answer that isn't rationalized. | 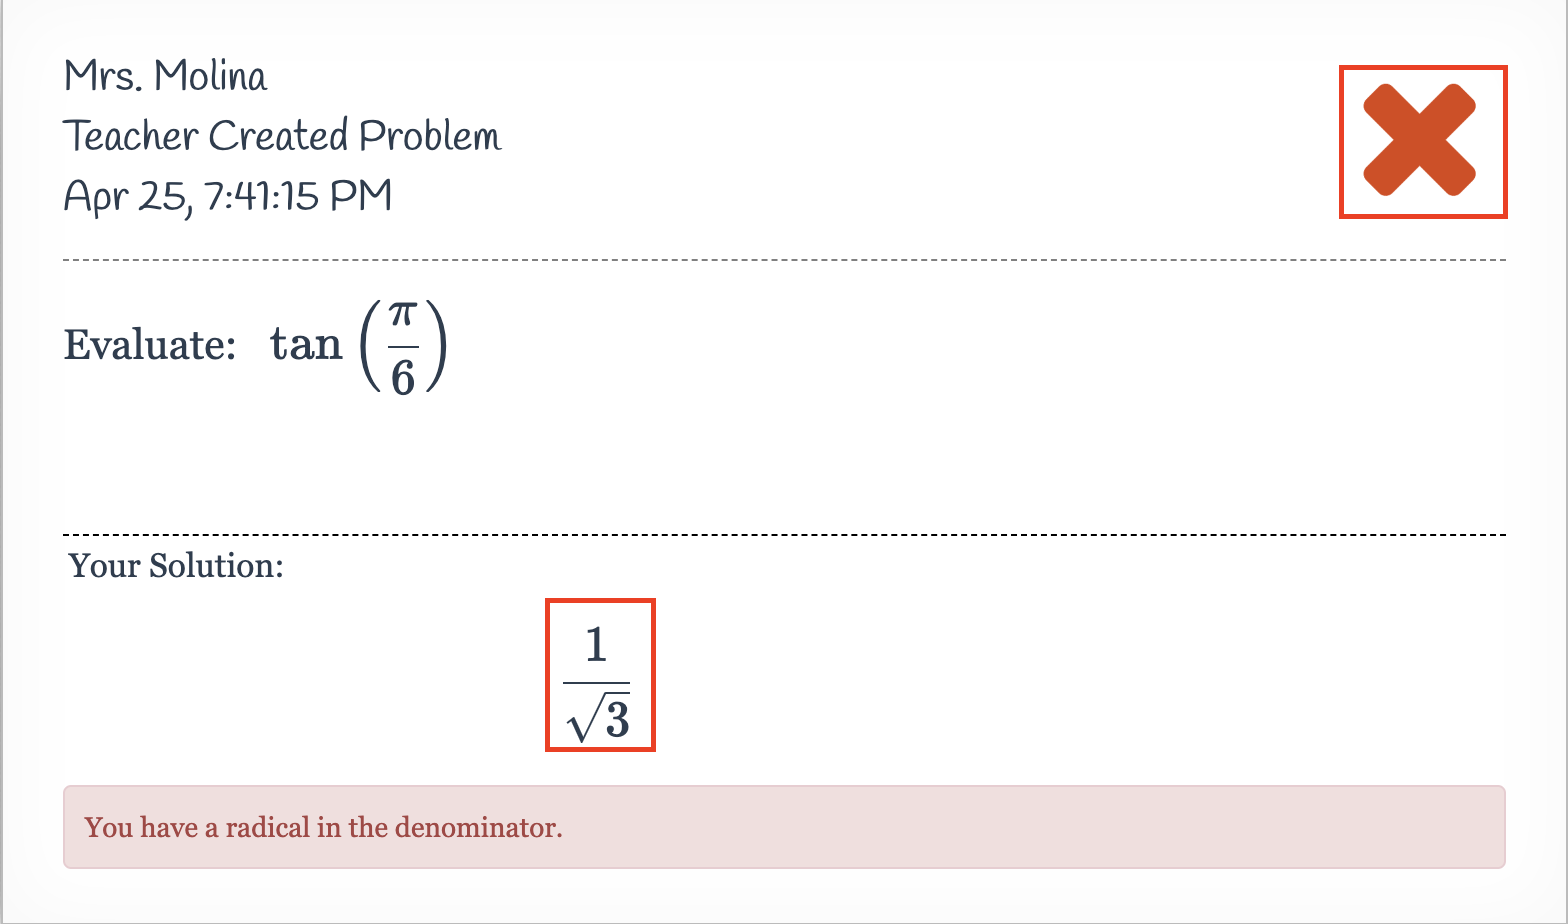 |
| In order to be marked correct, the student must provide an answer with a rationalized denominator. | 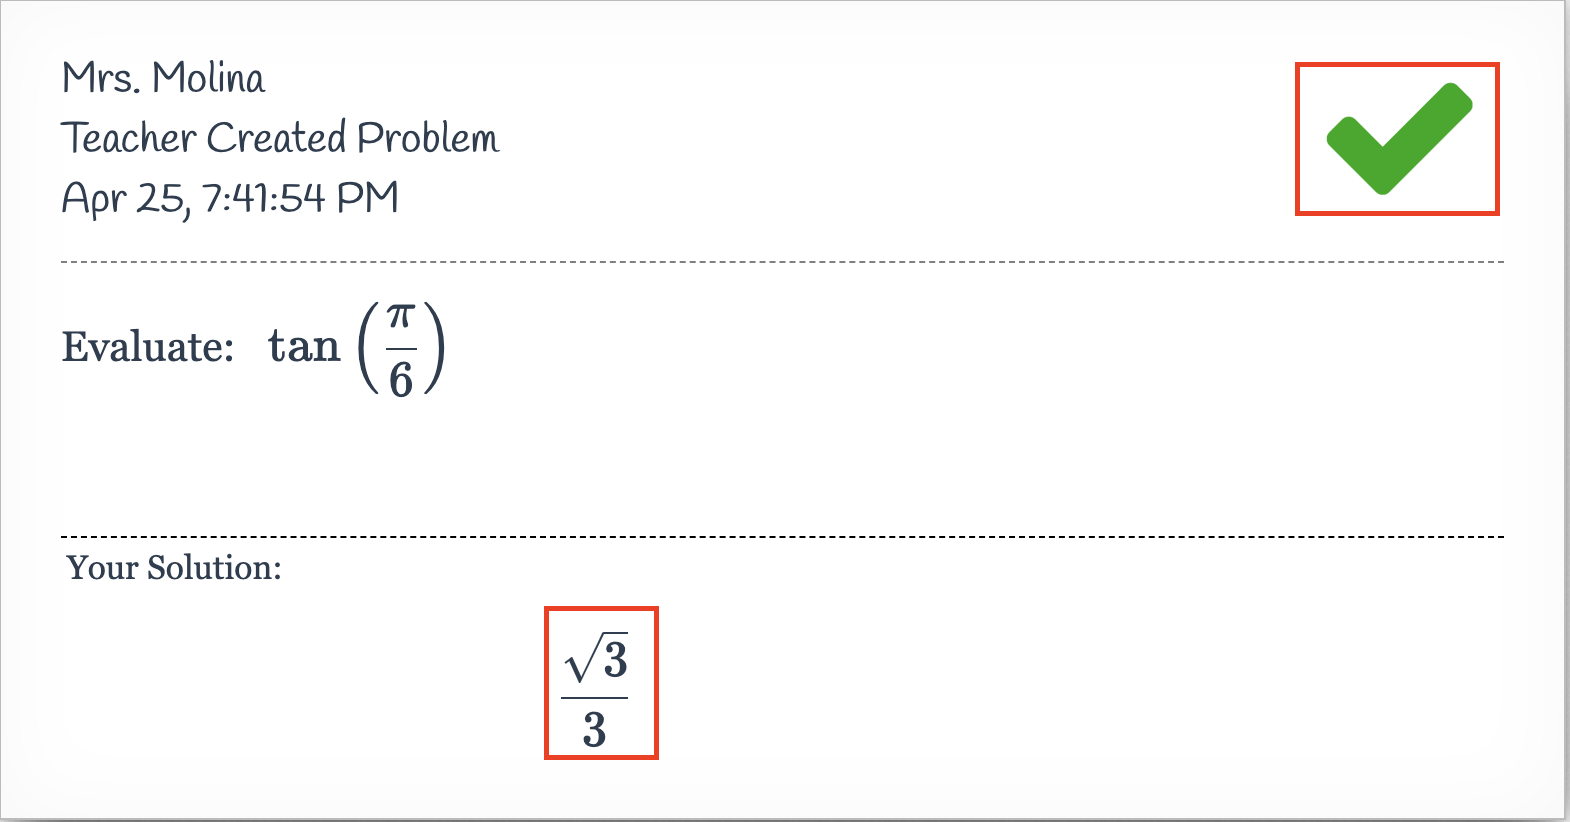 |
Rational Expression
| If the answer to your standard question involves a rational expression, you can customize which equivalent student responses will be accepted with our “Rational Expression” setting. |  |
| By default, when your answer is a rational expression, if you don't select “Simplify,” students can provide unsimplified but equivalent expressions and still be marked correct. | 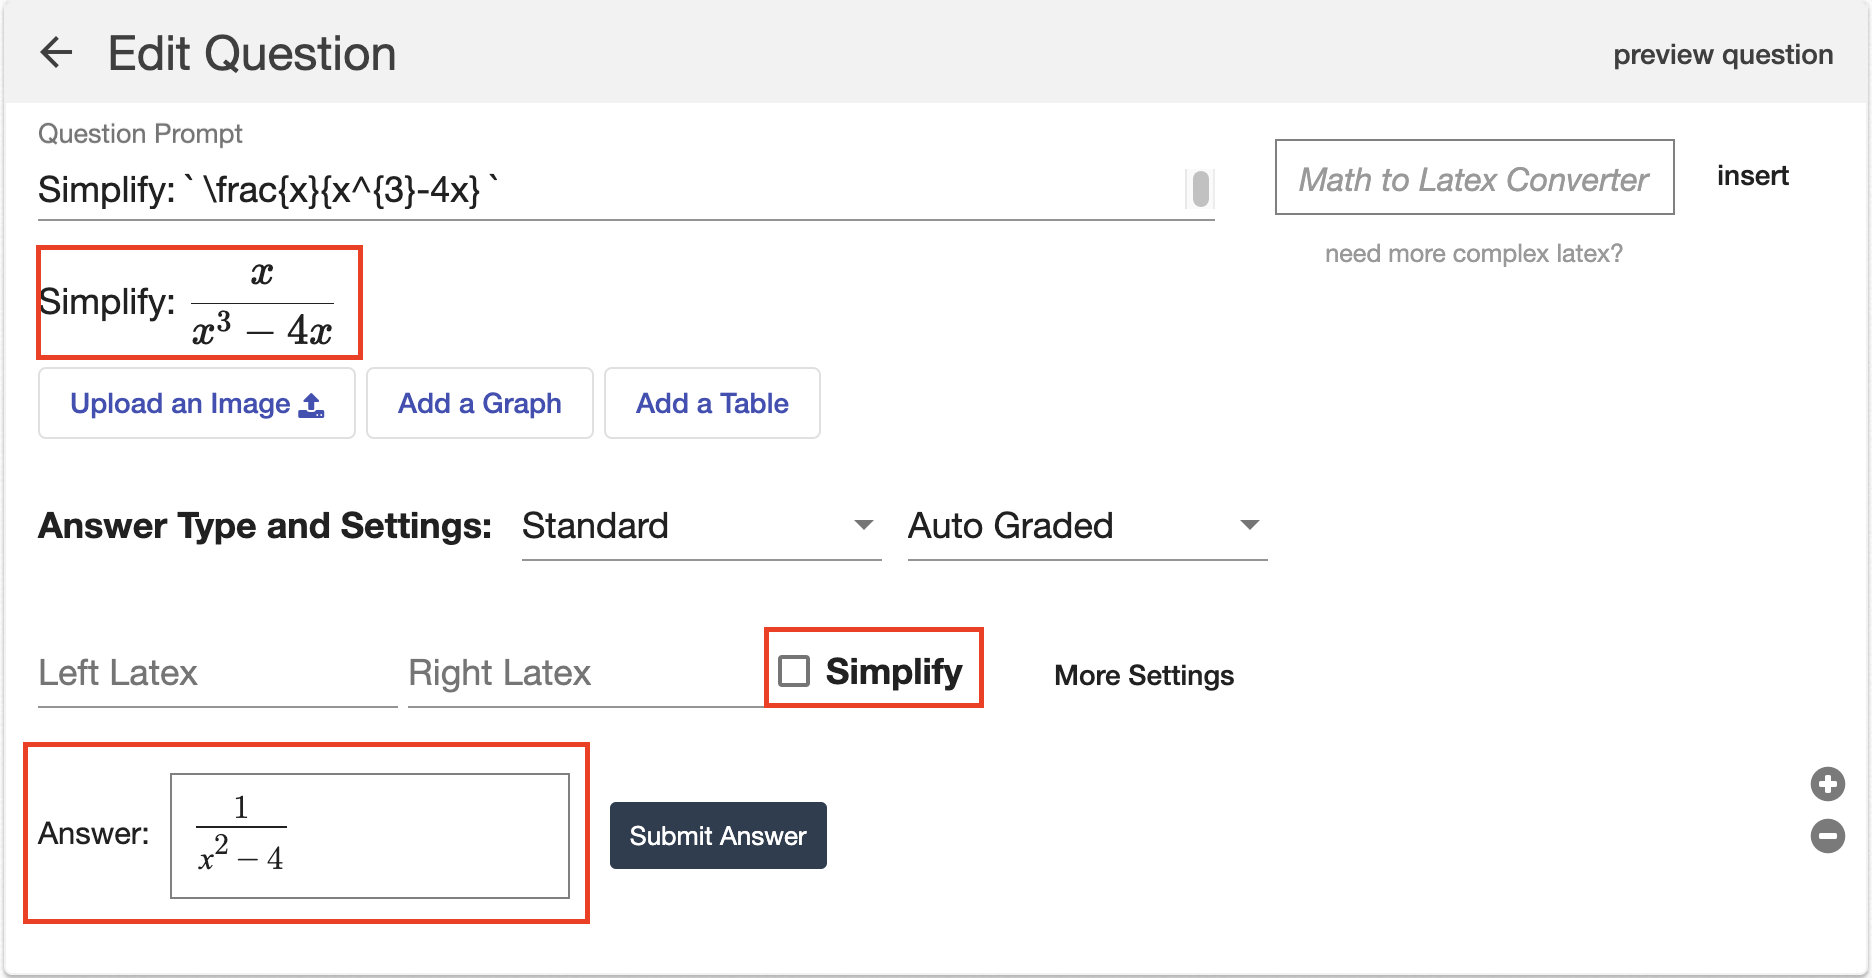 |
| For example, the answer to the right was marked correct because it was equivalent to the answer key, even though it wasn't simplified. | 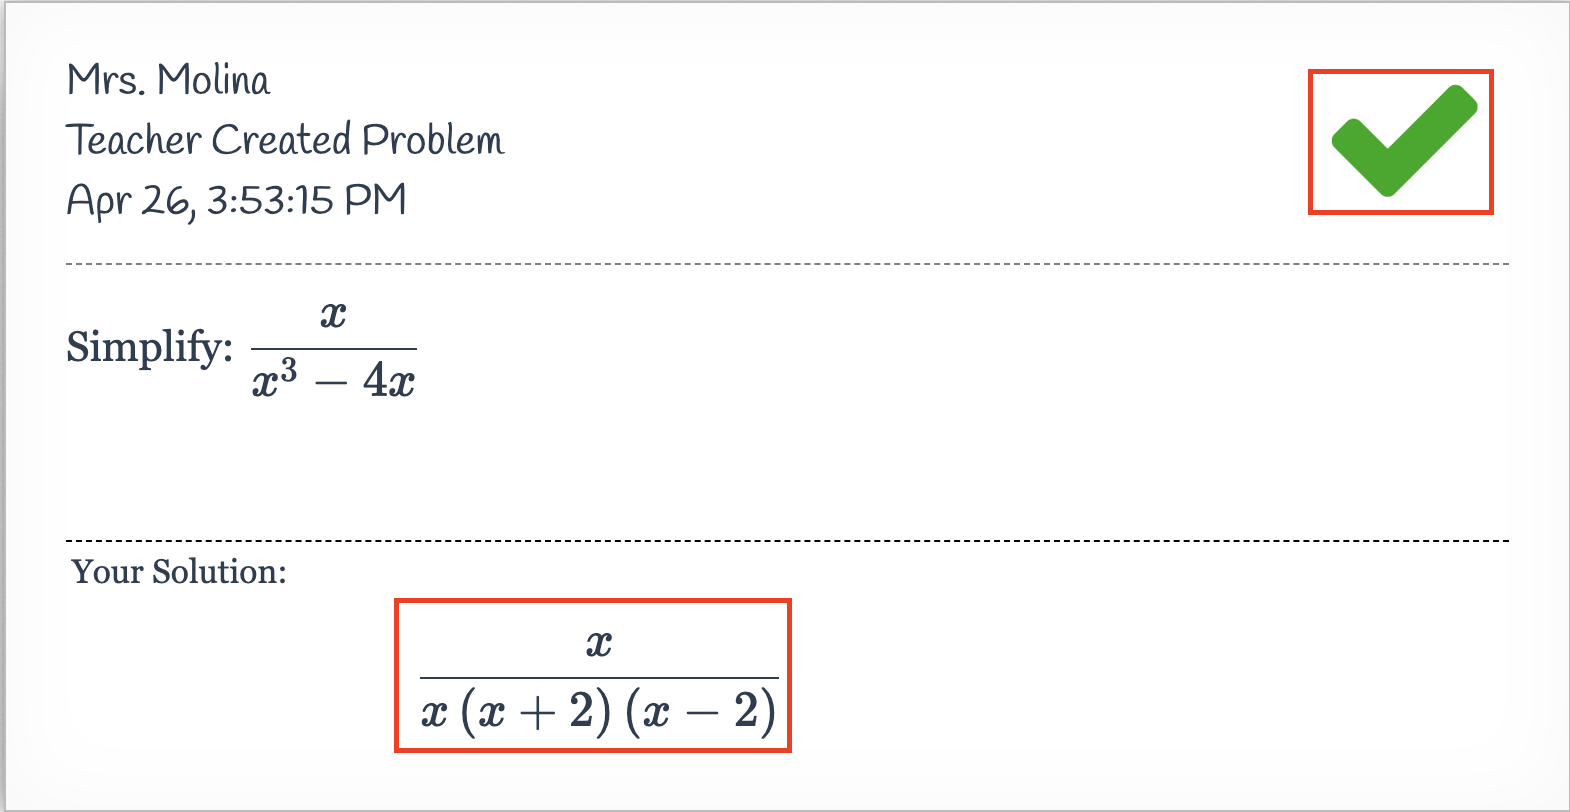 |
| Often, this isn't the desired result, as you want students to simplify the expression. This leads teachers to select “Simplify." | 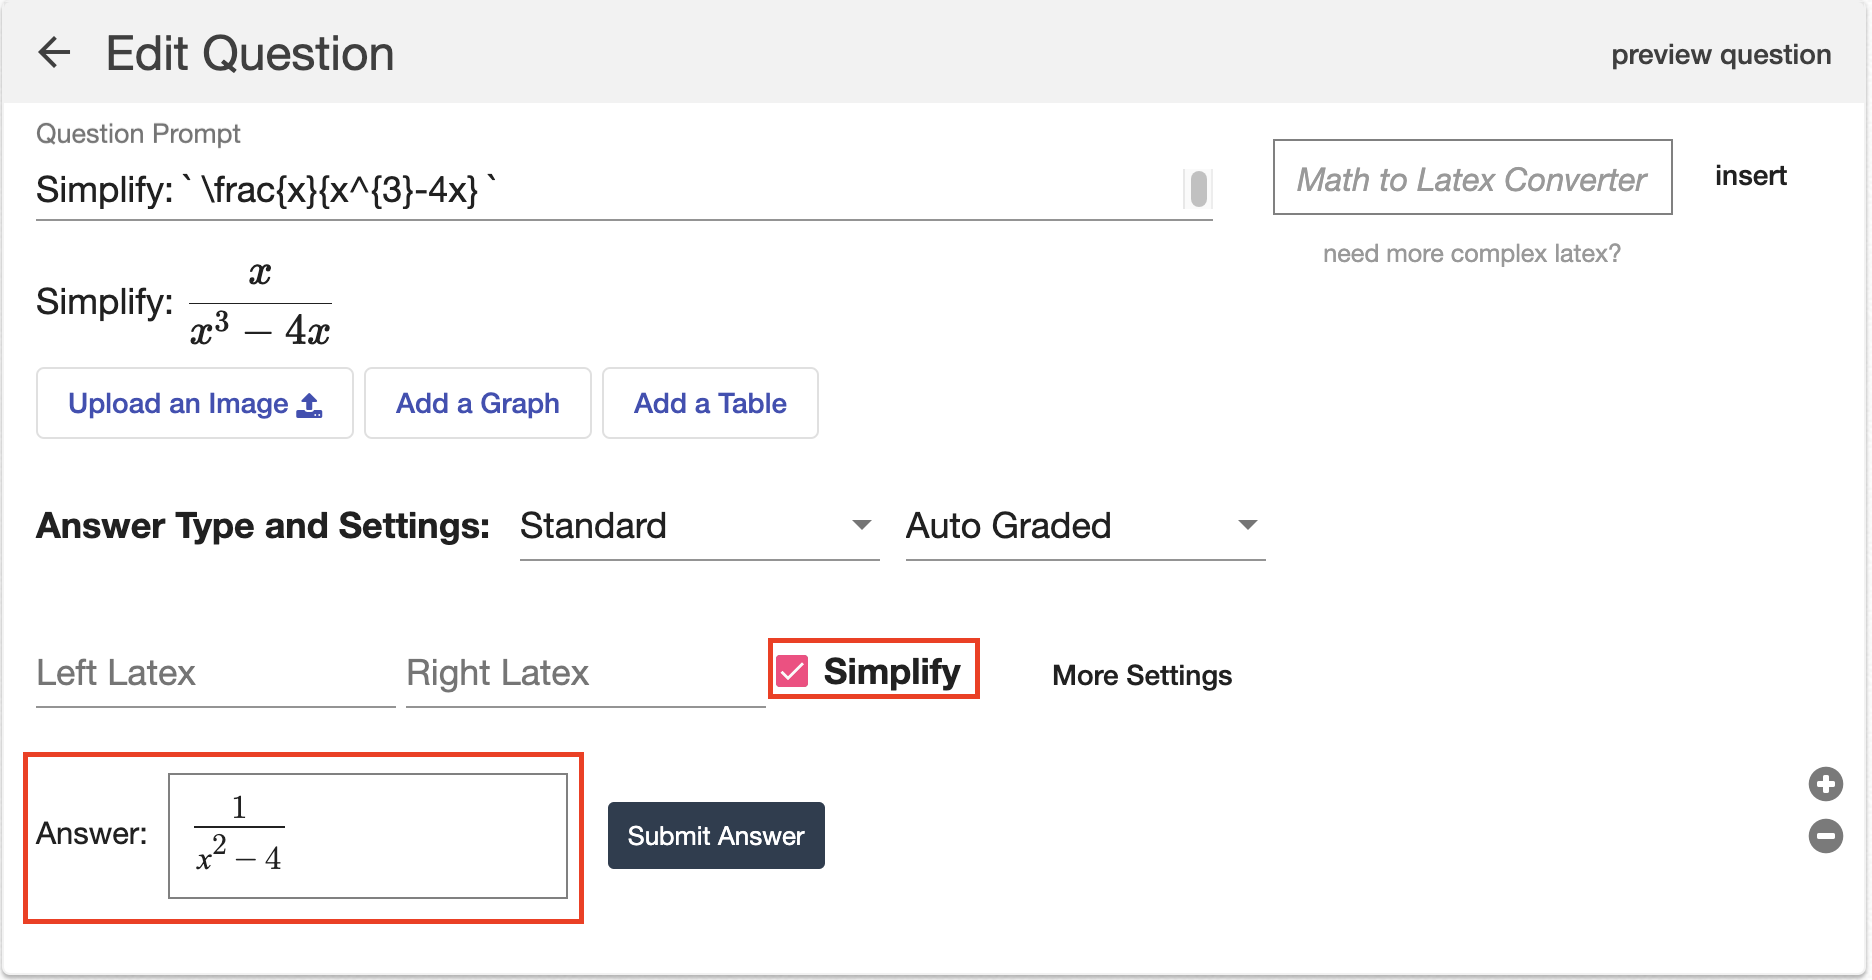 |
| However, in this situation, students would be marked incorrect if they provided an equivalent but factored expression, since it isn't fully simplified (meaning they didn't multiply the factors in the denominator). | 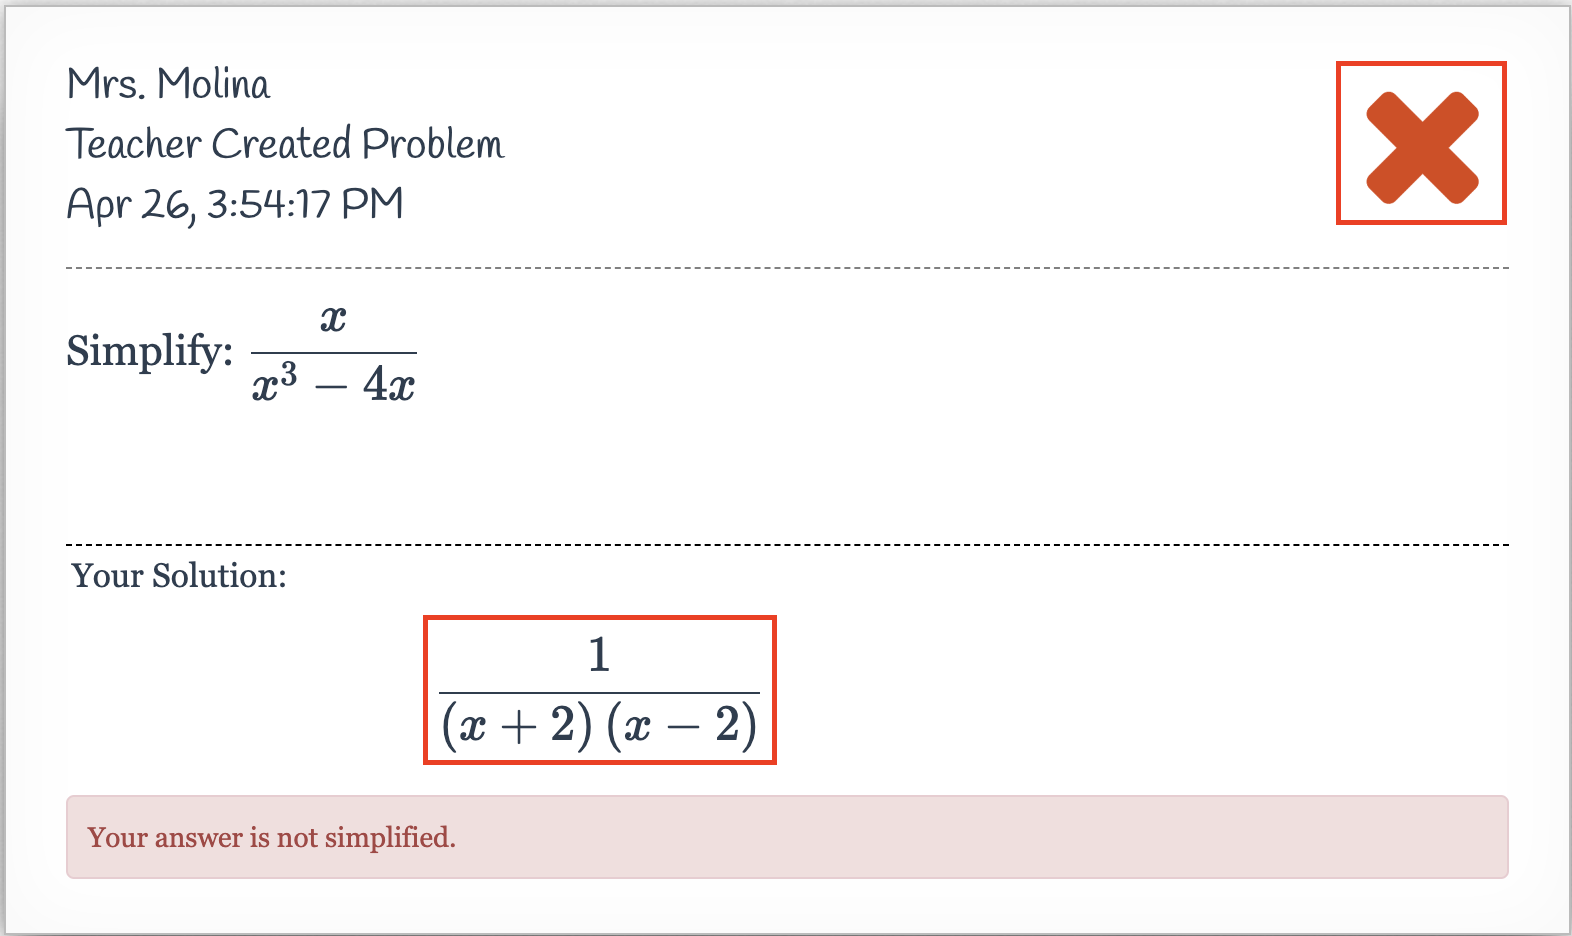 |
| You may want factored responses to be marked correct for your students. You can achieve this by selecting that your answer contains a “Rational Expression.” | 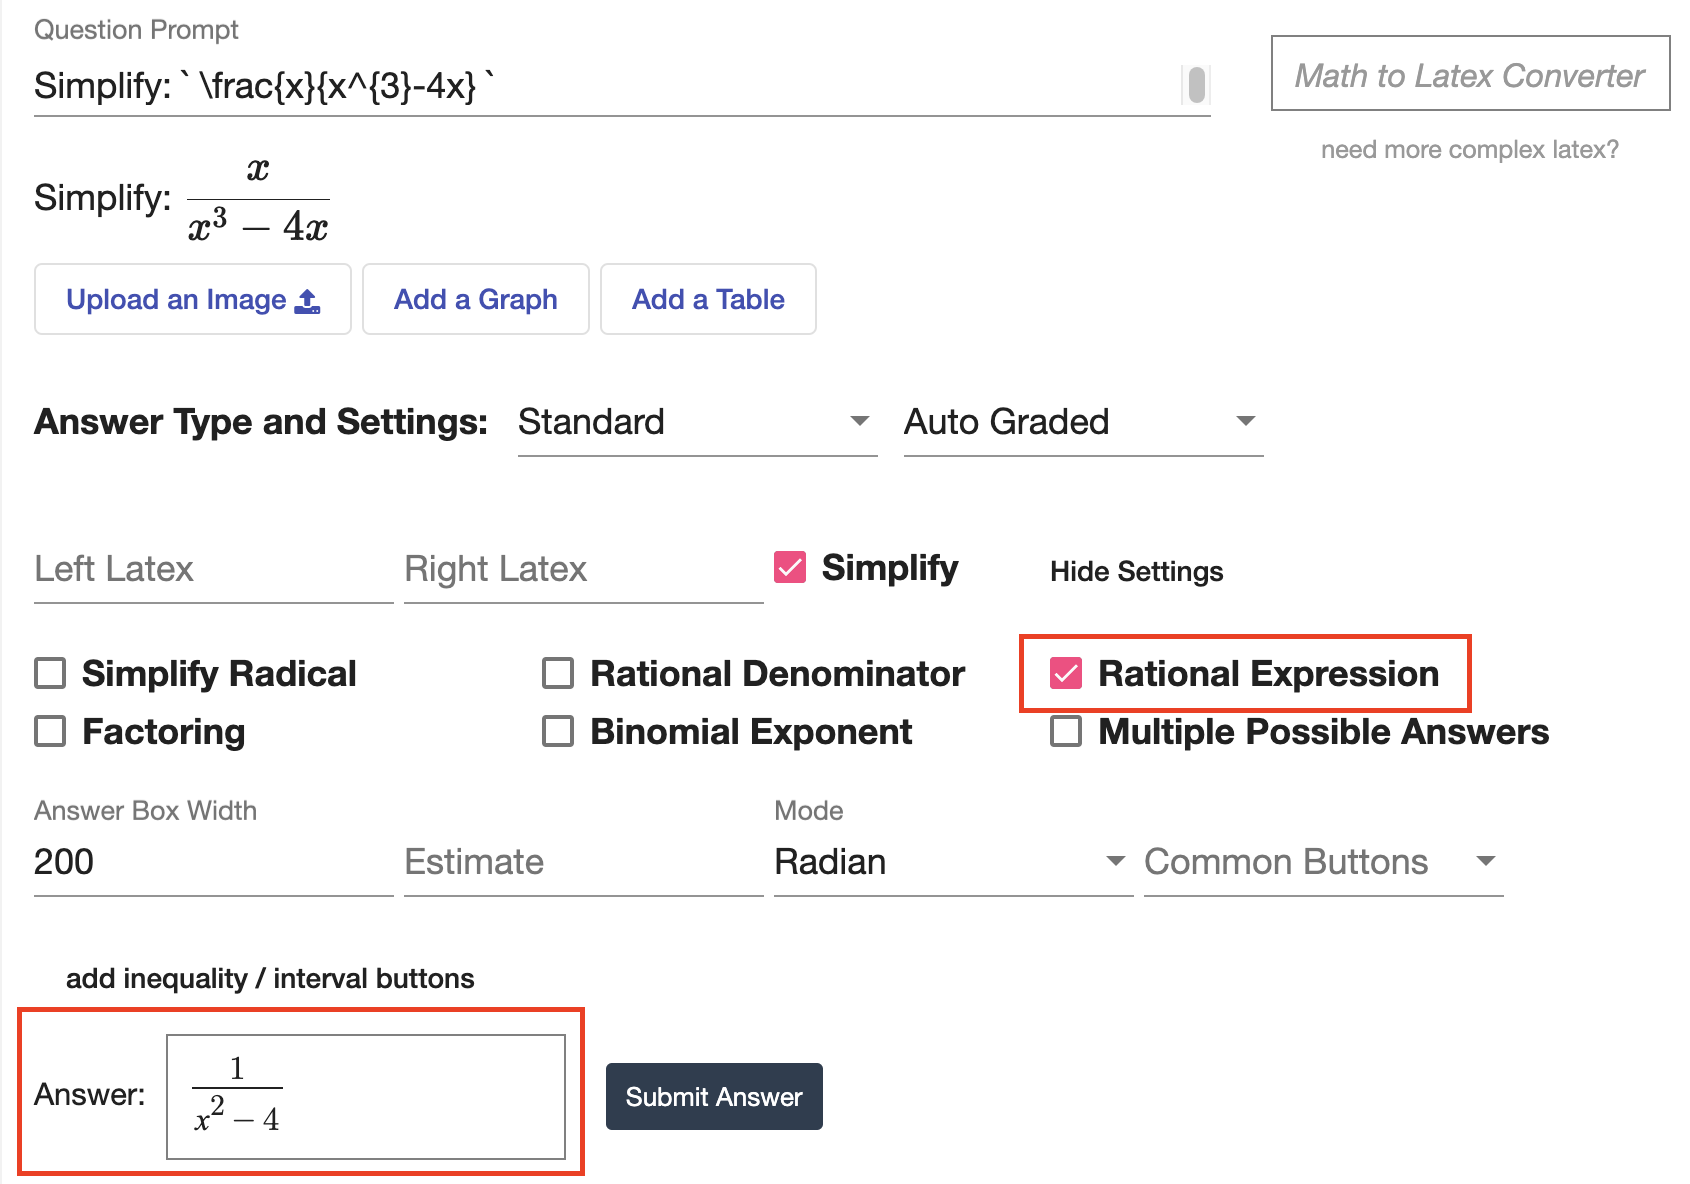 |
| Once this setting is selected, students must submit a simplified rational expression to be marked correct, but they can leave the factors in the final response. | 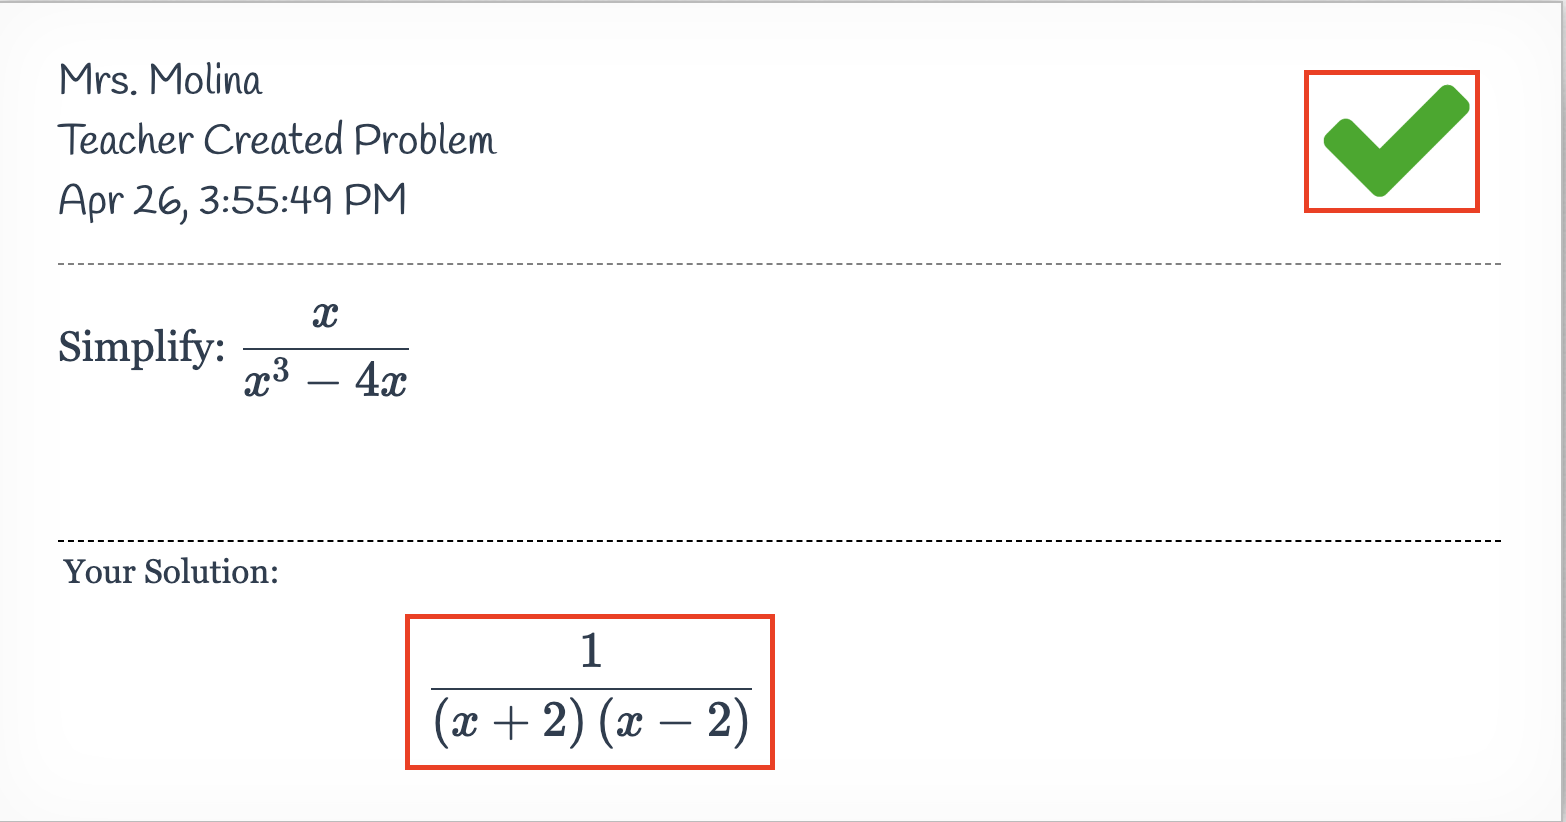 |
Factoring
| If the answer to your standard question involves a factored expression, you can customize which equivalent student responses will be accepted with our “Factoring” setting. |  |
| If you want your student to answer with a factored expression, be sure to select both the “Simplify” and “Factoring” settings. | 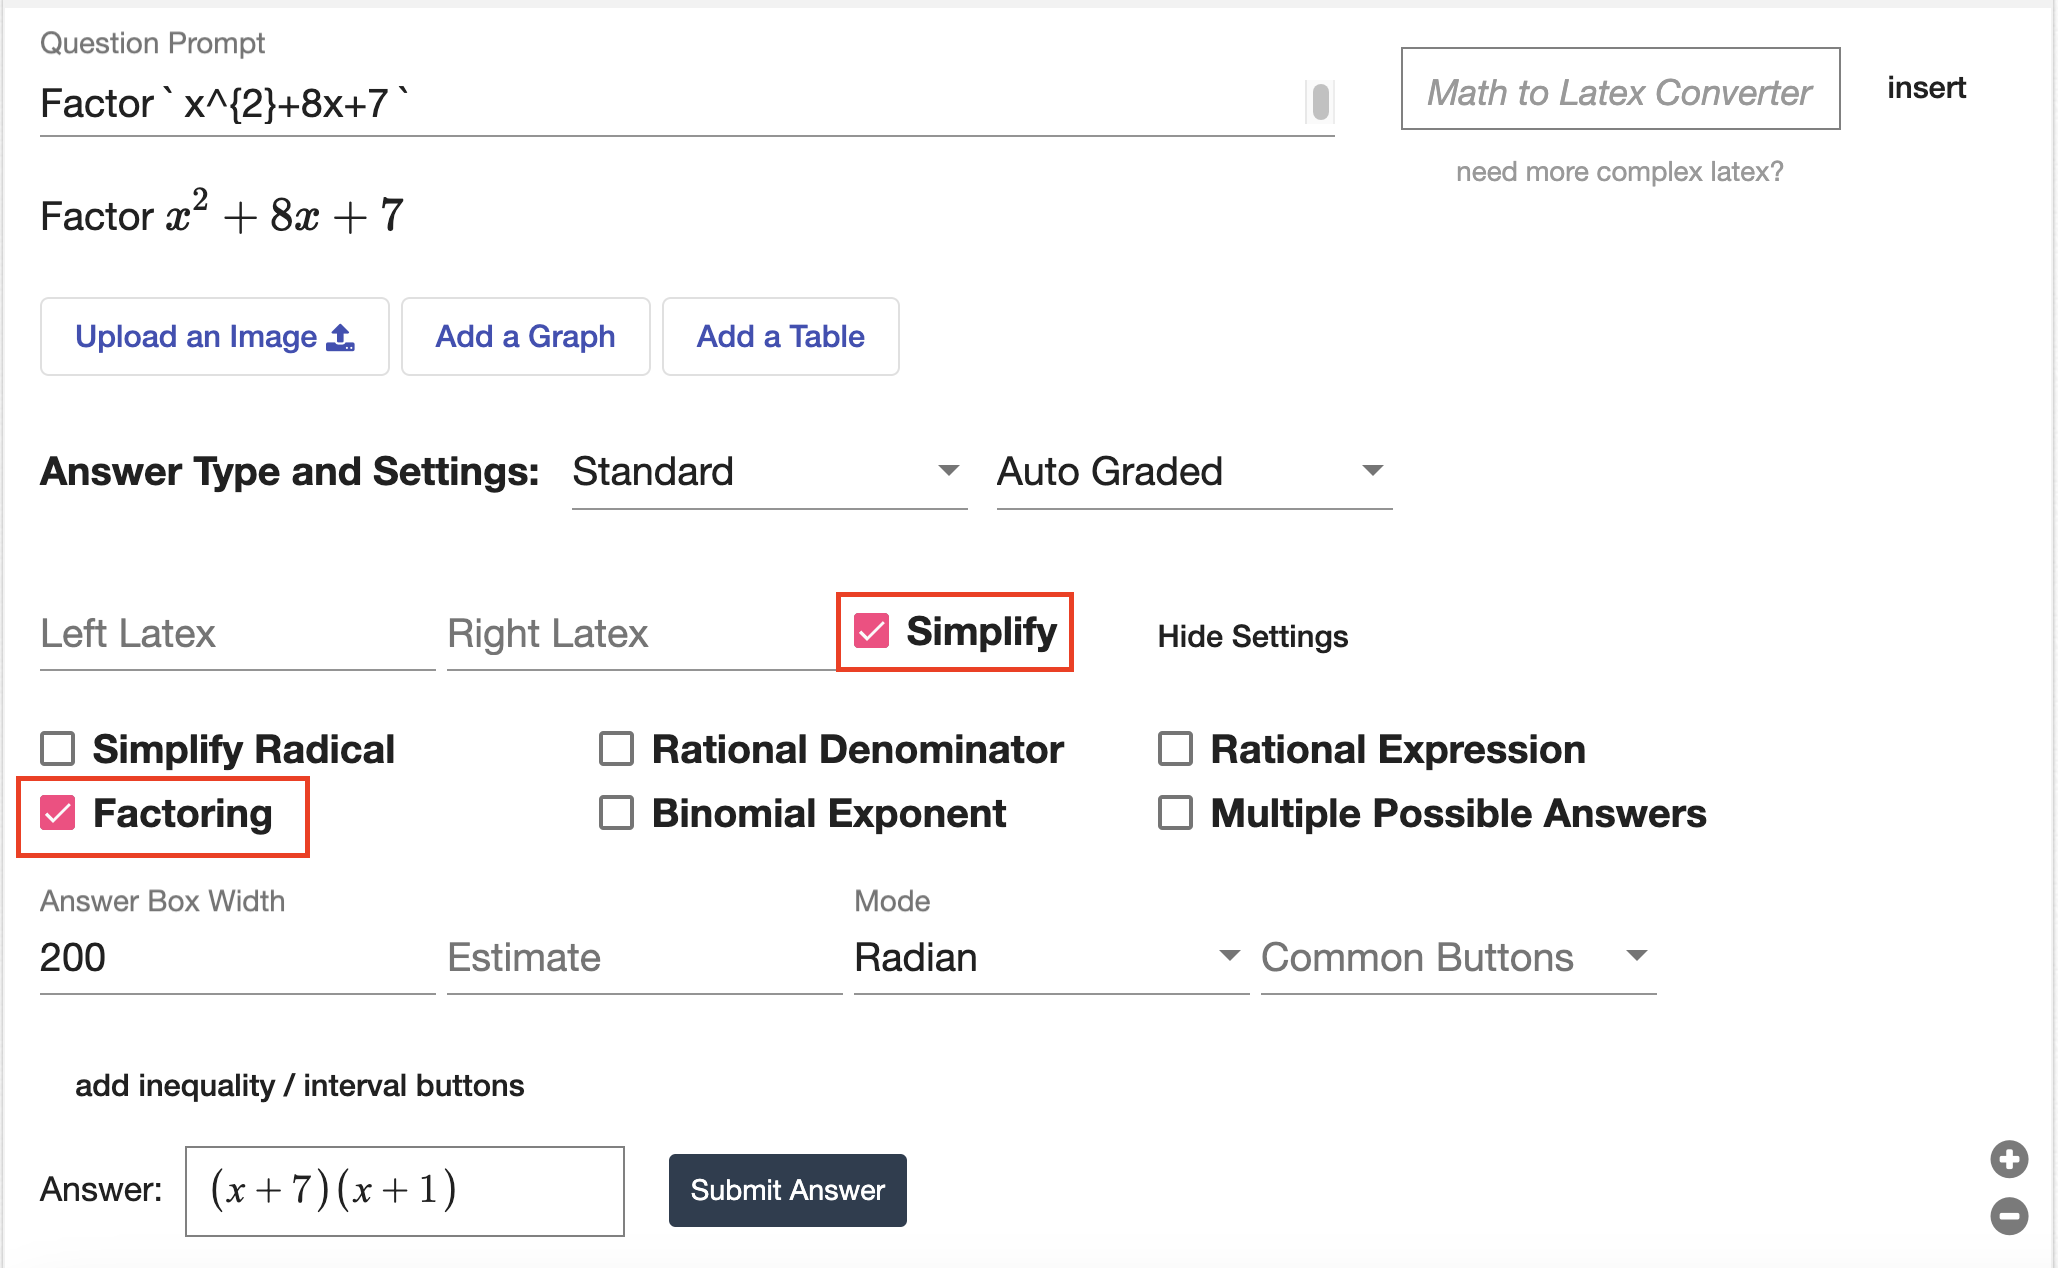 |
| Students will be marked correct if they submit an equivalent factored expression. | 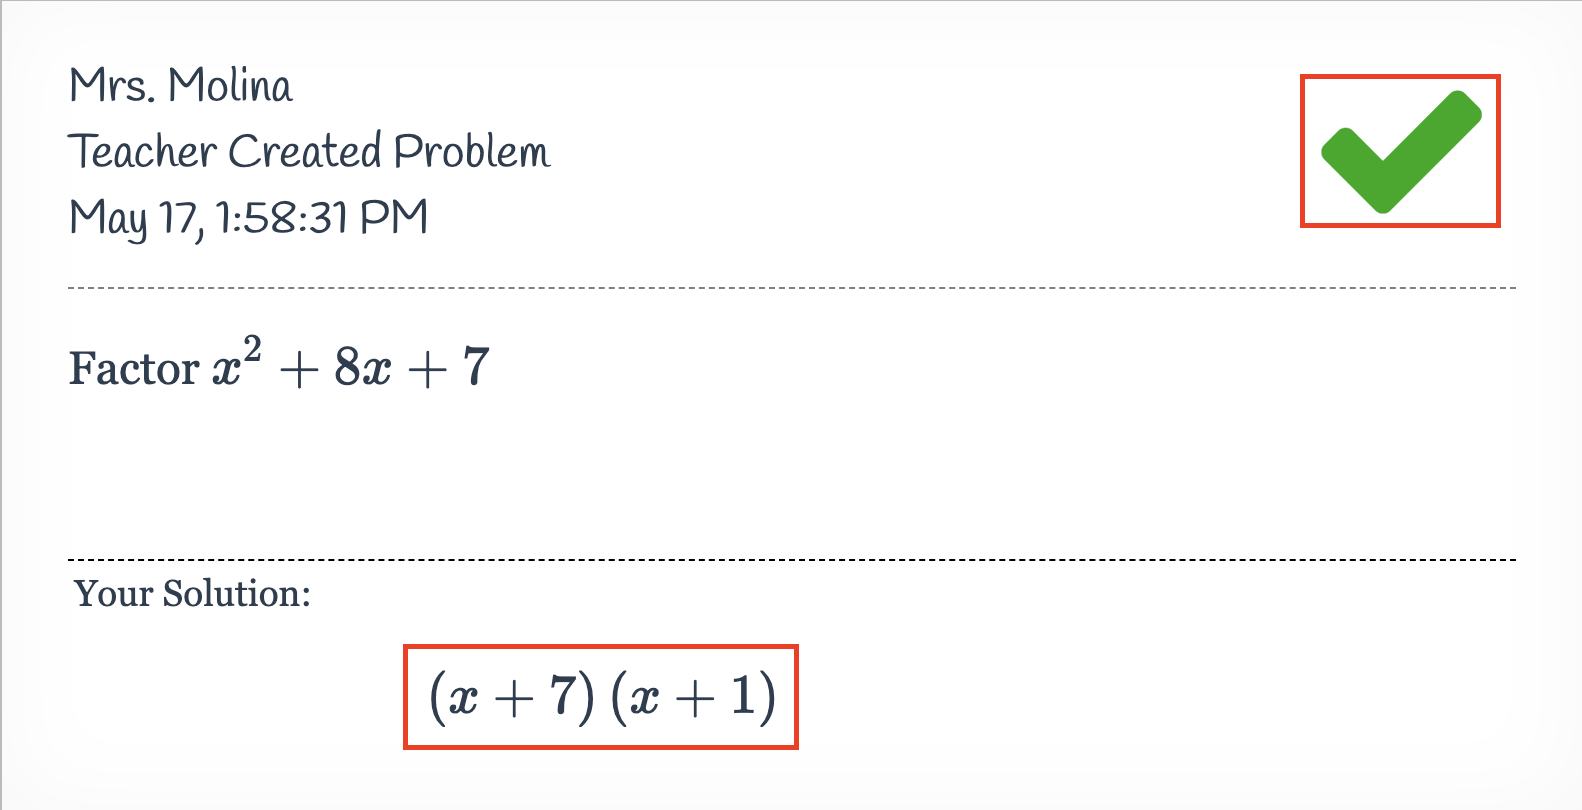 |
| Even if a student lists the factors in a different order than the answer key, they will still be marked correct. | 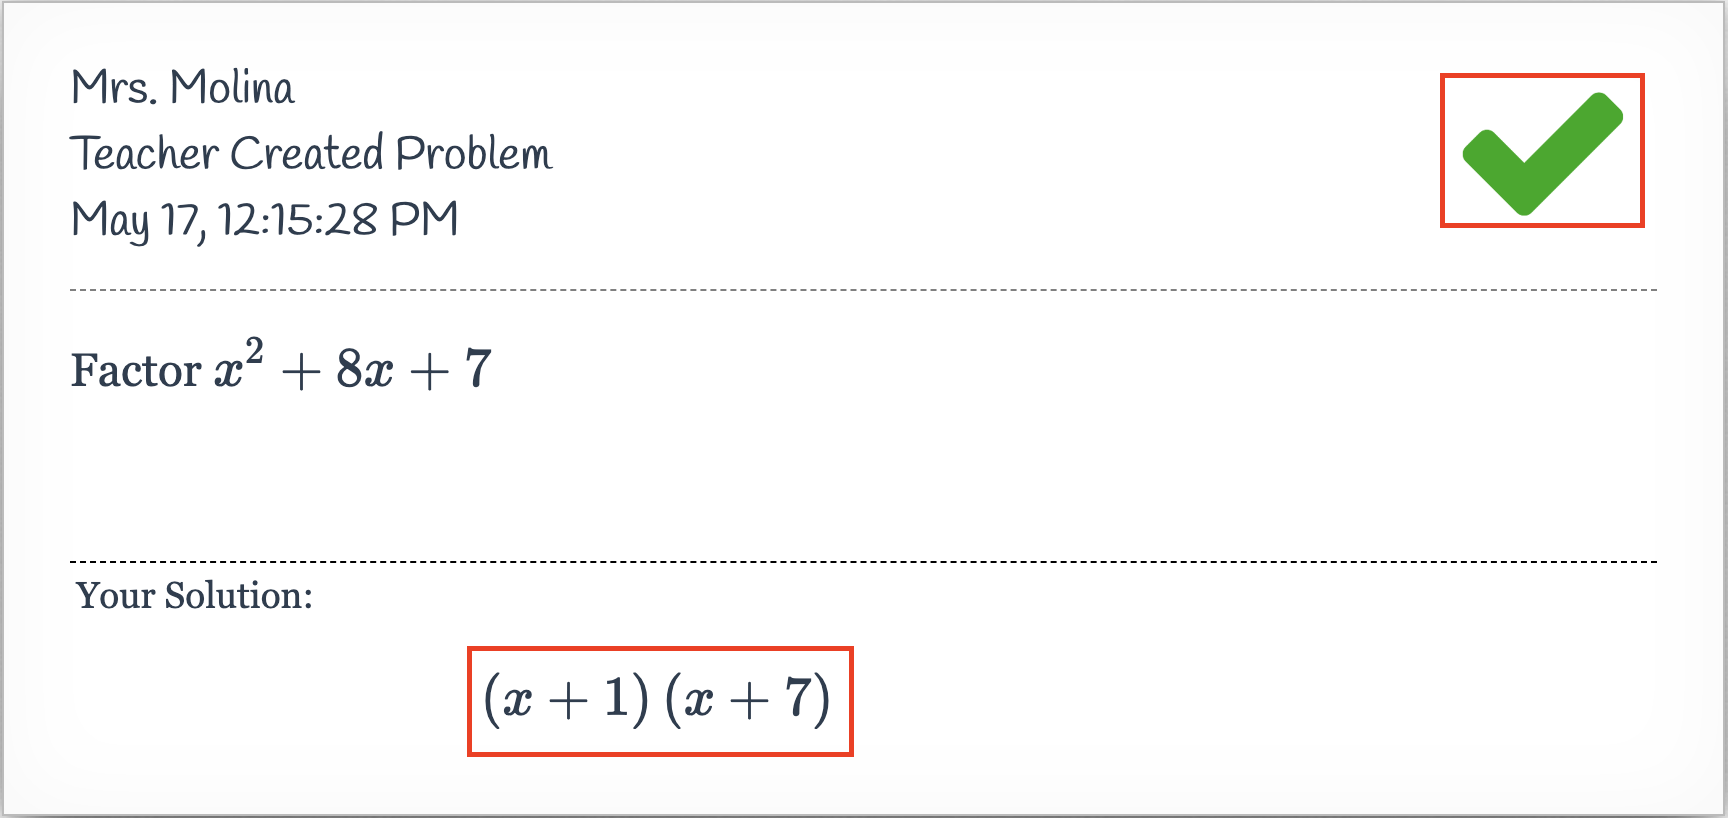 |
| If you don't select the “Simplify” and “Factoring” settings, an equivalent answer that isn't factored (including an expression in standard form) will still be marked correct. | 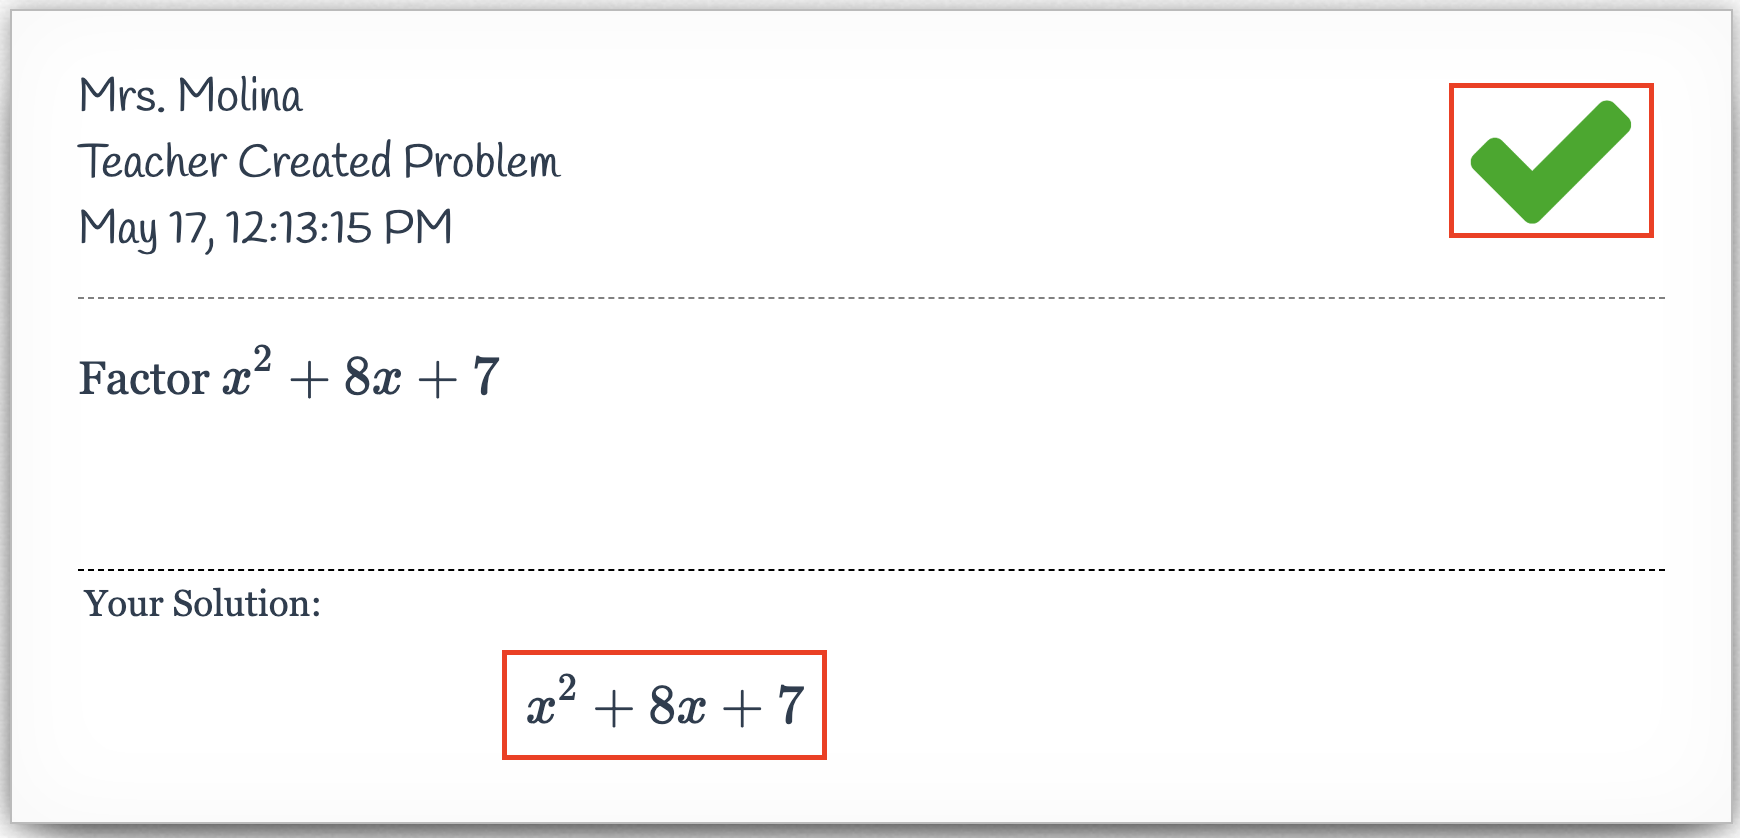 |
Binomial Exponent
| If the answer contains an exponent with multiple terms, you should select the “Binomial Exponent” setting. |  |
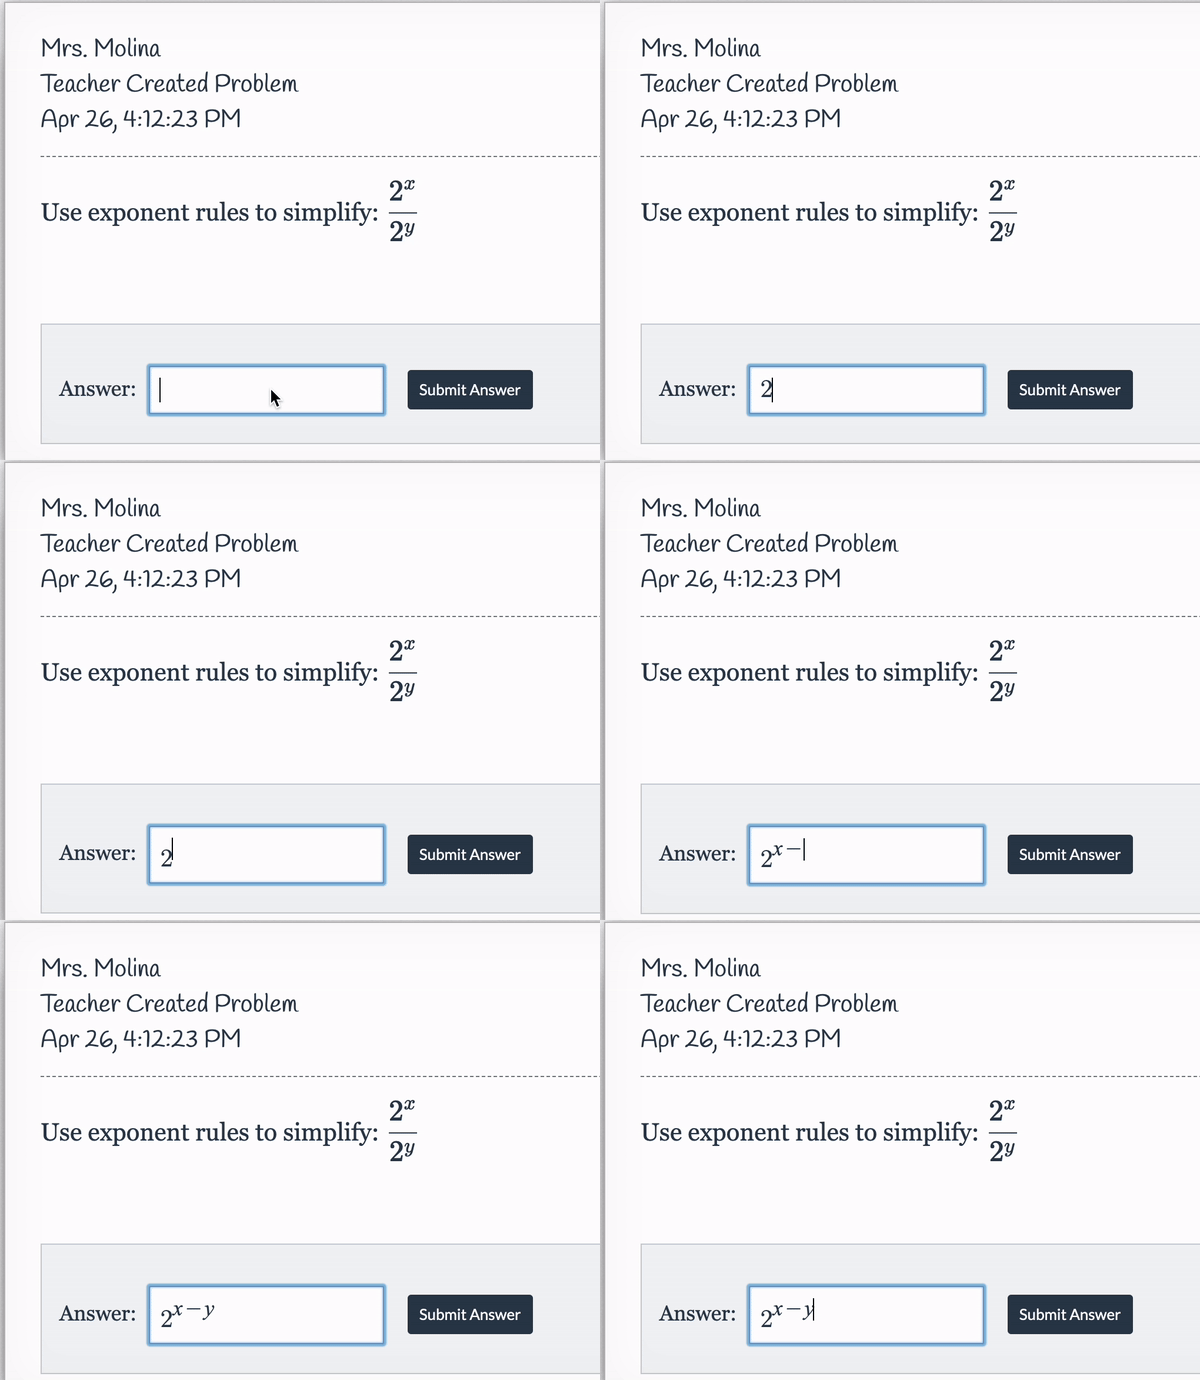
| By default, entering a binomial exponent as your answer can be difficult to do. When you enter a + or - symbol, the cursor automatically moves out of the superscript space for exponents and back down to indicate regular text. | 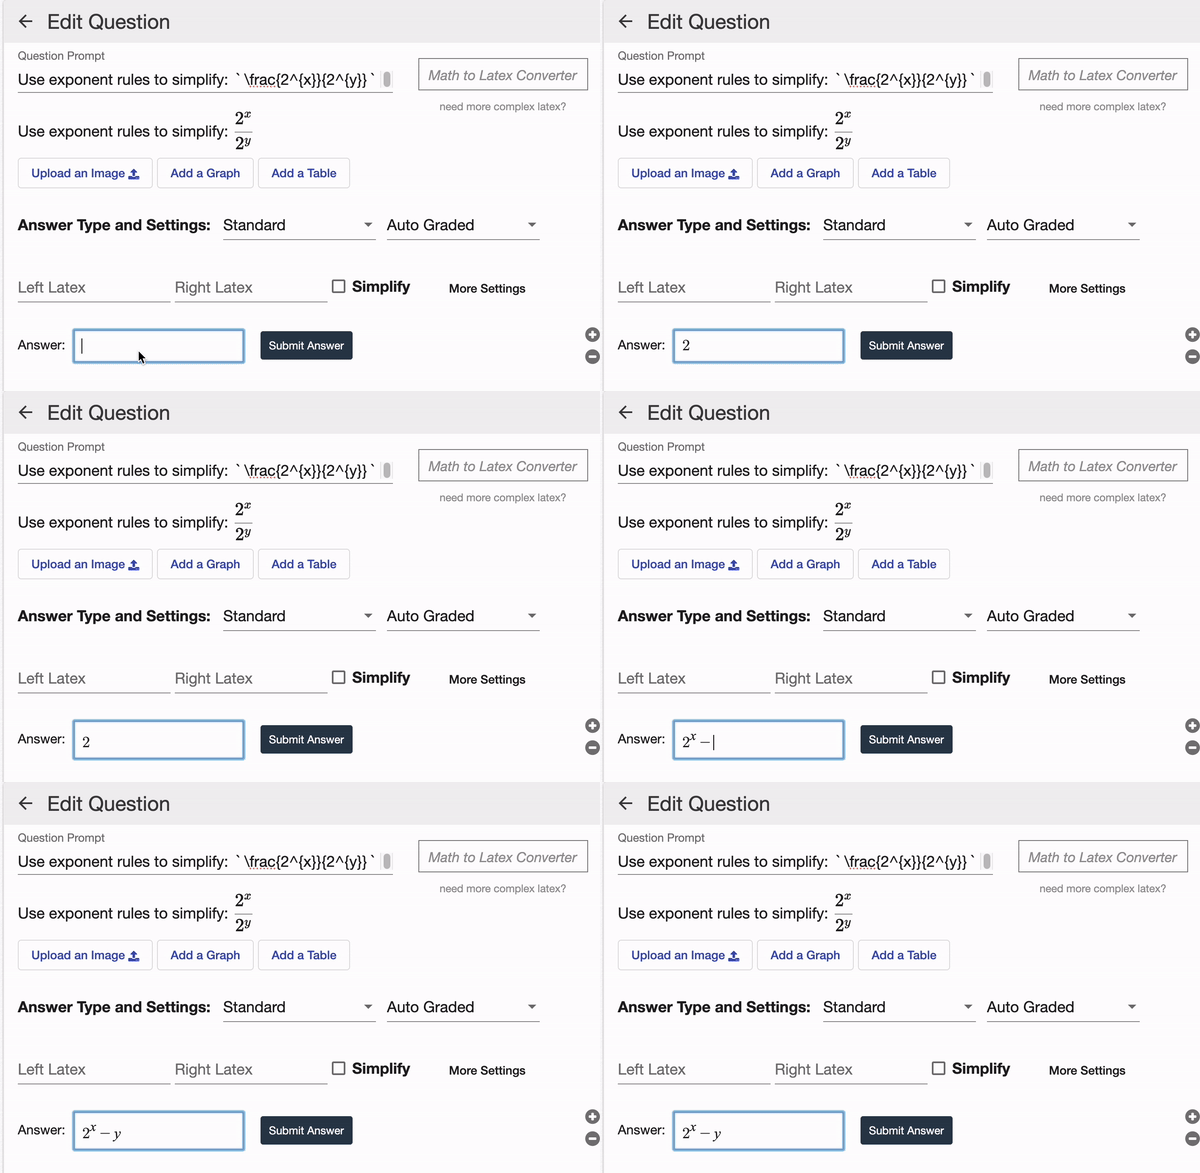 |
| On the teacher's end, correctly entering a binomial exponent requires the use of parentheses. | 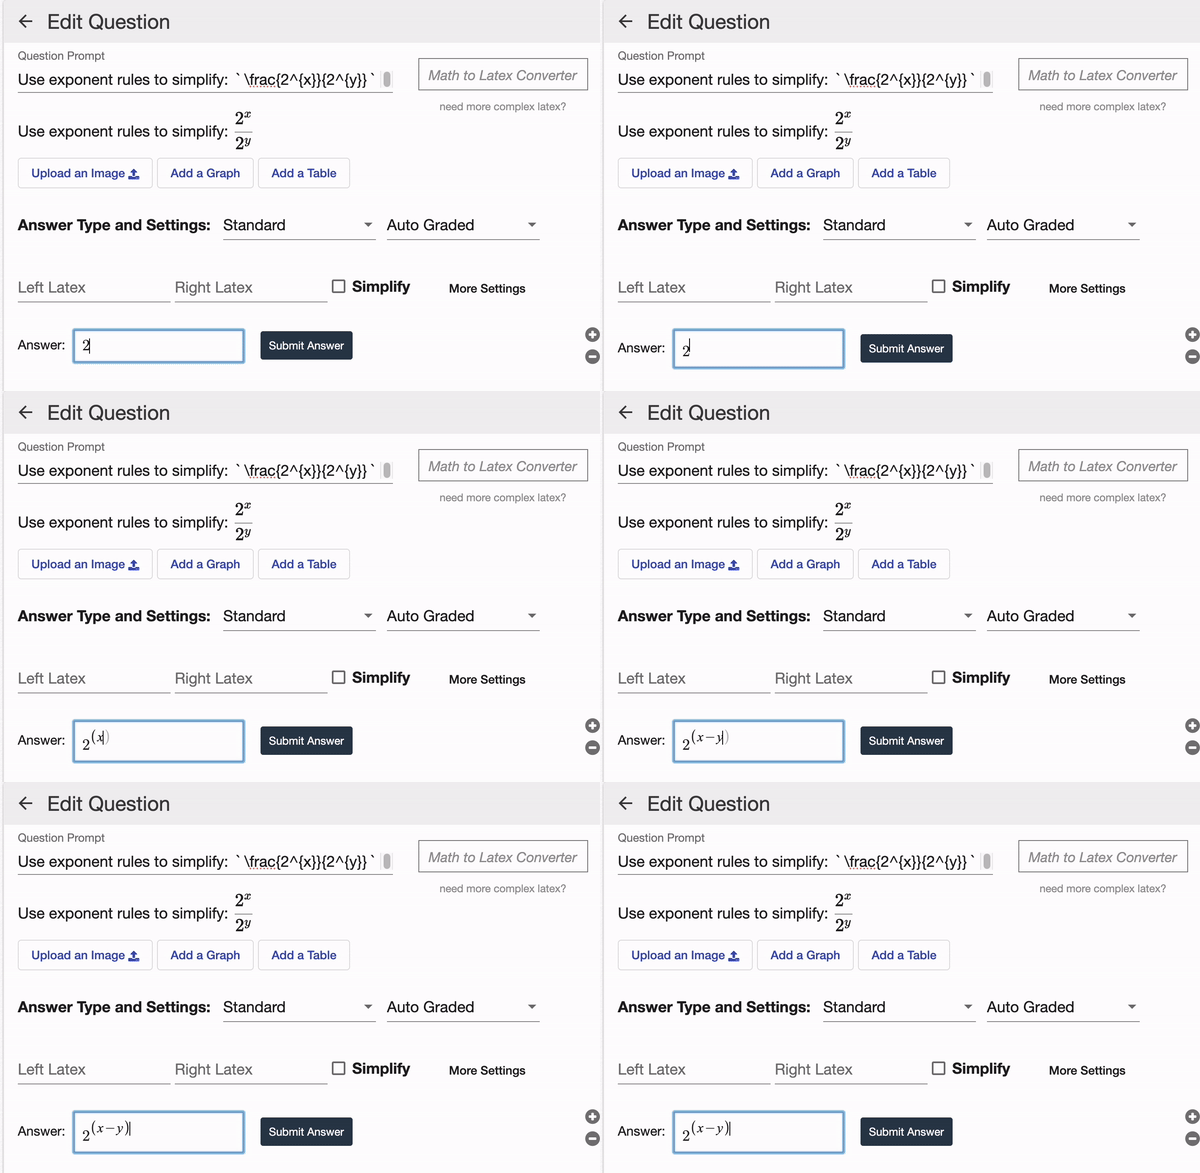 |
| To make entering the correct answer easier for students, you can select the “Binomial Exponent” setting. | 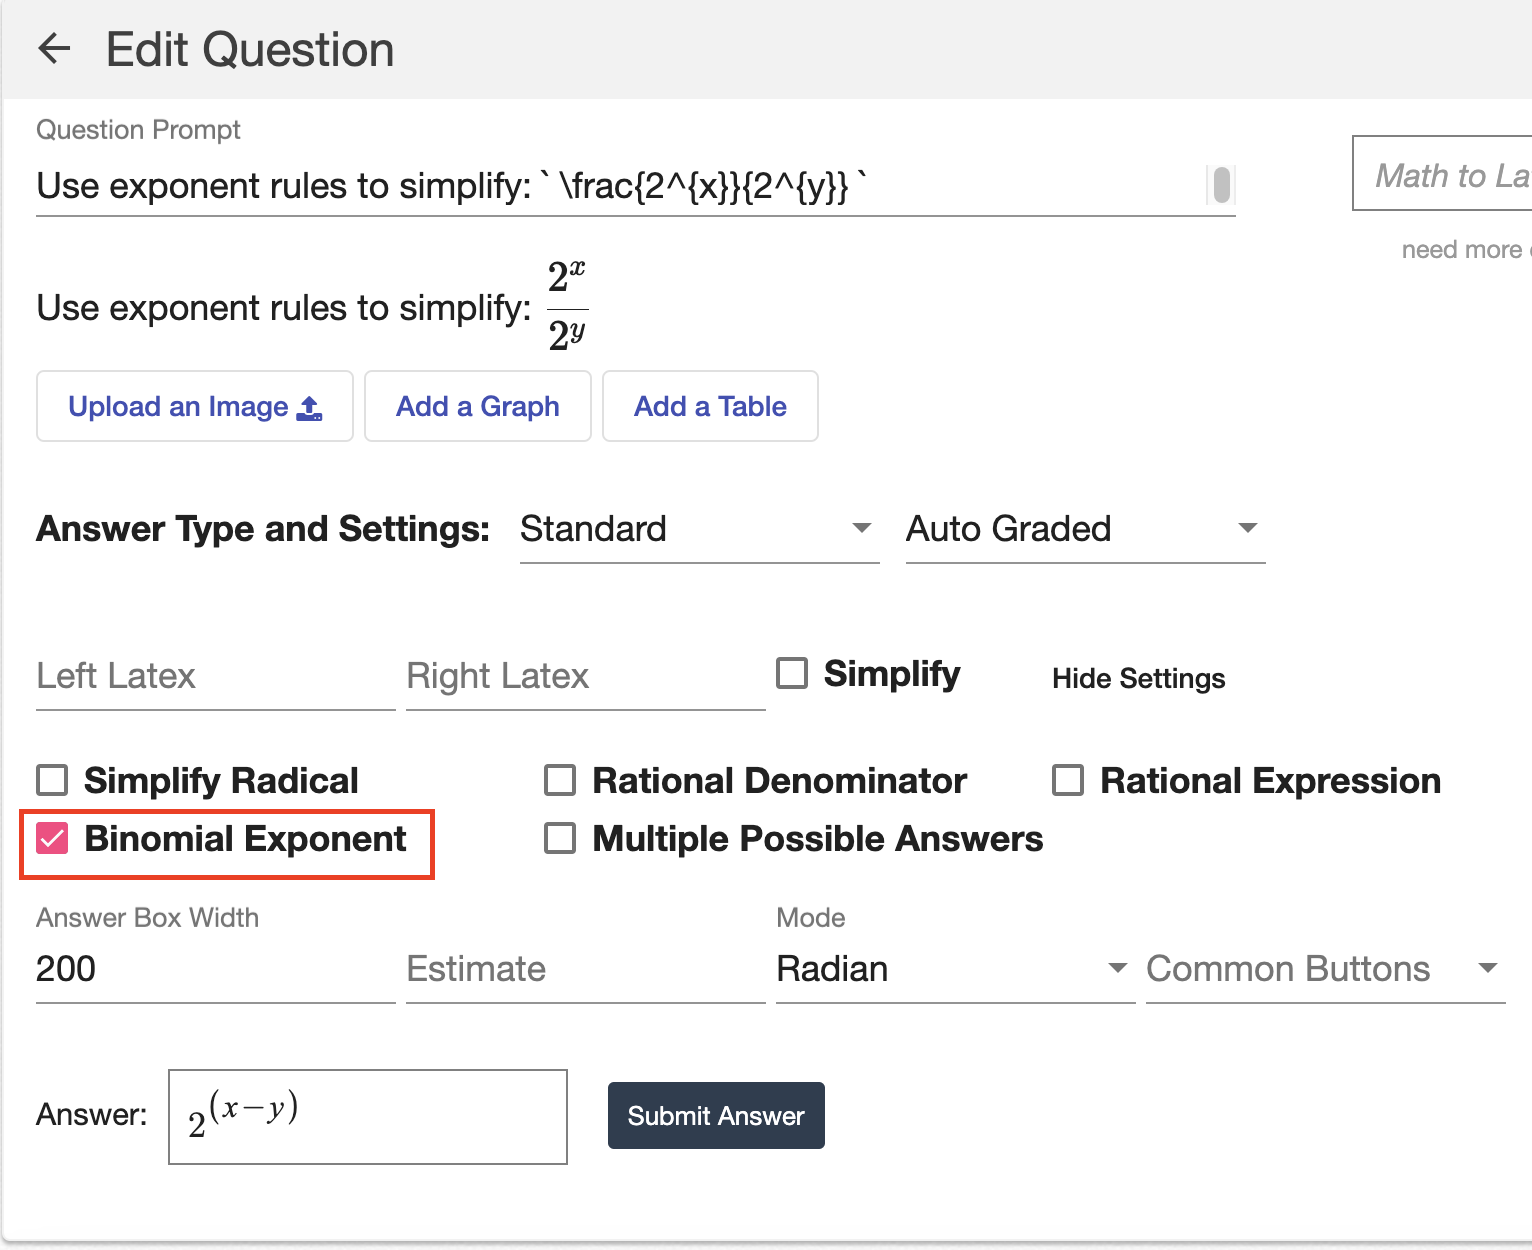 |
|
This allows students to enter the correct answer without using parentheses. The cursor will remain in the superscript space for exponents, even if students enter a + or - symbol.
Students can still use the right arrow key to move out of the superscript space, if needed. |
 |
| If you don't select the “Binomial Exponent” setting, students will need to use parentheses to enter the correct answer. | 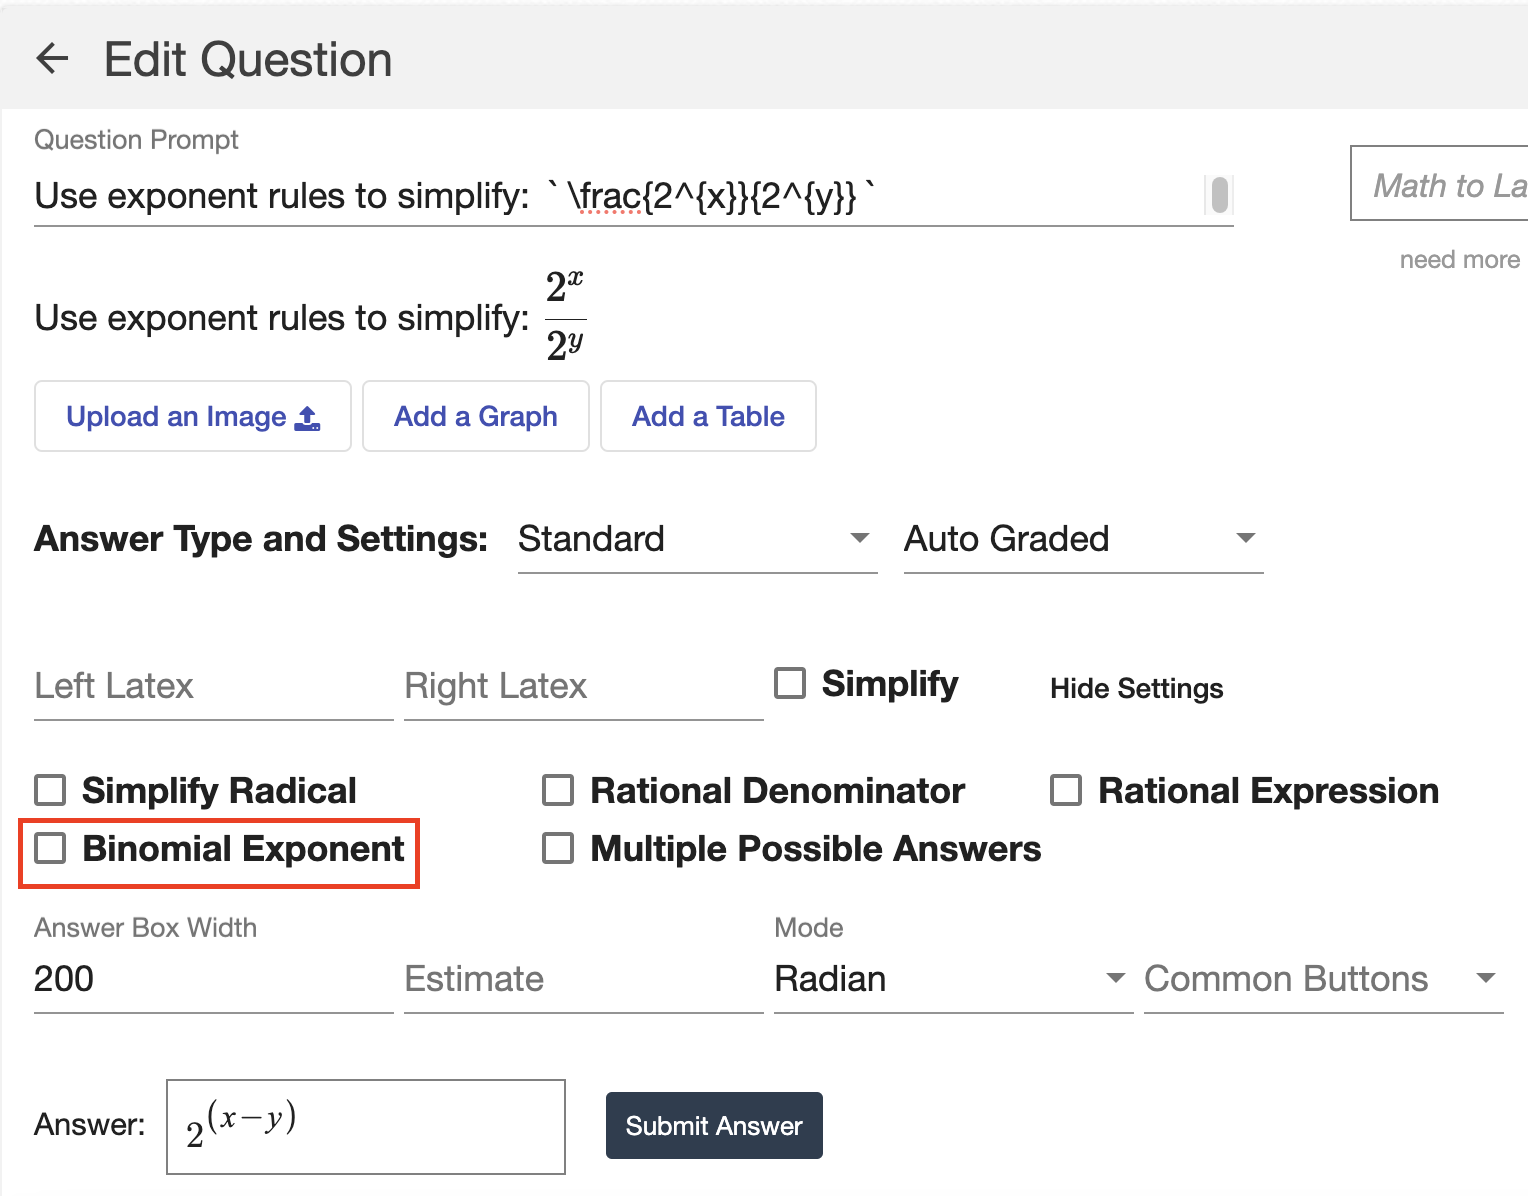 |
| To the right, you can see a demonstration of the student experience. Notice how students aren't able to easily enter a binomial exponent and will need to use parentheses to accurately type the correct answer. | 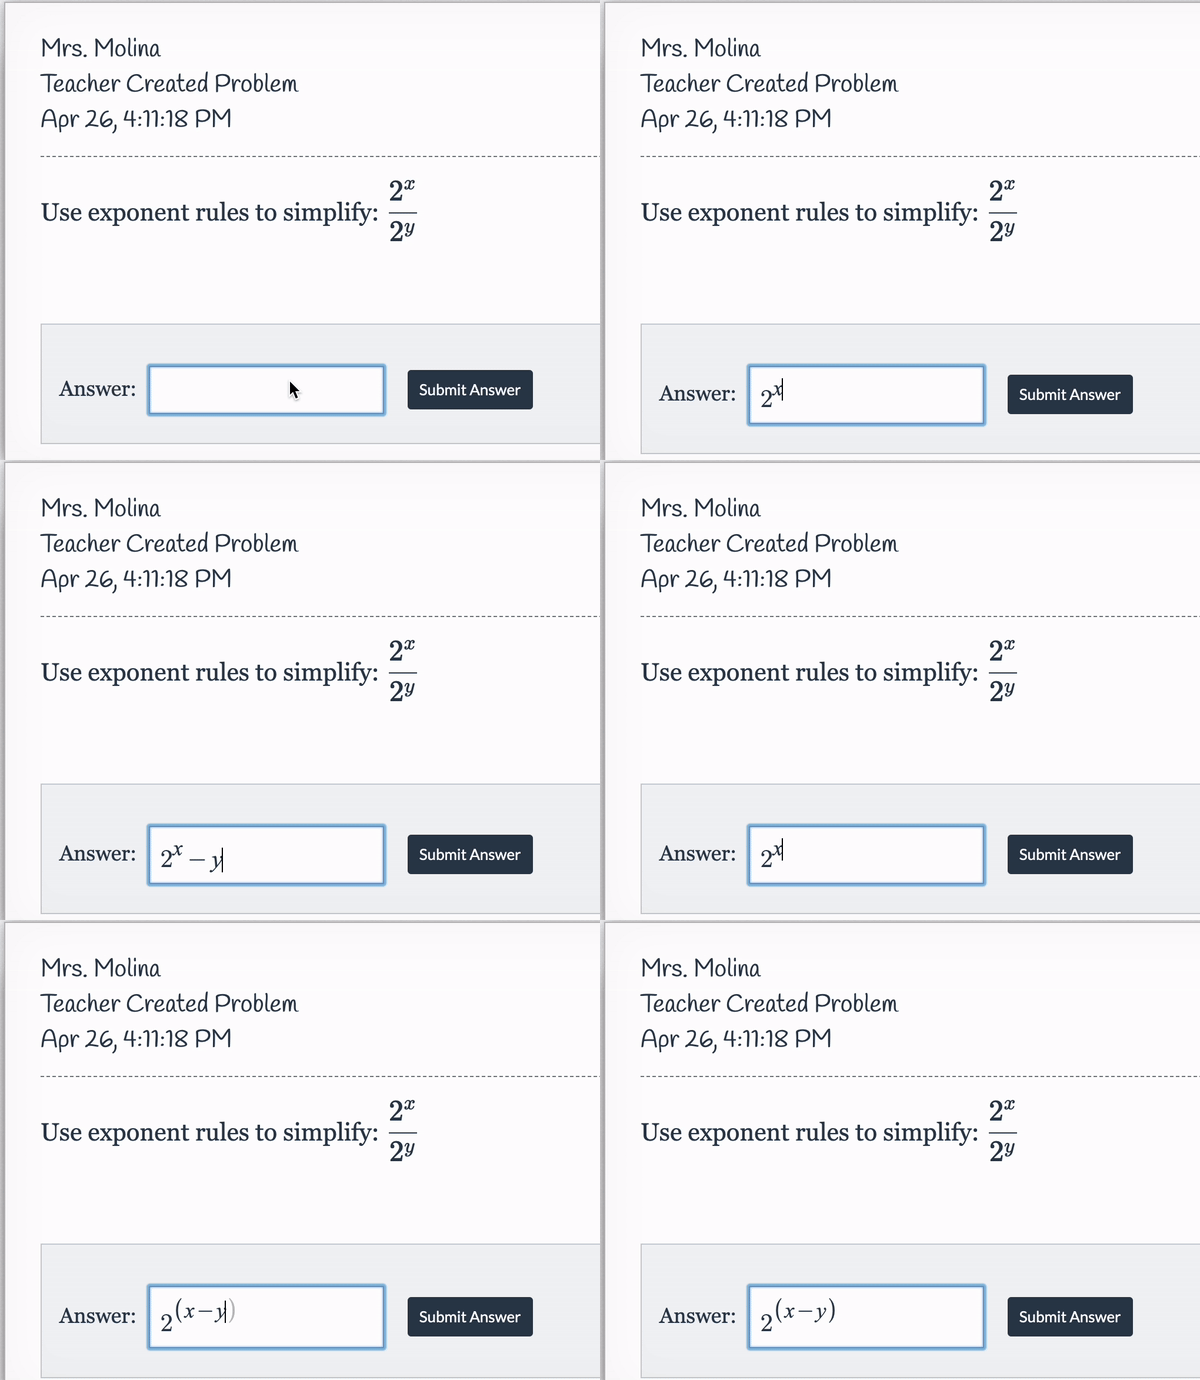 |
| Note: Selecting the “Binomial Exponent” setting will only affect the student experience. Teachers will still need to use parentheses when entering binomial exponents in the answer space. |
Multiple Possible Answers
|
If there are multiple possible answers you would like to accept for your questions, you should select the “Multiple Possible Answers” setting.
Note: This is not the same as a “Multiple Select” question. This setting should only be used when you want students to type in a single correct answer out of a list of many possible correct answers. |
 |
| Using the example to the right, there are multiple possible correct answers to the question being asked. The “Multiple Possible Answers” setting is selected, which creates multiple answer boxes for teachers to list all possible answers to the question. | 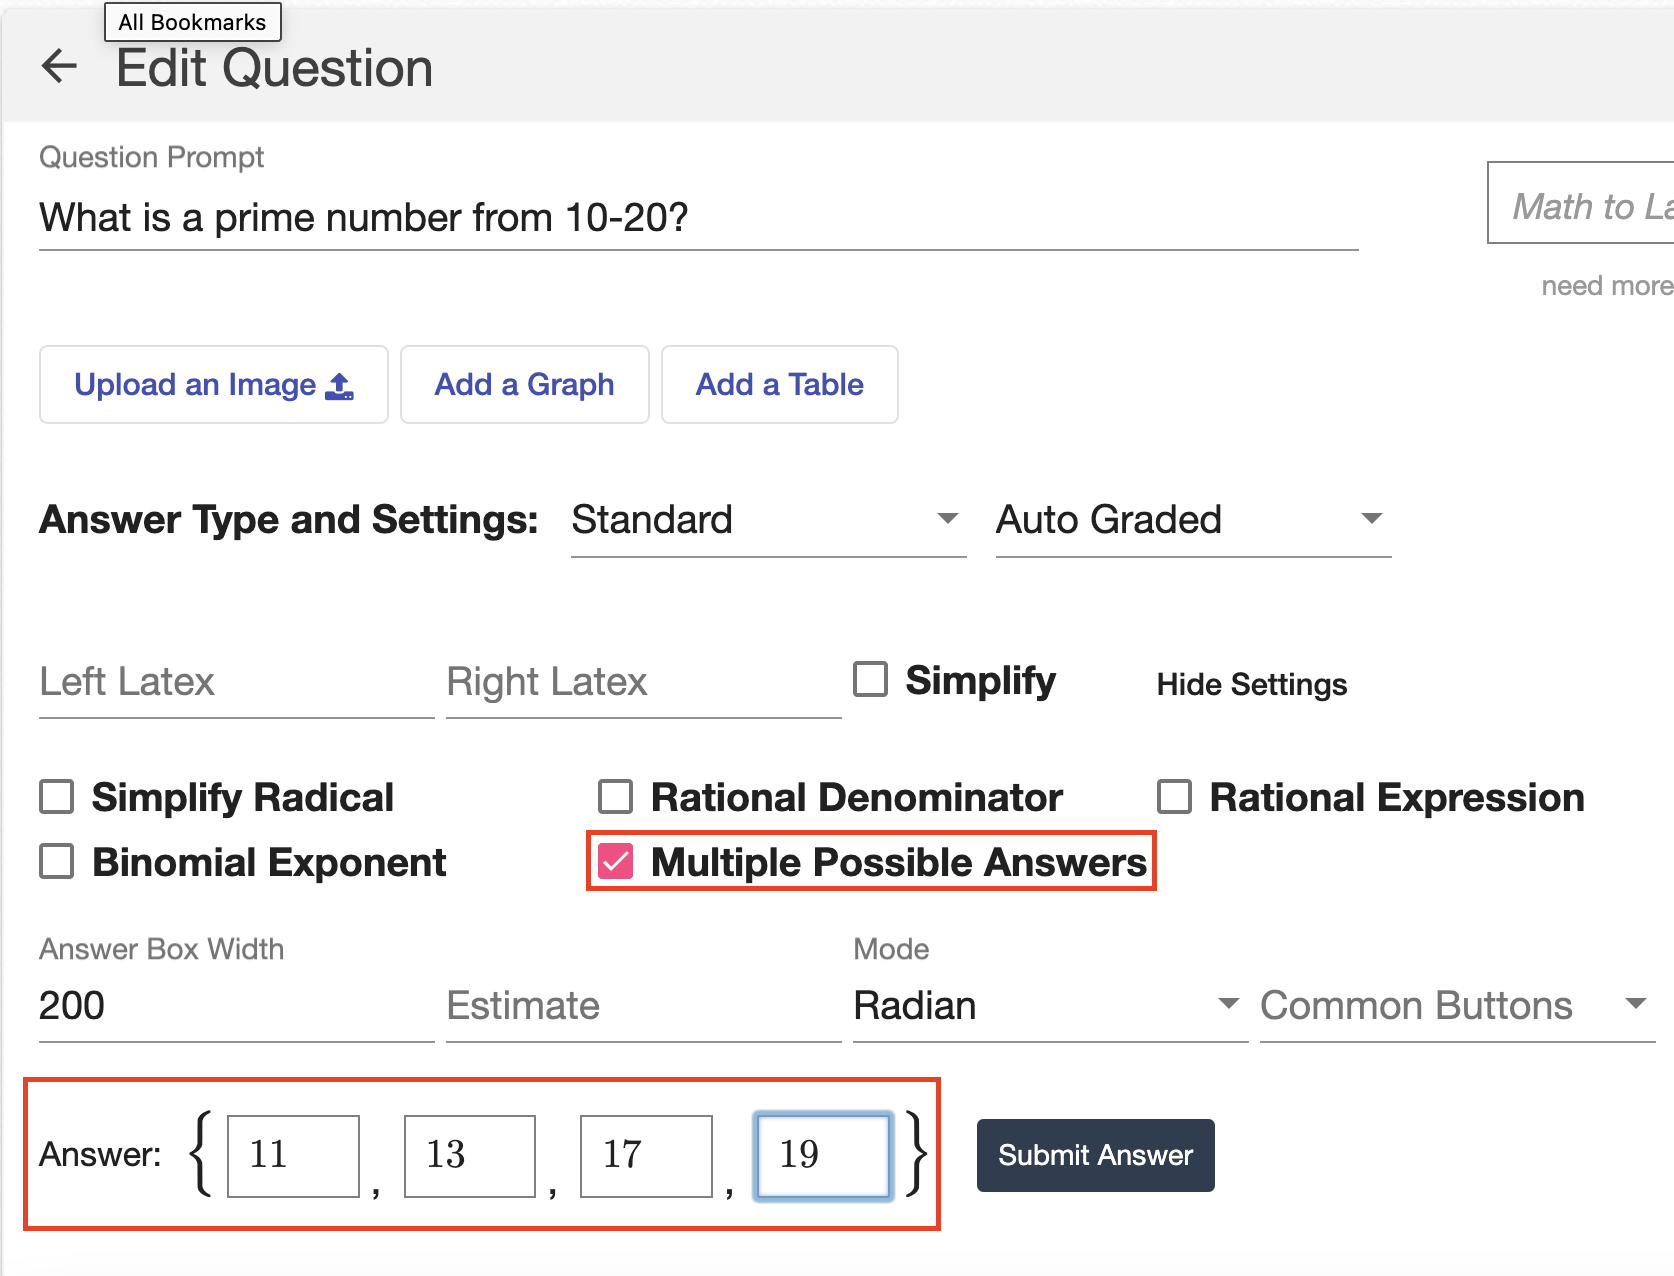 |
| If a student enters one of the correct answers, they will be marked correct. | 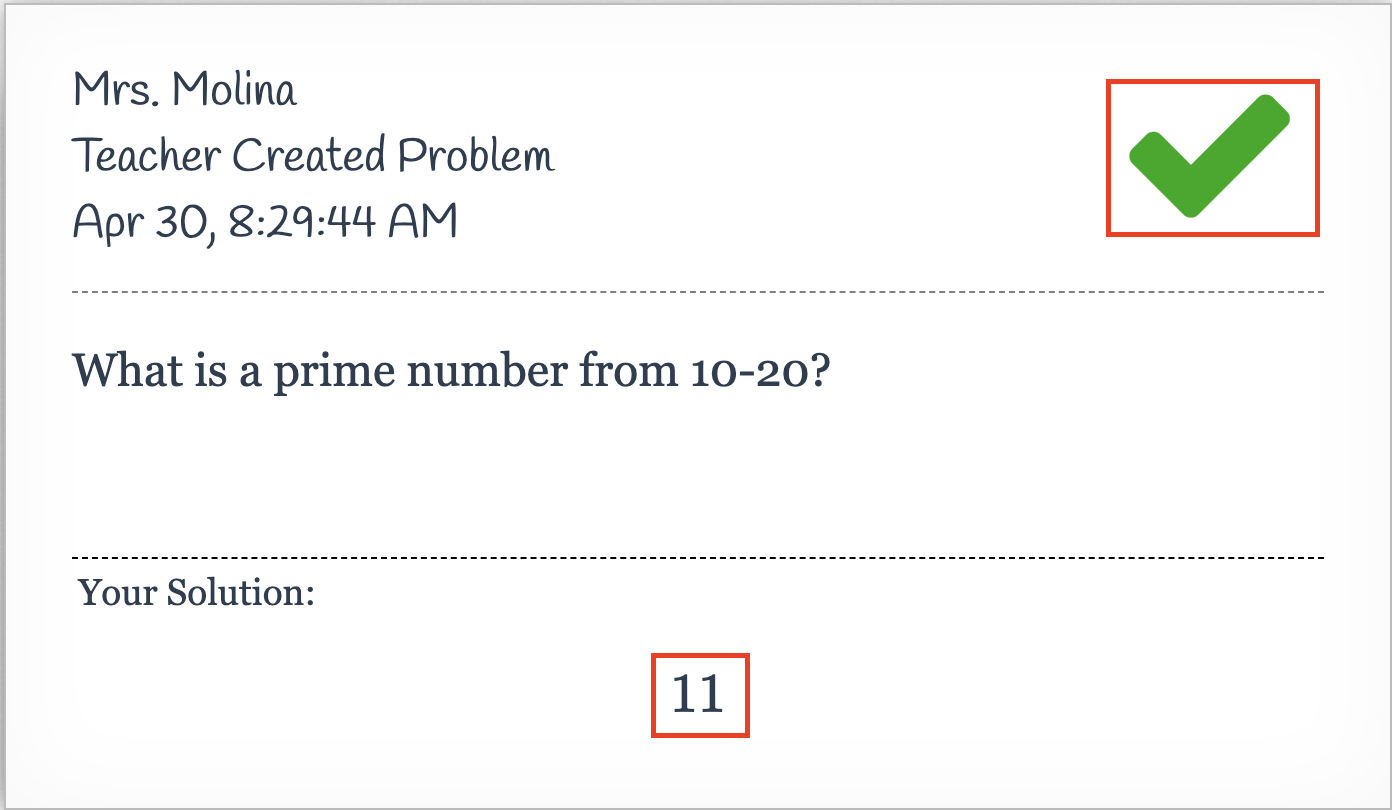 |
| If another student enters a different correct answer, they will also be marked correct. | 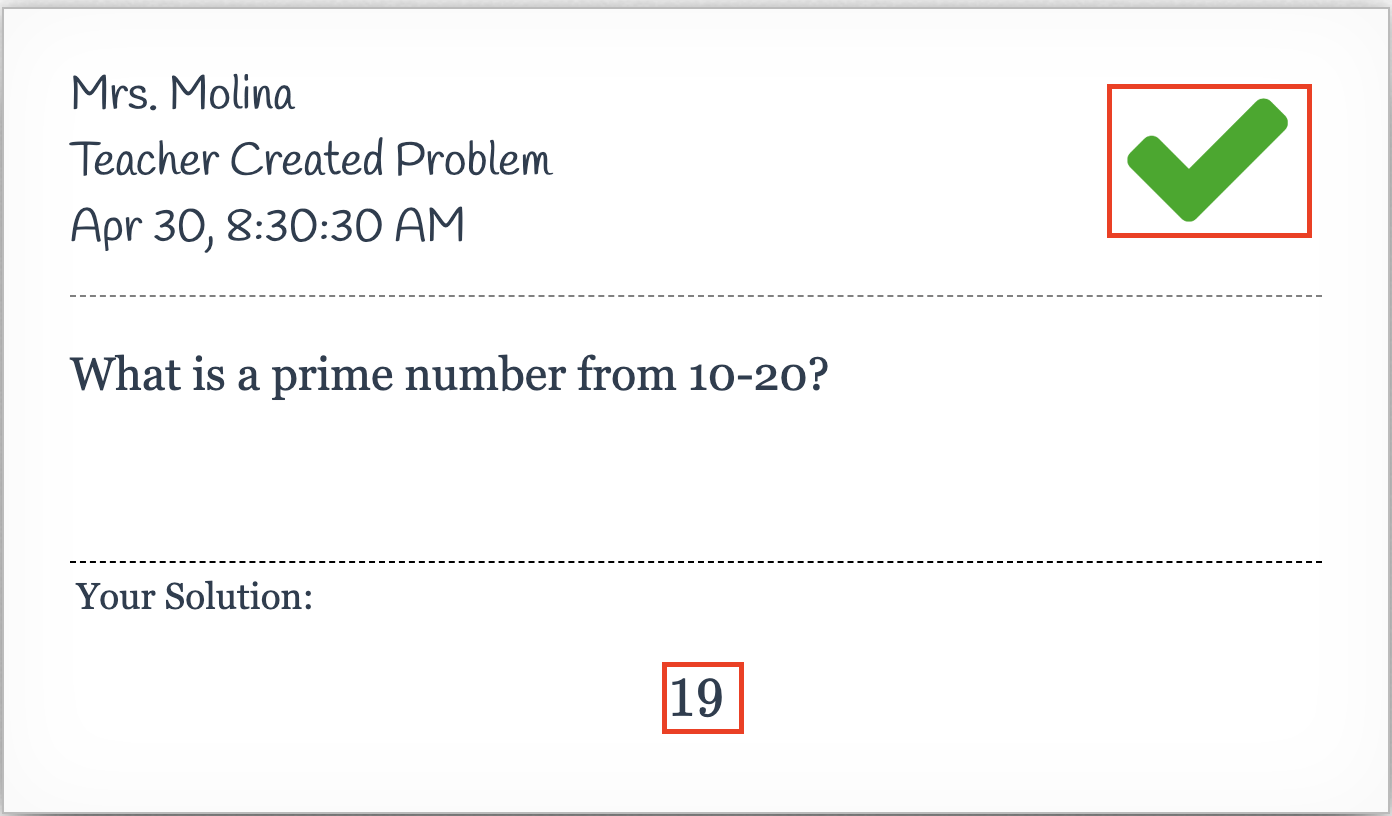 |
| However, if a student lists ALL correct answers, they will be marked incorrect. | 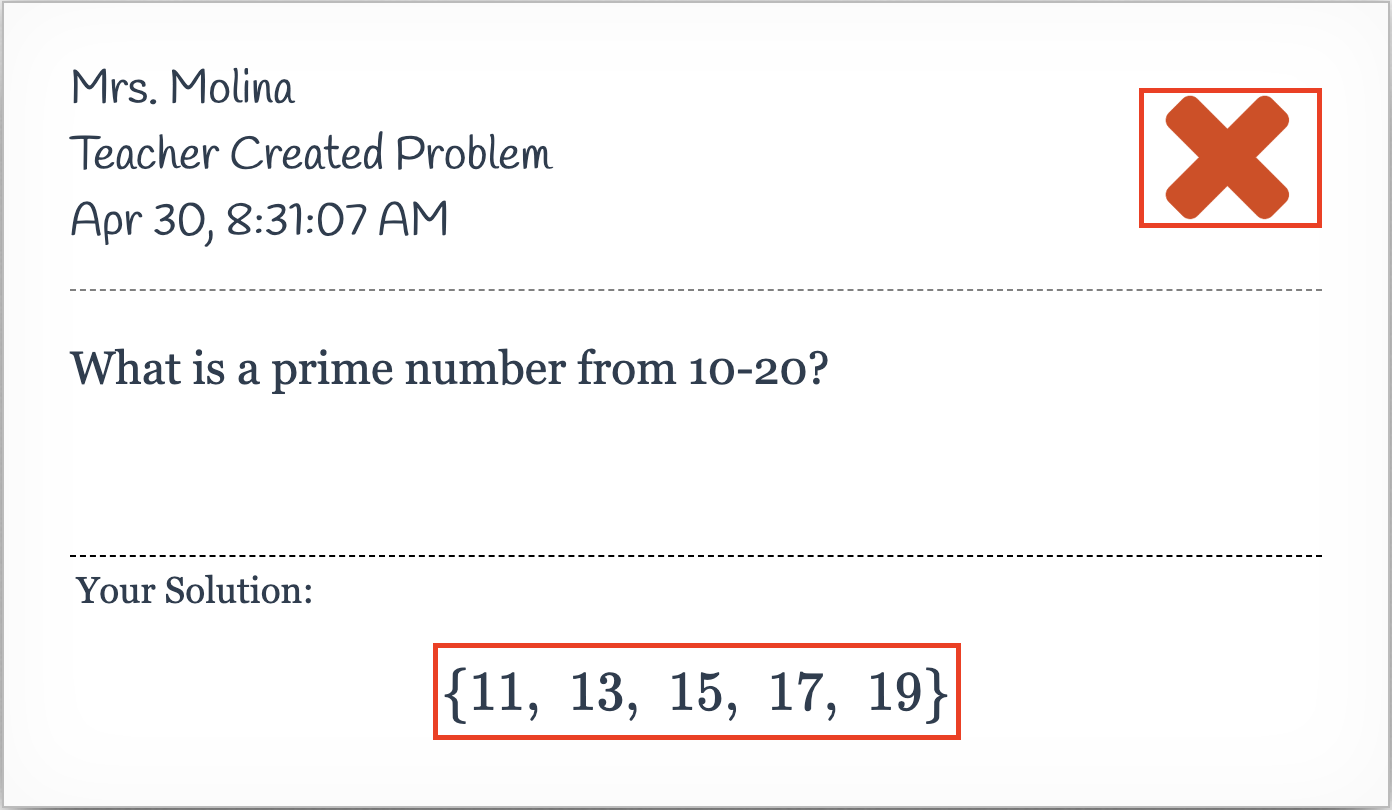 |
| If you would like students to provide ALL of the correct answers, leave this setting unchecked. | 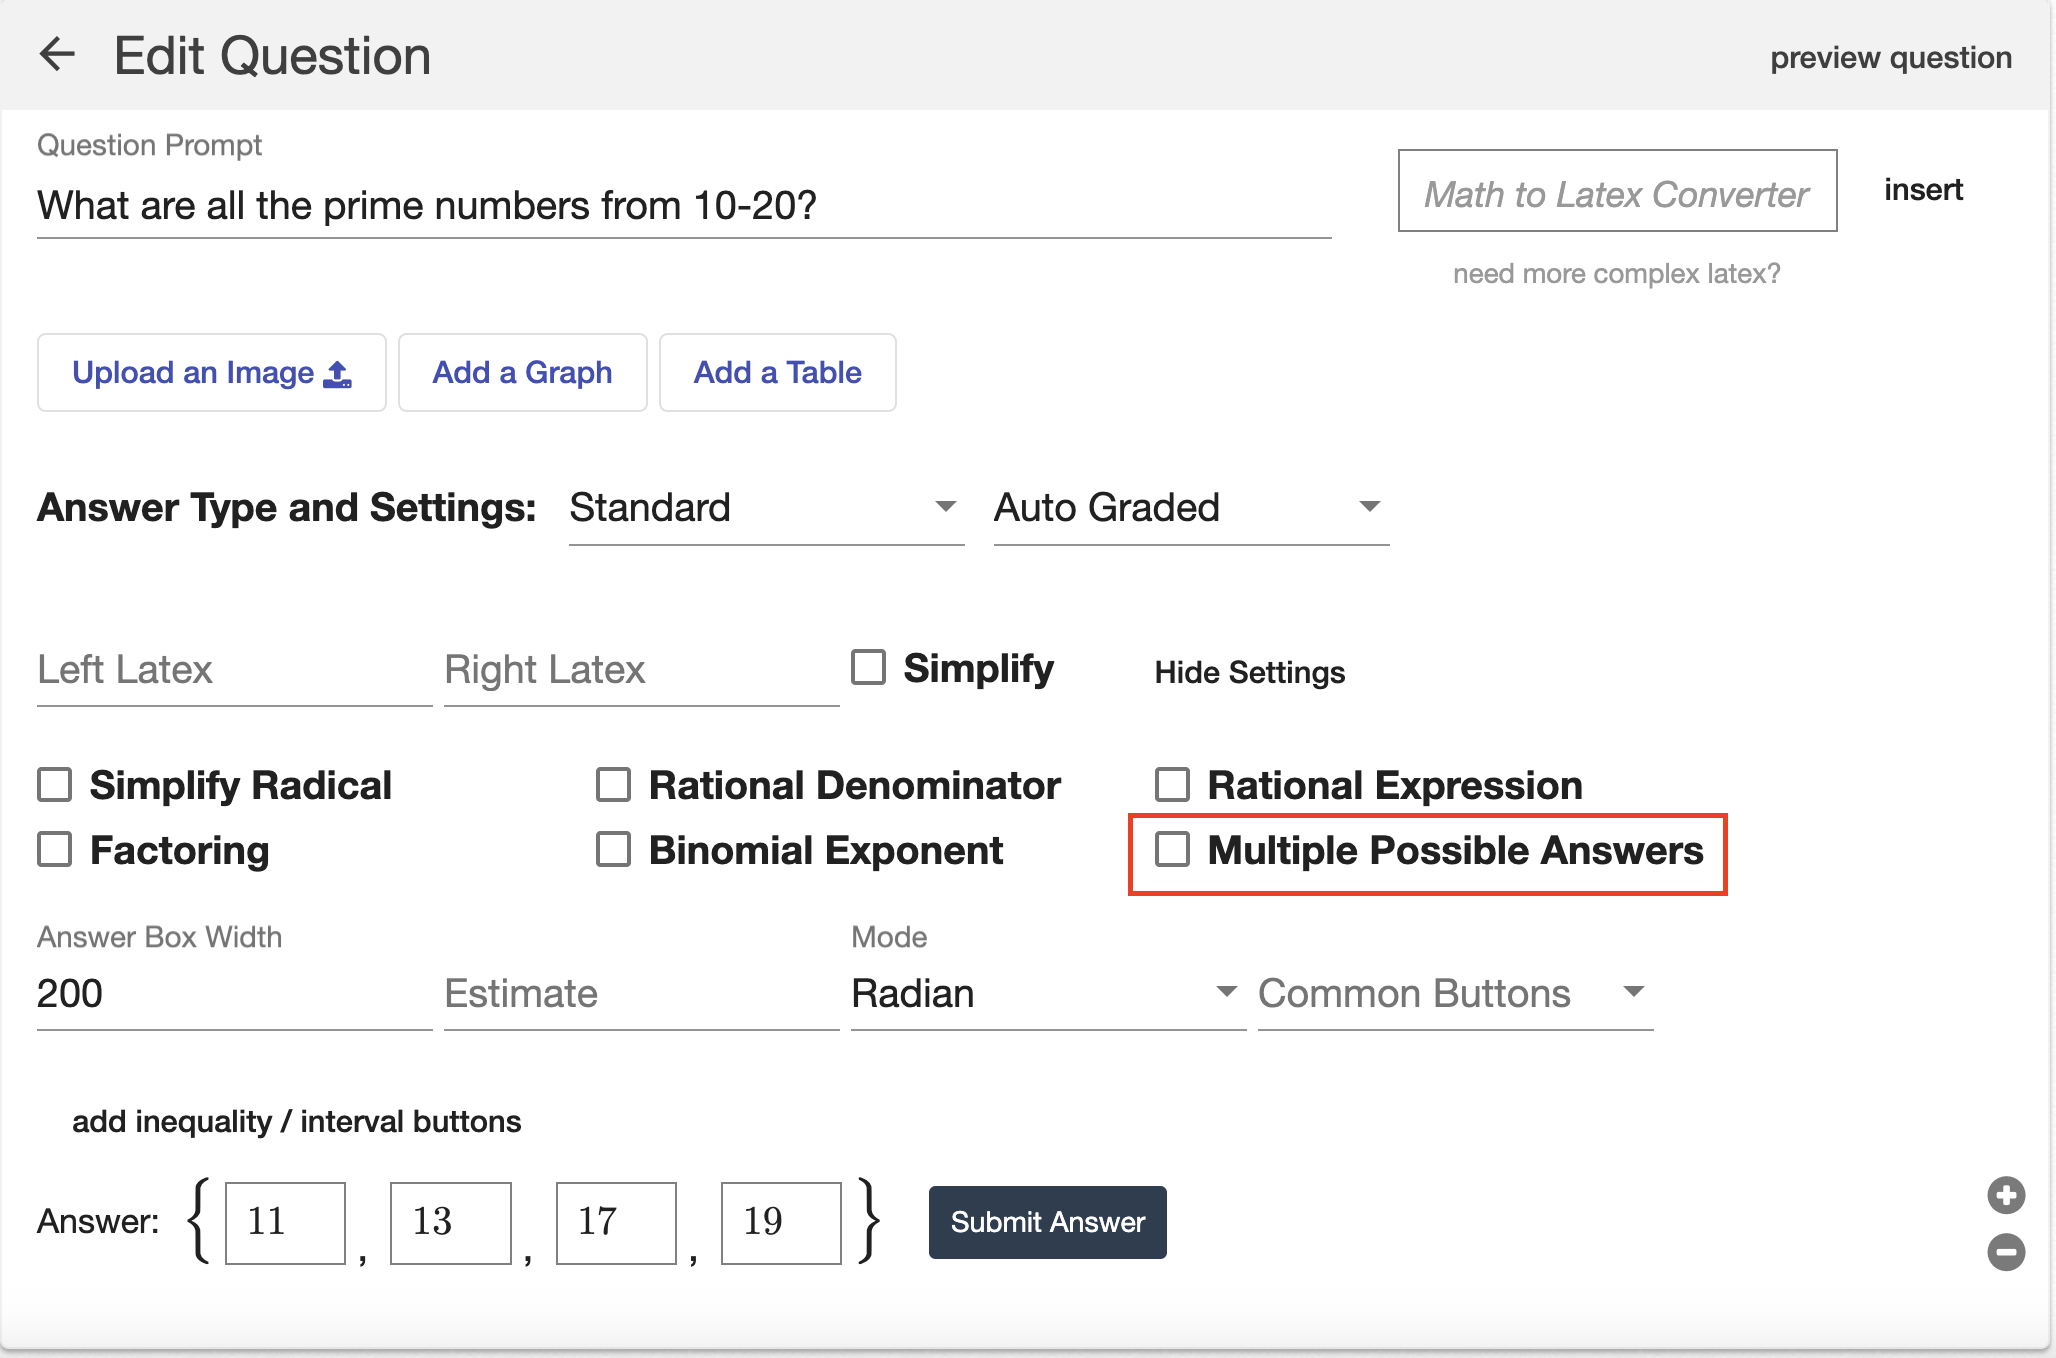 |
| If unchecked, the student needs to provide all correct answers, in any order, to be marked correct. | 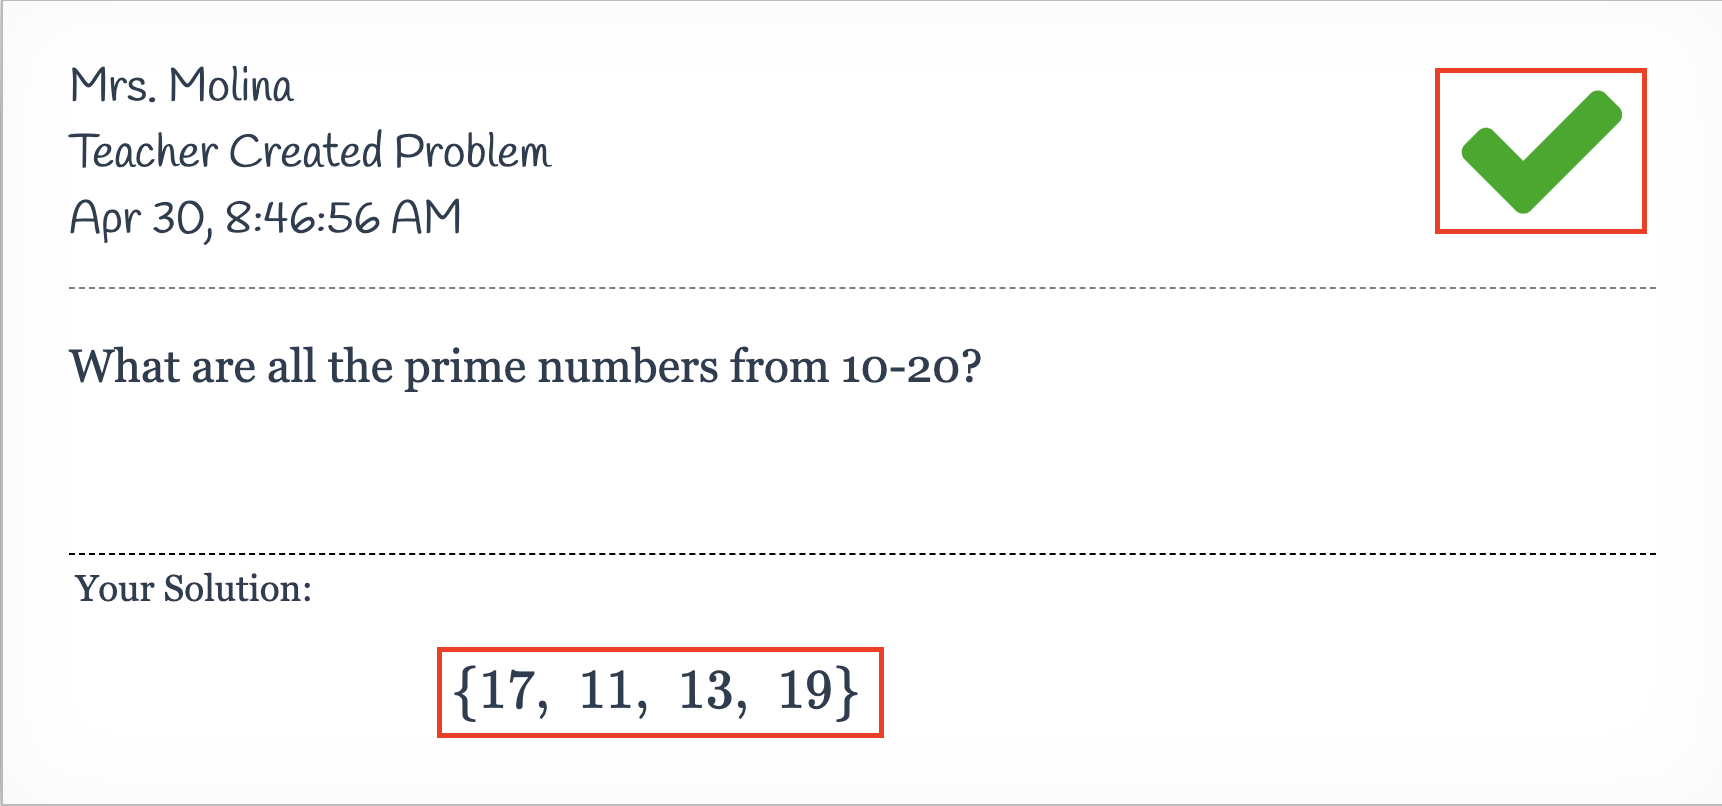 |
| Note: It is not necessary to use this setting for equivalent answers. DeltaMath automatically marks equivalent answers as correct. |
Answer Box Width
| The default width of the answer box is 200 pixels. | 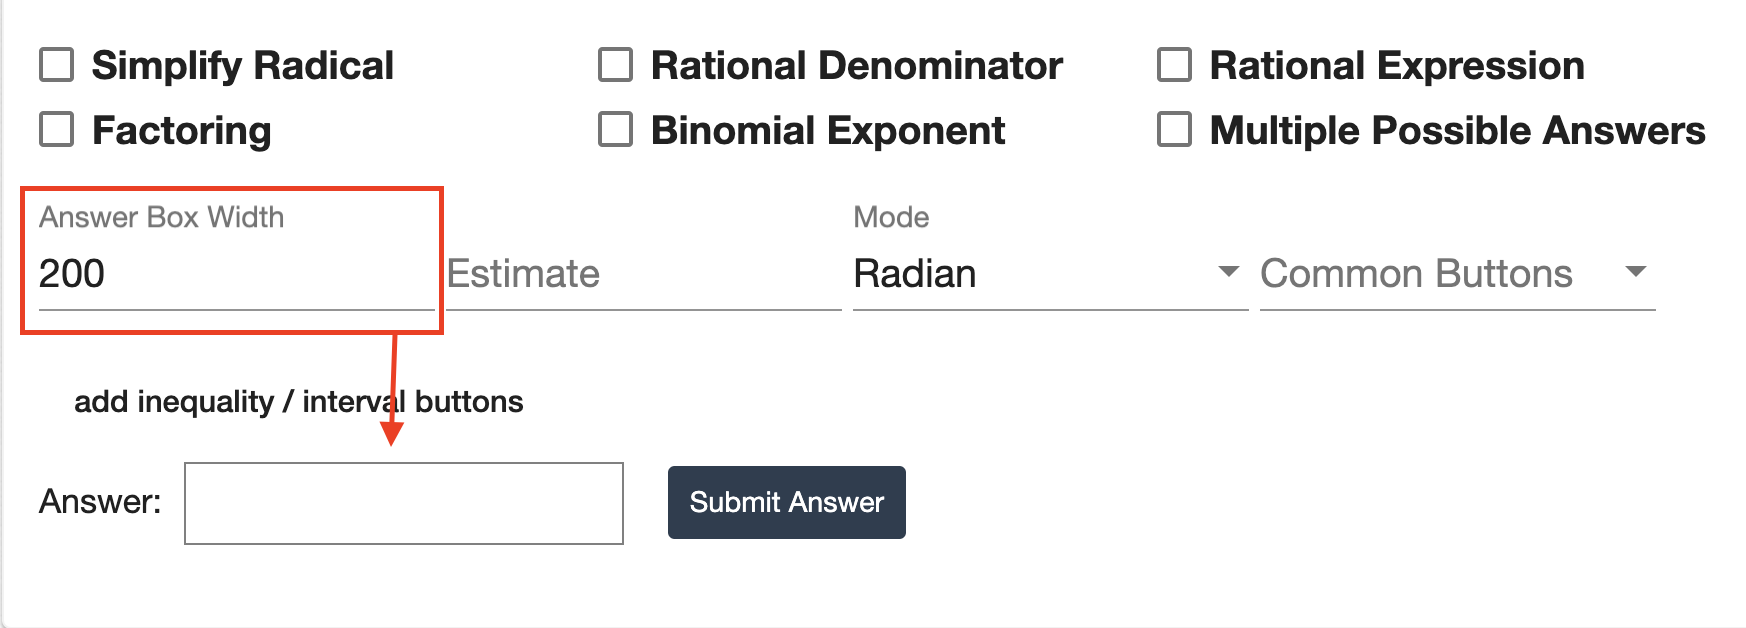 |
| You can adjust this number to make the answer box wider or narrower for students. | 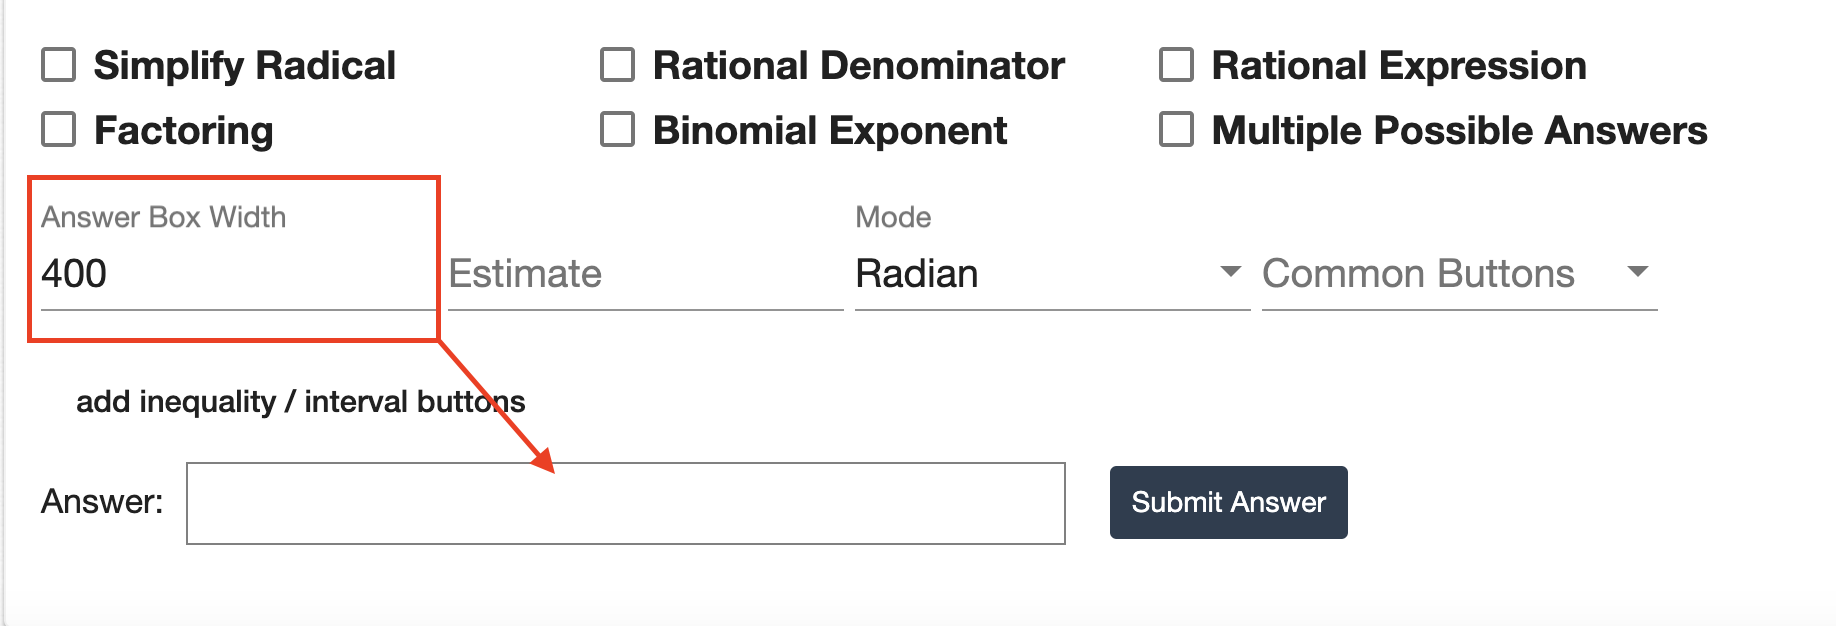 |
Estimate
| The “Estimate” setting allows you to select a range of answers that will be accepted, enabling you to set an allowable tolerance for student answers. |  |
|
The default estimate is always 0, meaning only exact (or equivalent) answers will be accepted.
In the example to the right, the answer is 2.1, and no estimate is provided. |
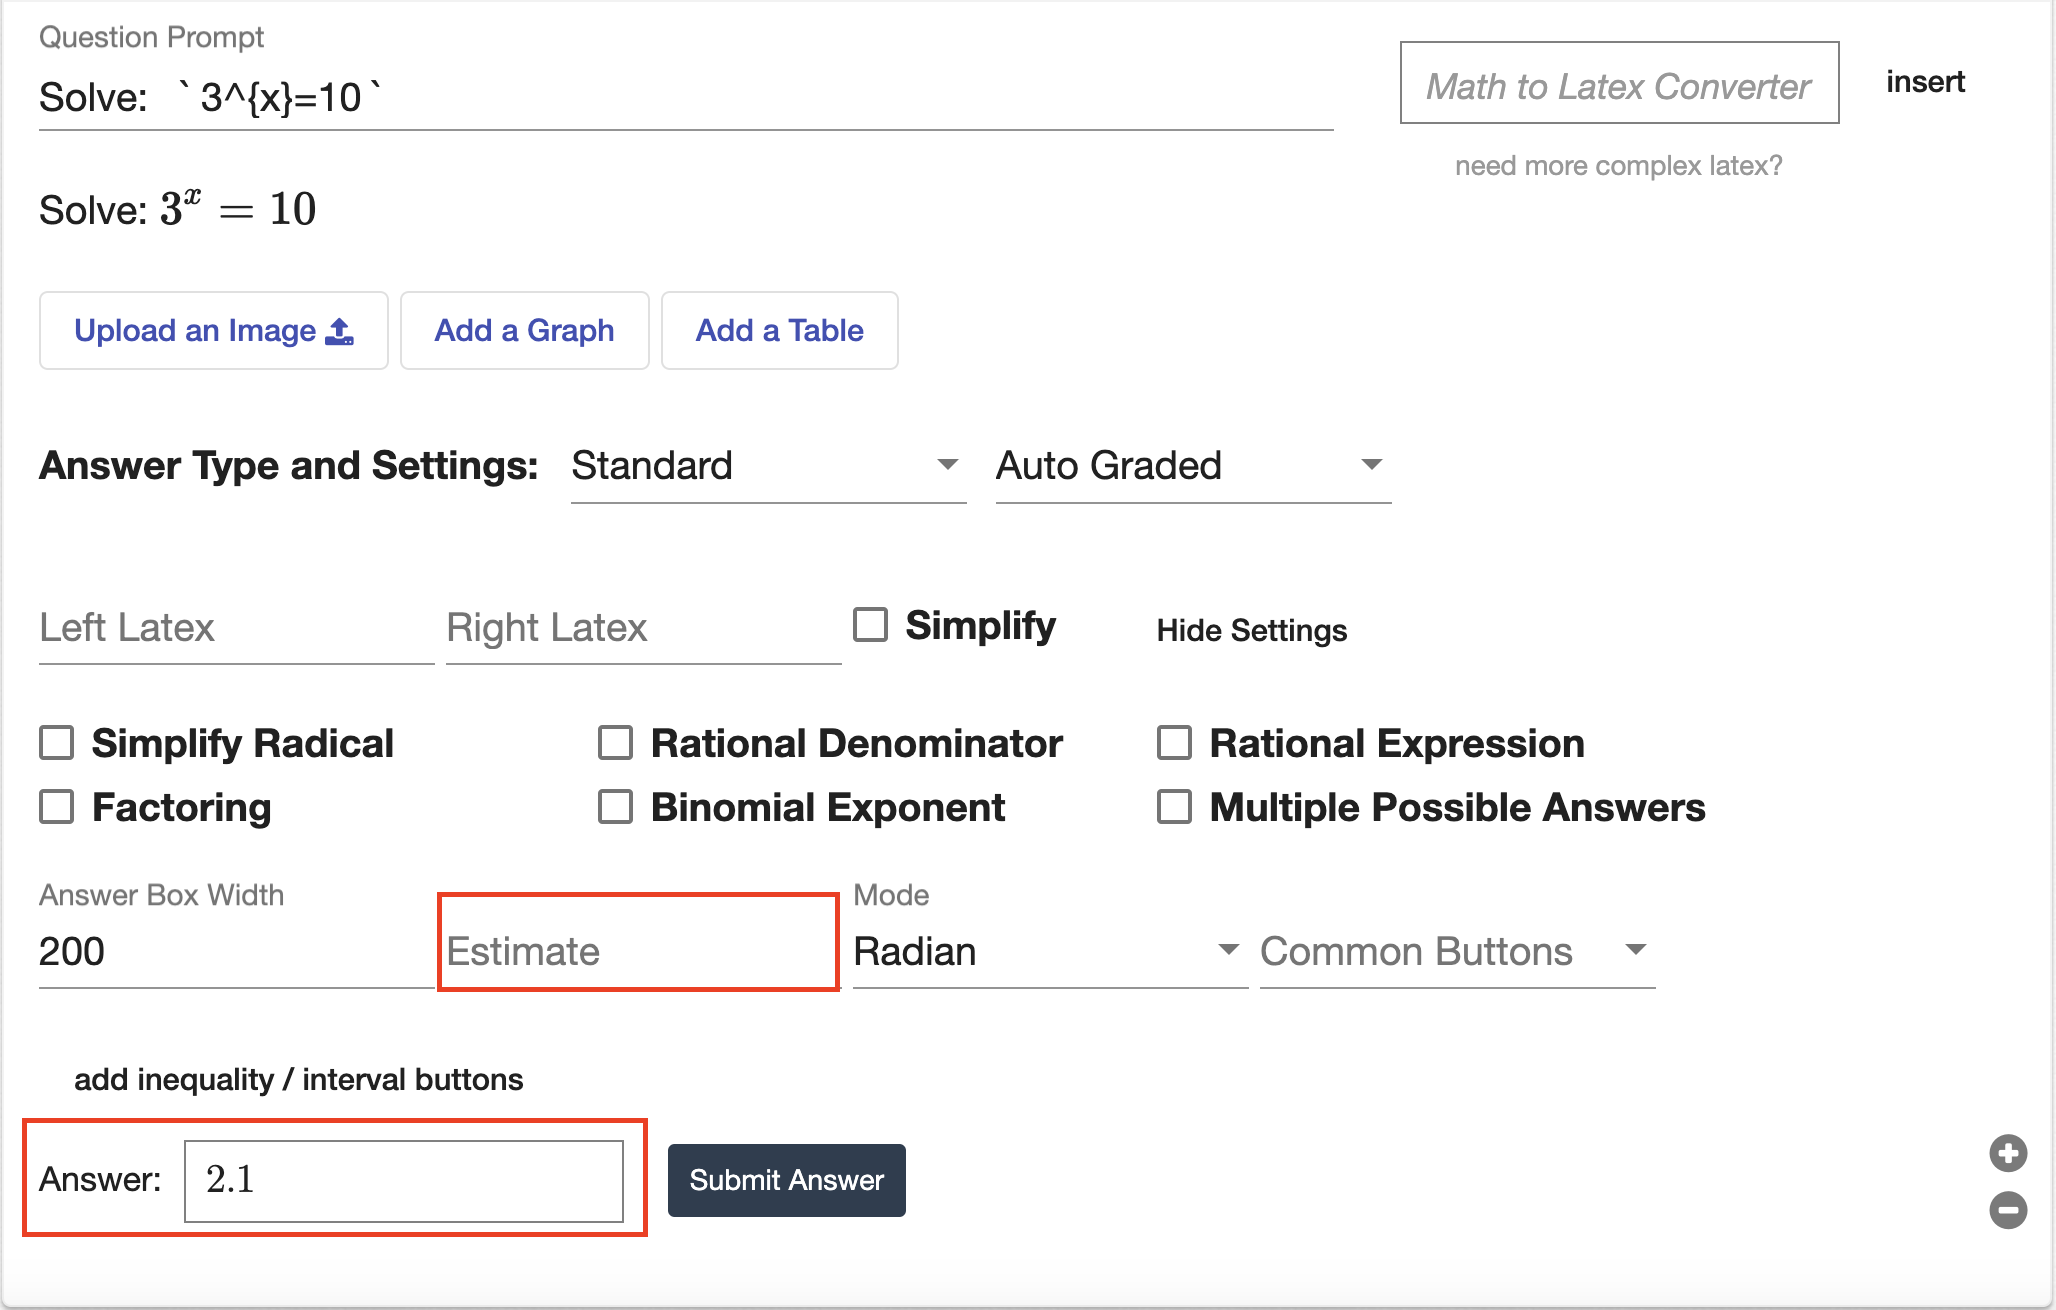 |
| This means that only 2.1 will be marked as correct, and any answer that differs will be marked incorrect. | 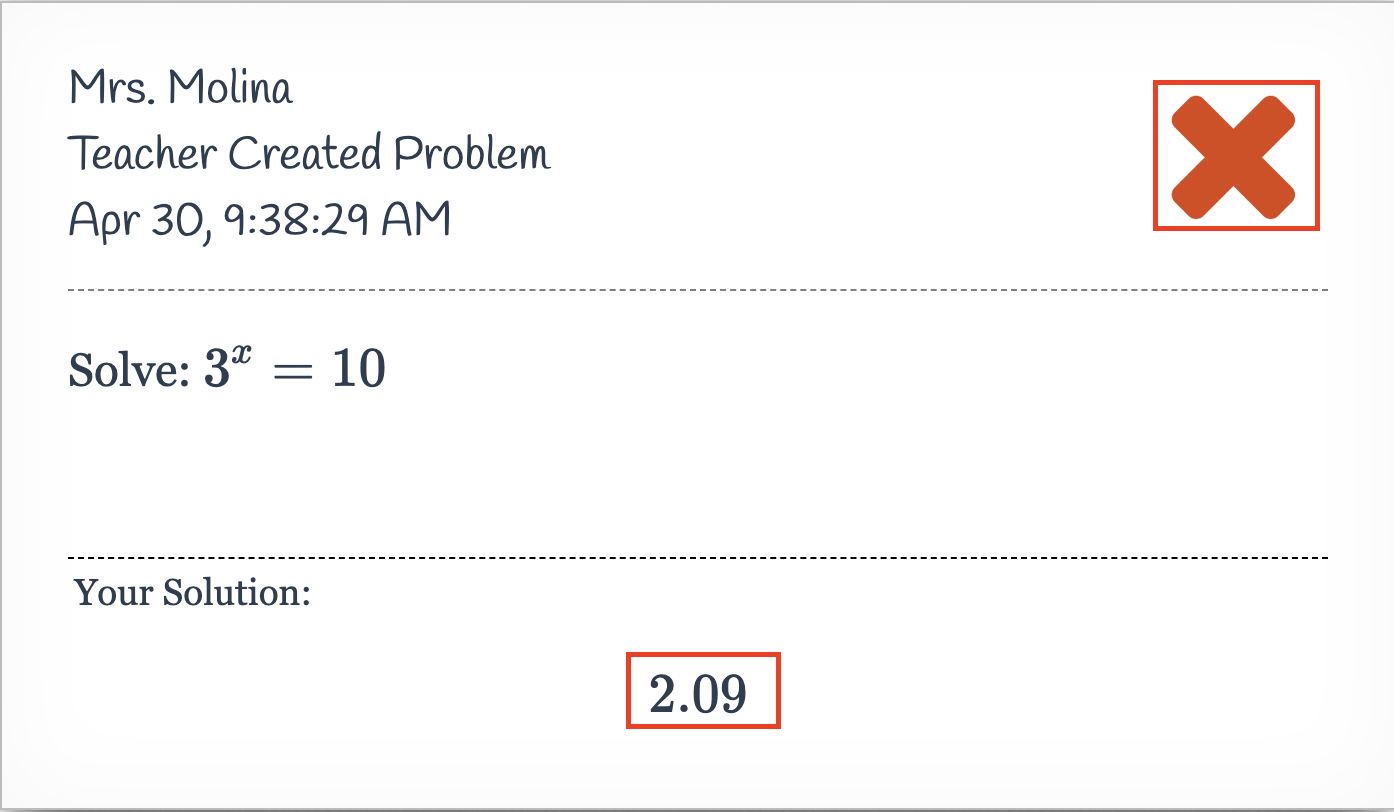 |
|
When you provide an estimate, you are creating a range of possible answers that will be marked correct.
In the example to the right, an estimate of 0.1 has been set. This means that the range of correct answers is 2.1±0.1, or any value between 2 and 2.2. |
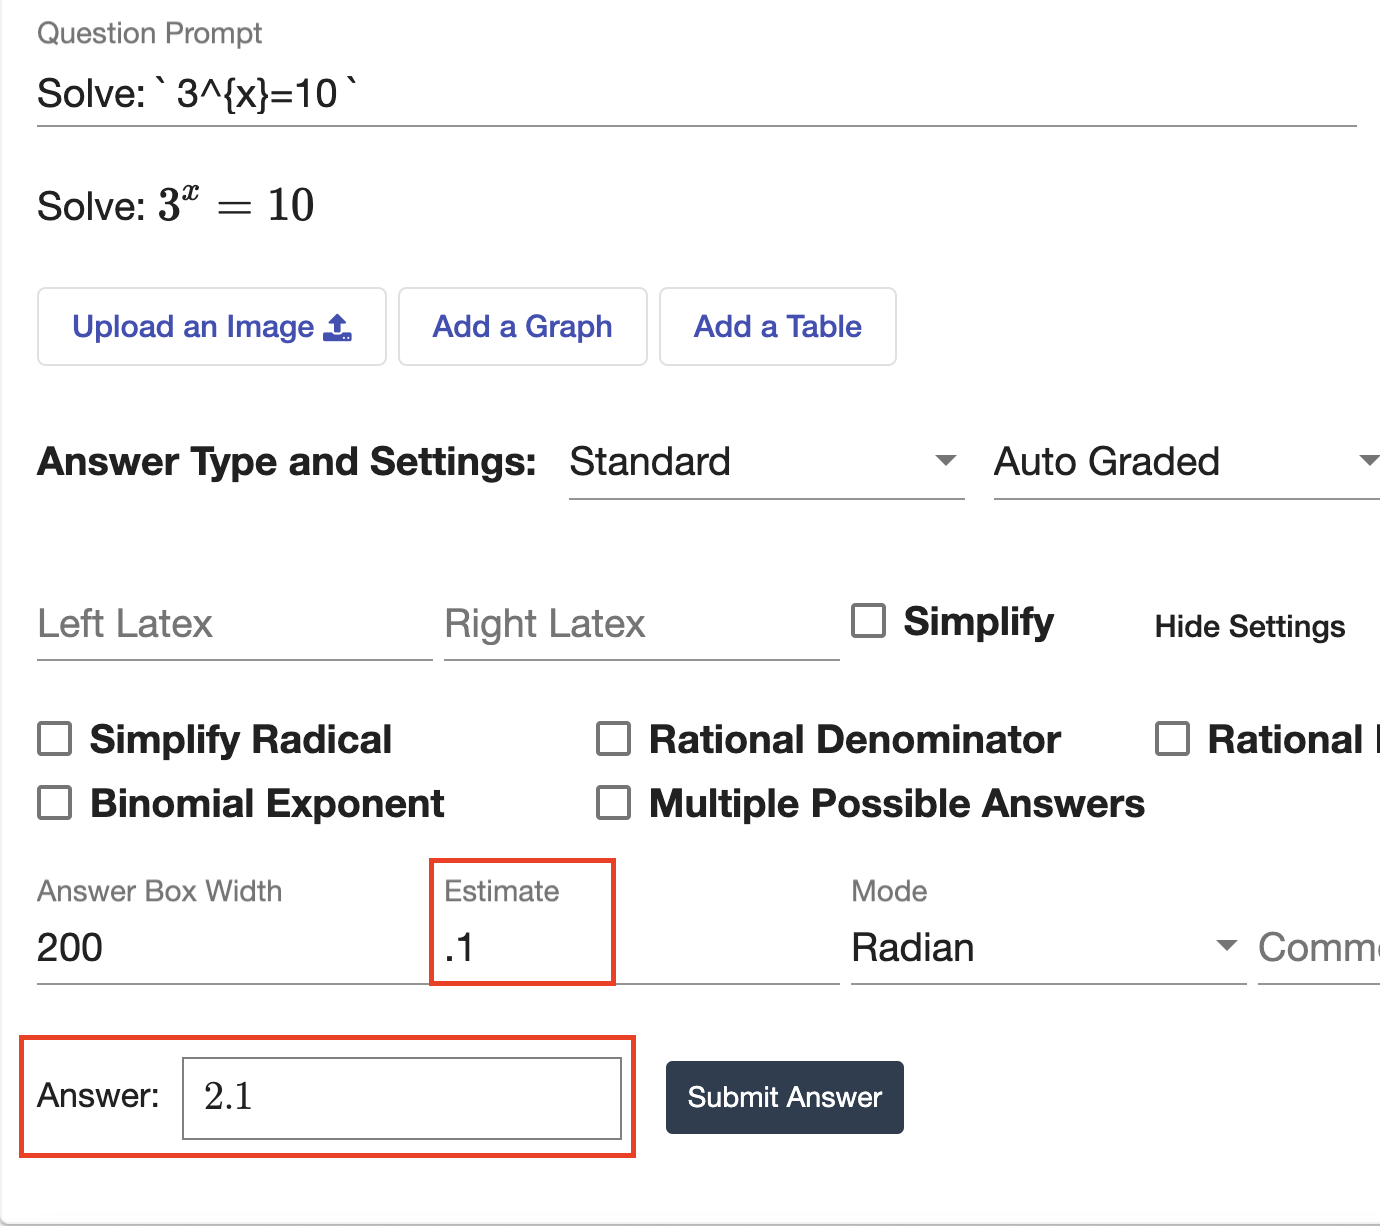 |
| Now, you will see that 2.09 is marked correct because it is within the acceptable range created by the estimate. | 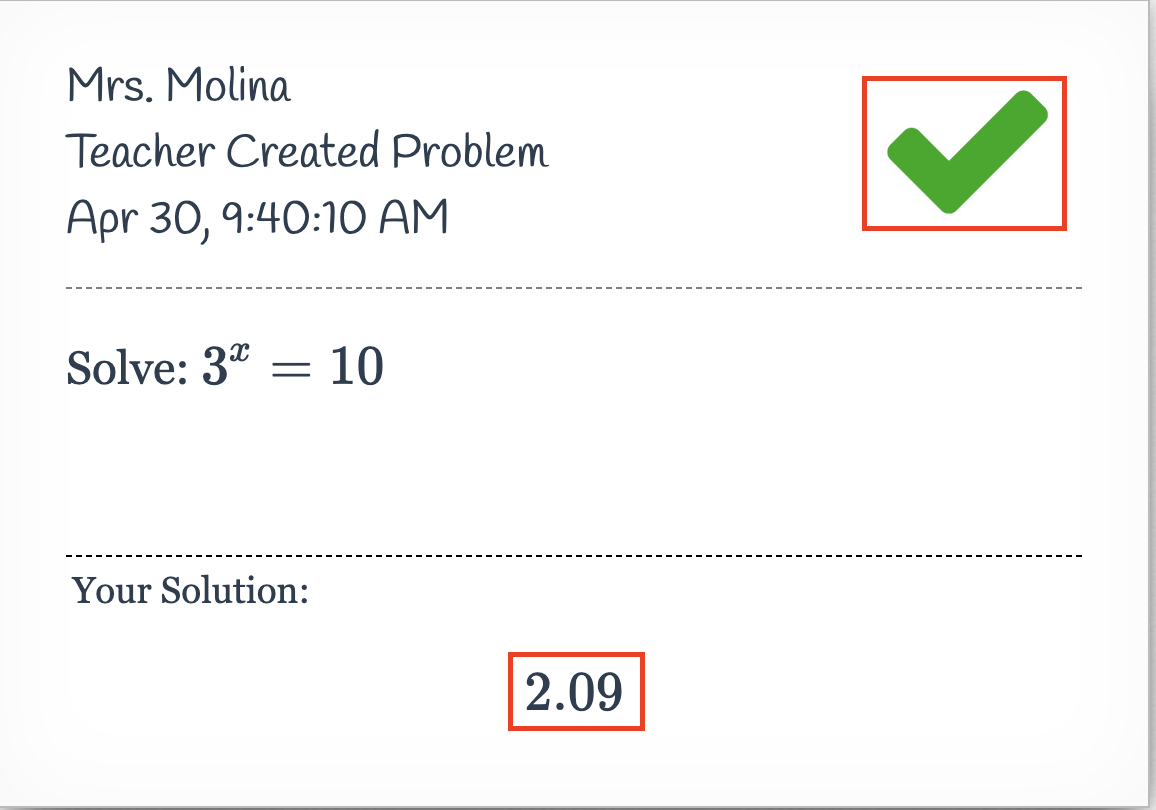 |
| As a note, any student submission within the acceptable range will be marked correct. | 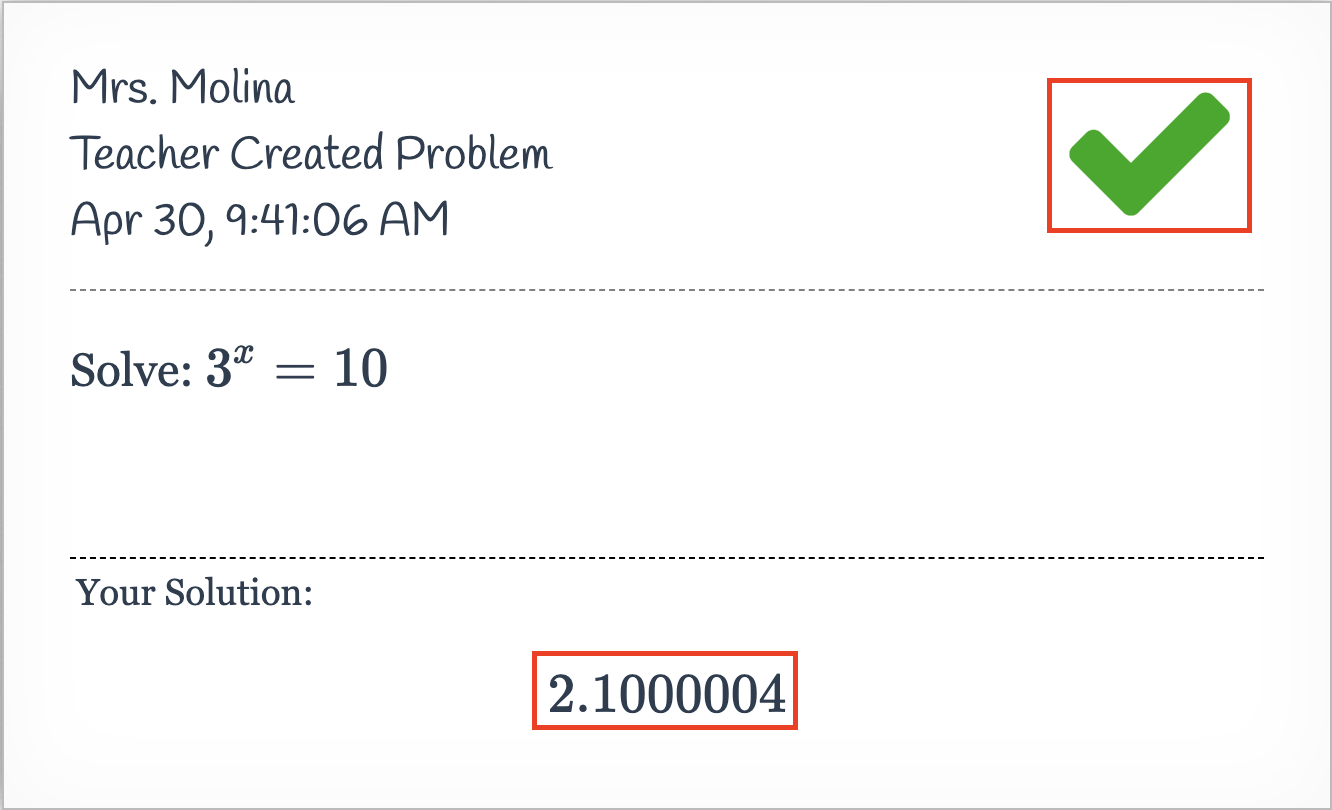 |
Mode
| The default mode for a standard question is “Radian,” which affects which equivalent answers will be accepted. |  |
| Using the example to the right, “Radian” mode is currently selected, and the answer is sin(pi/3). | 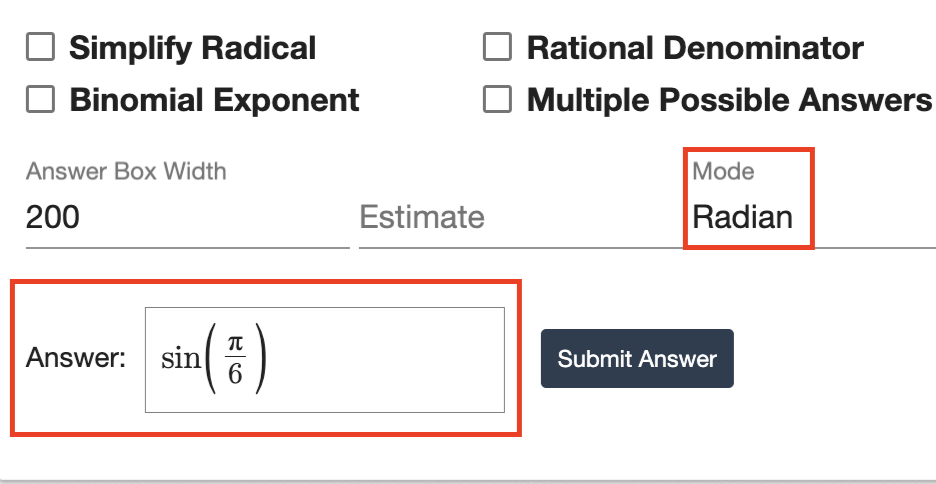 |
| Any equivalent answer in radians will be marked as correct. | 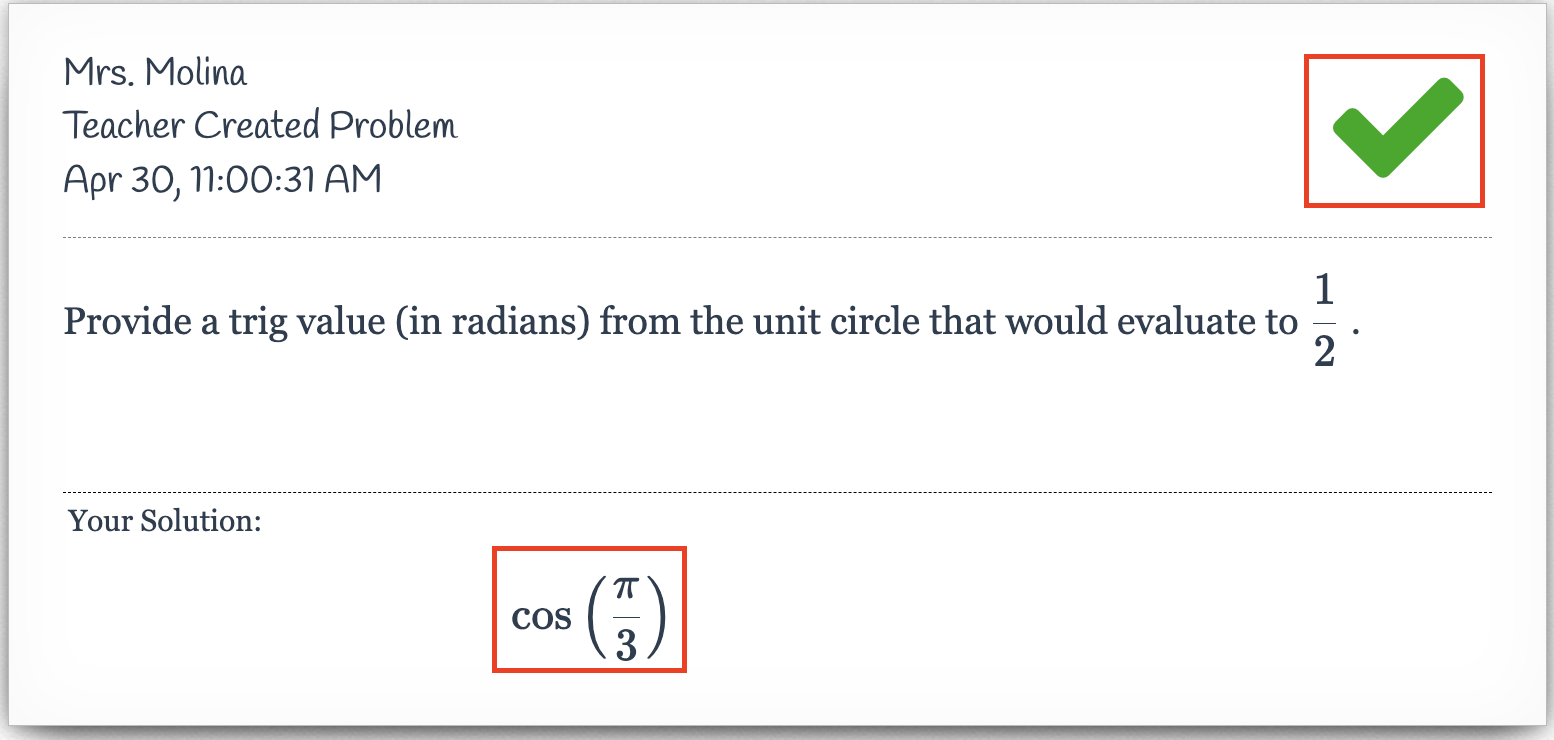 |
| However, if a student provides an equivalent answer in degrees, it will be marked incorrect. | 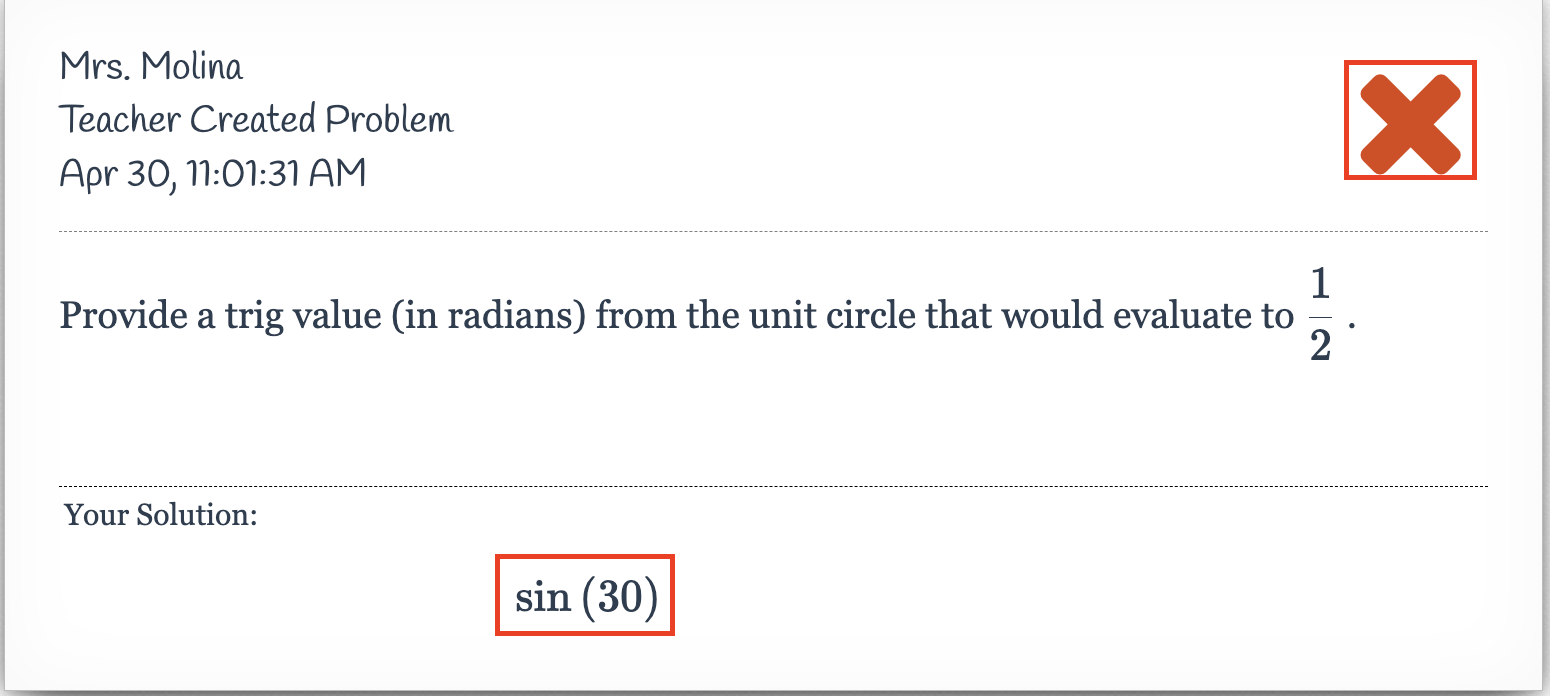 |
| Setting the mode to “Degree” means that any equivalent answer in degrees will be accepted. Using the example to the right, the correct answer is sin(30). | 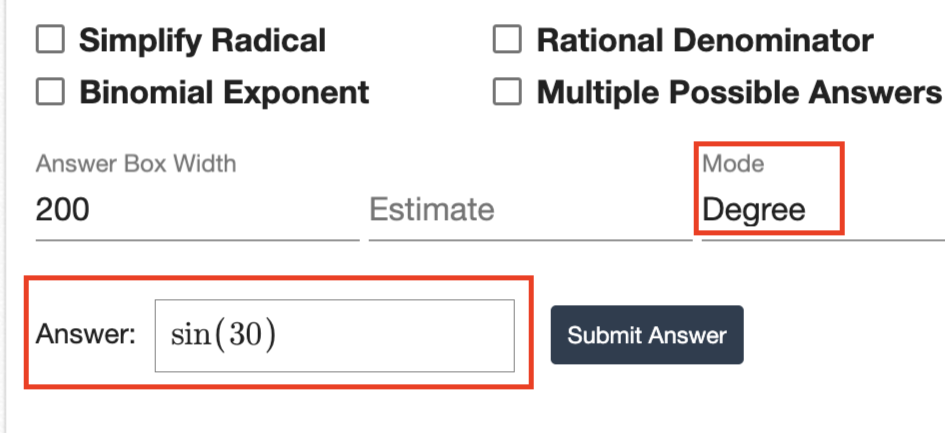 |
| If a student provides an equivalent answer in degrees, they will be marked correct. | 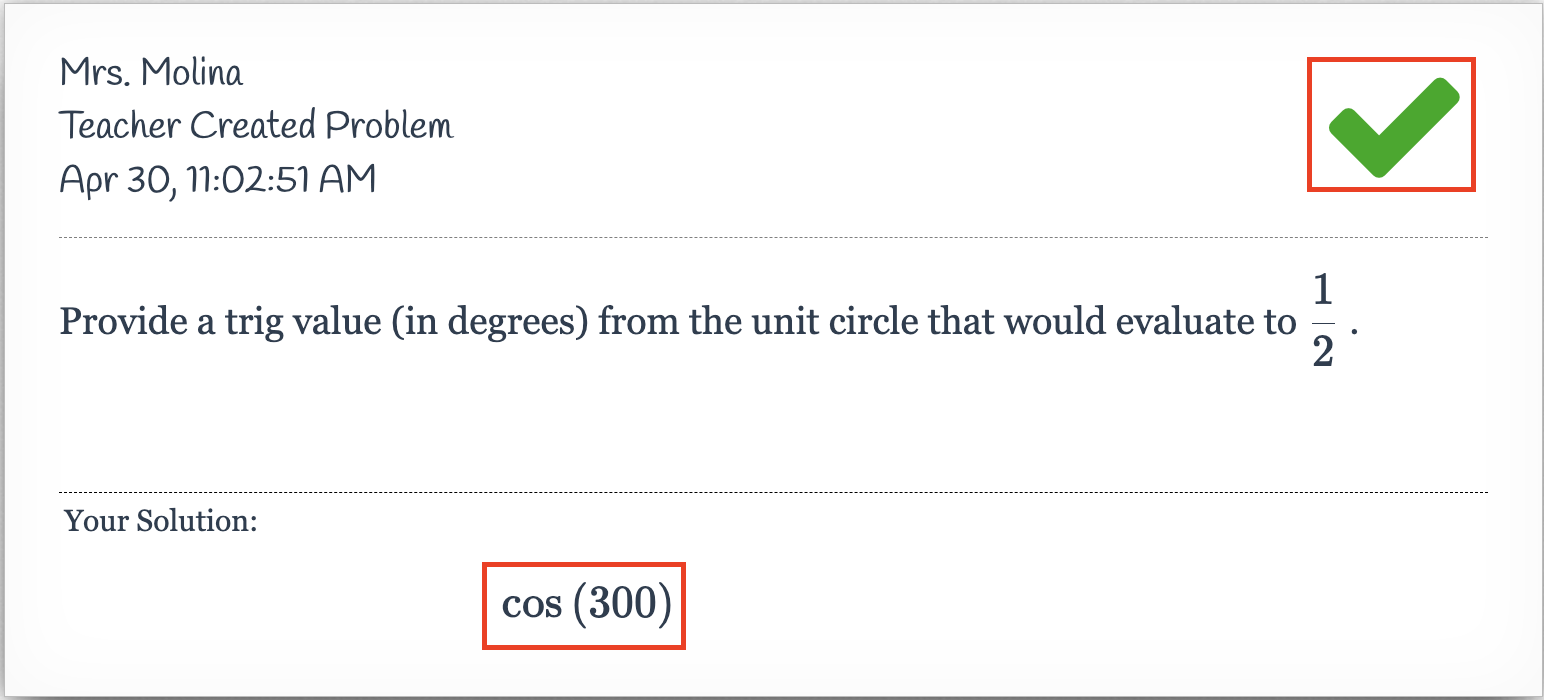 |
| Note: Regardless of which mode is selected, if the student enters the exact answer the teacher provided, their answer will be marked correct. |
Common Buttons
| Under “More Settings,” you can choose to add common buttons for your students. This means that instead of just a regular answer box, students will also see the option to click common button(s) to support them in typing their answer. |  |
| Click on “Common Buttons,” and a list will appear with different common buttons you can add to your question. | 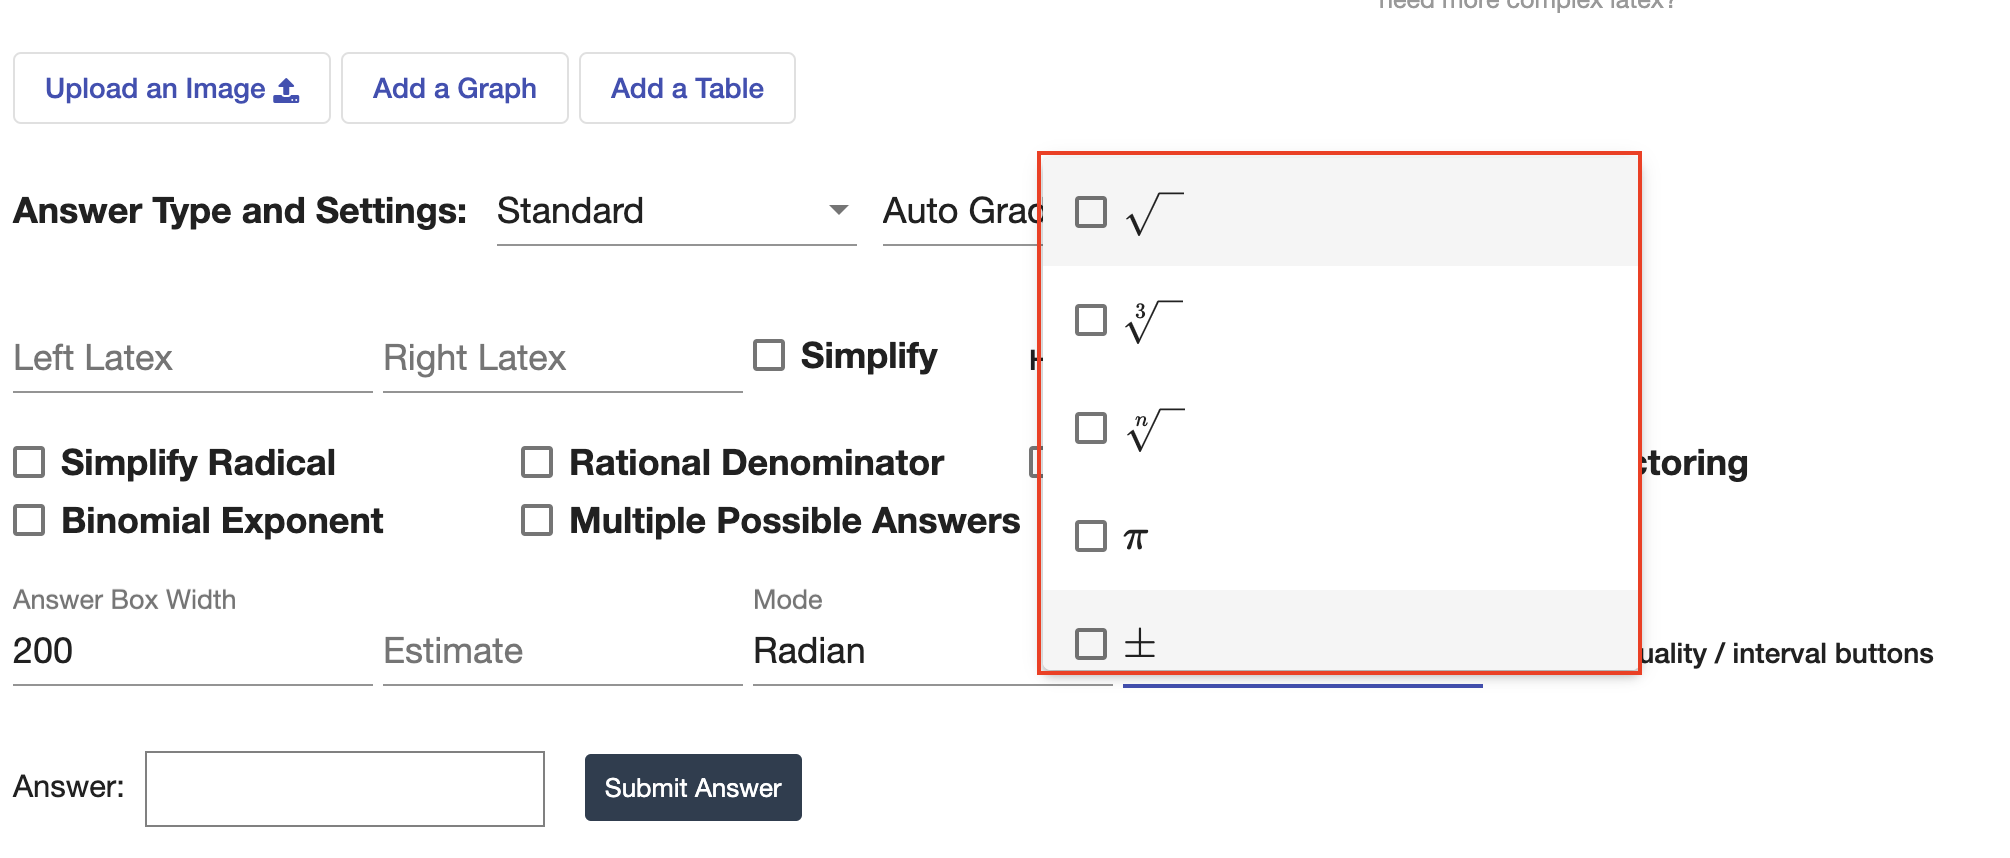 |
| Once selected, the common button will appear underneath the answer box of your question for students to click. You can select multiple common buttons if needed. | 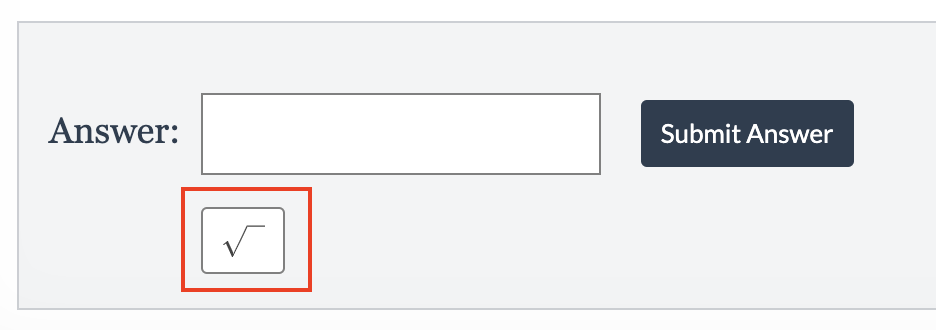 |
| You also have the option to “add inequality / interval buttons.” | 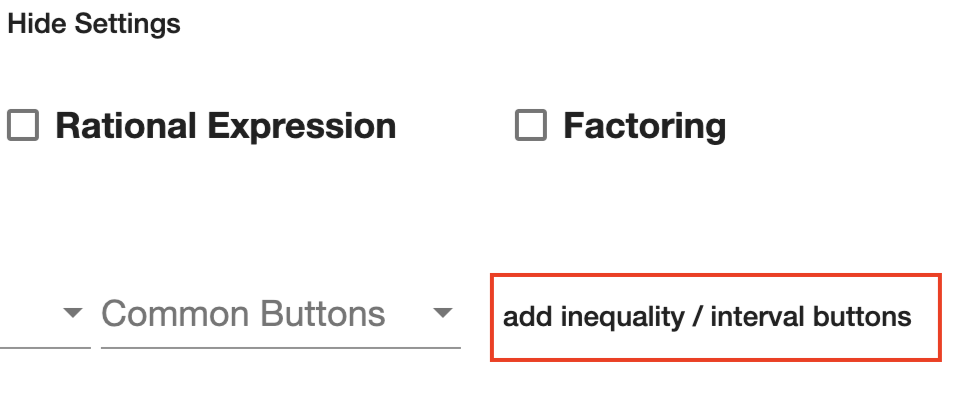 |
| If selected, students will have access to all inequality and interval common buttons when entering their answer. |  |
Preview a Standard Question
| You can preview your standard question by selecting “preview question” in the top right corner. | 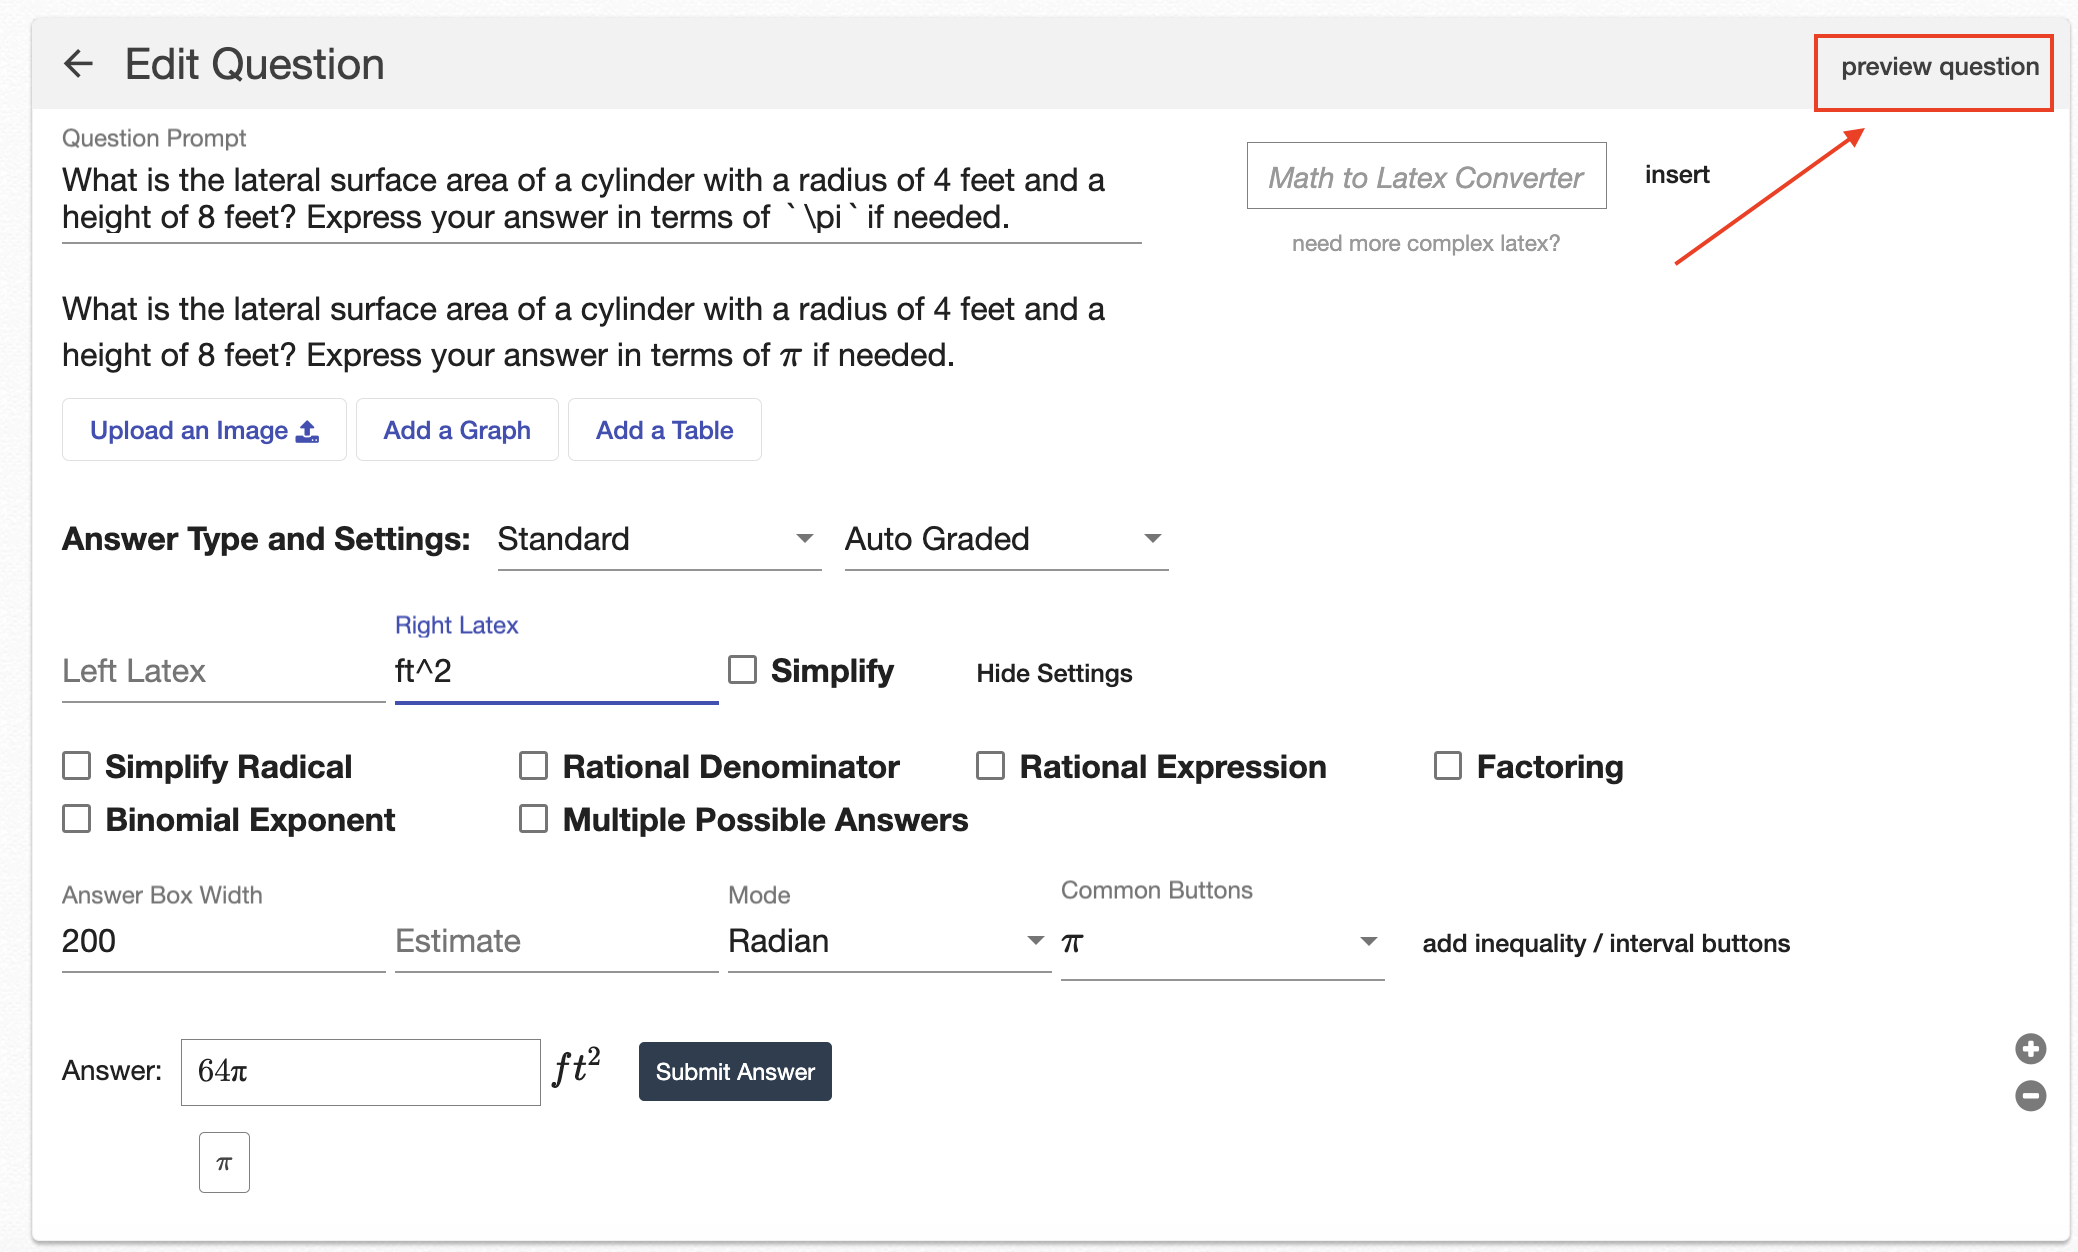 |
| Once selected, you will preview what the student will see for this question, including any left or right LaTeX you entered and any common buttons you selected. | 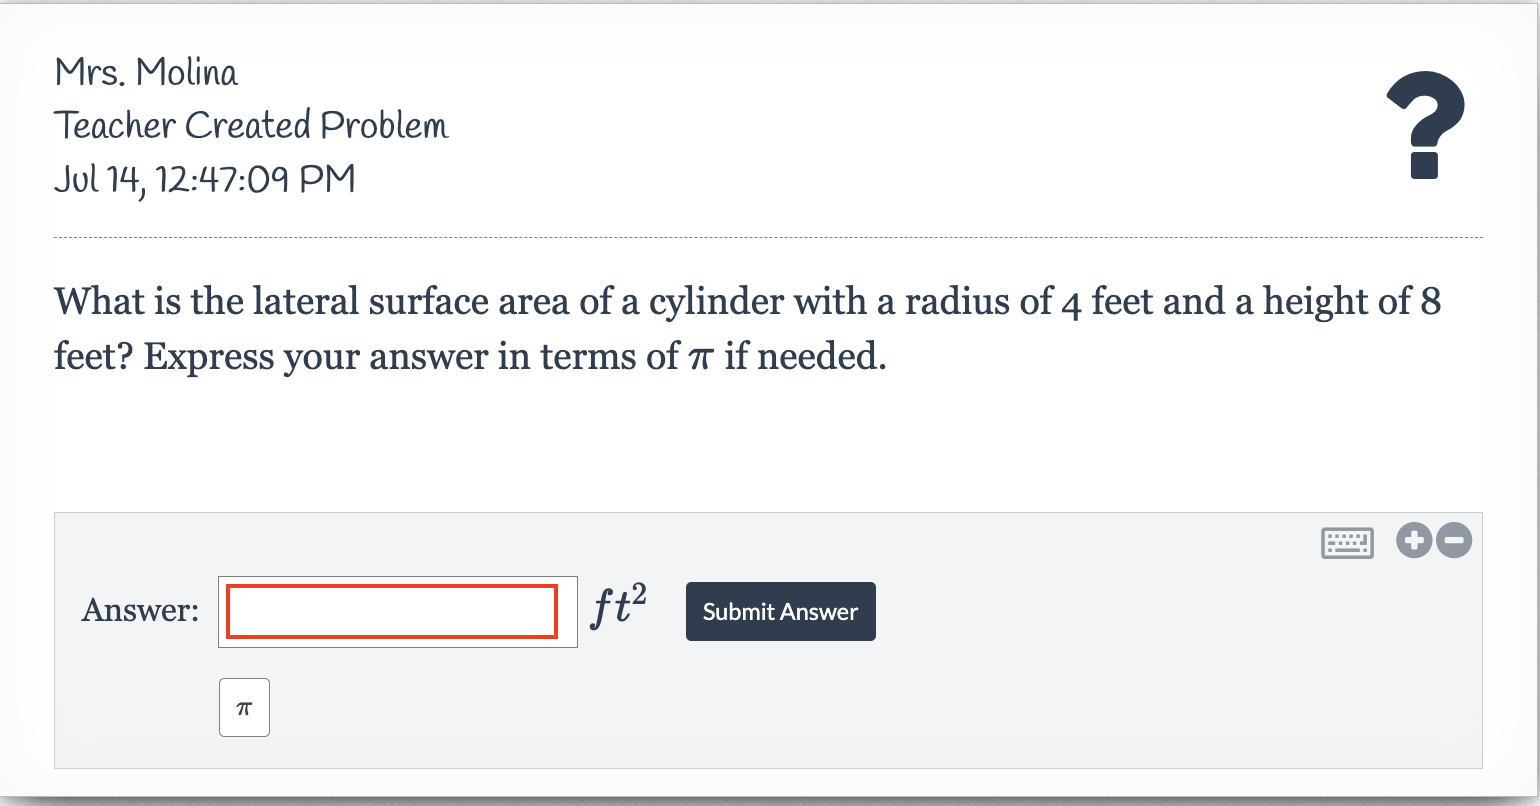 |
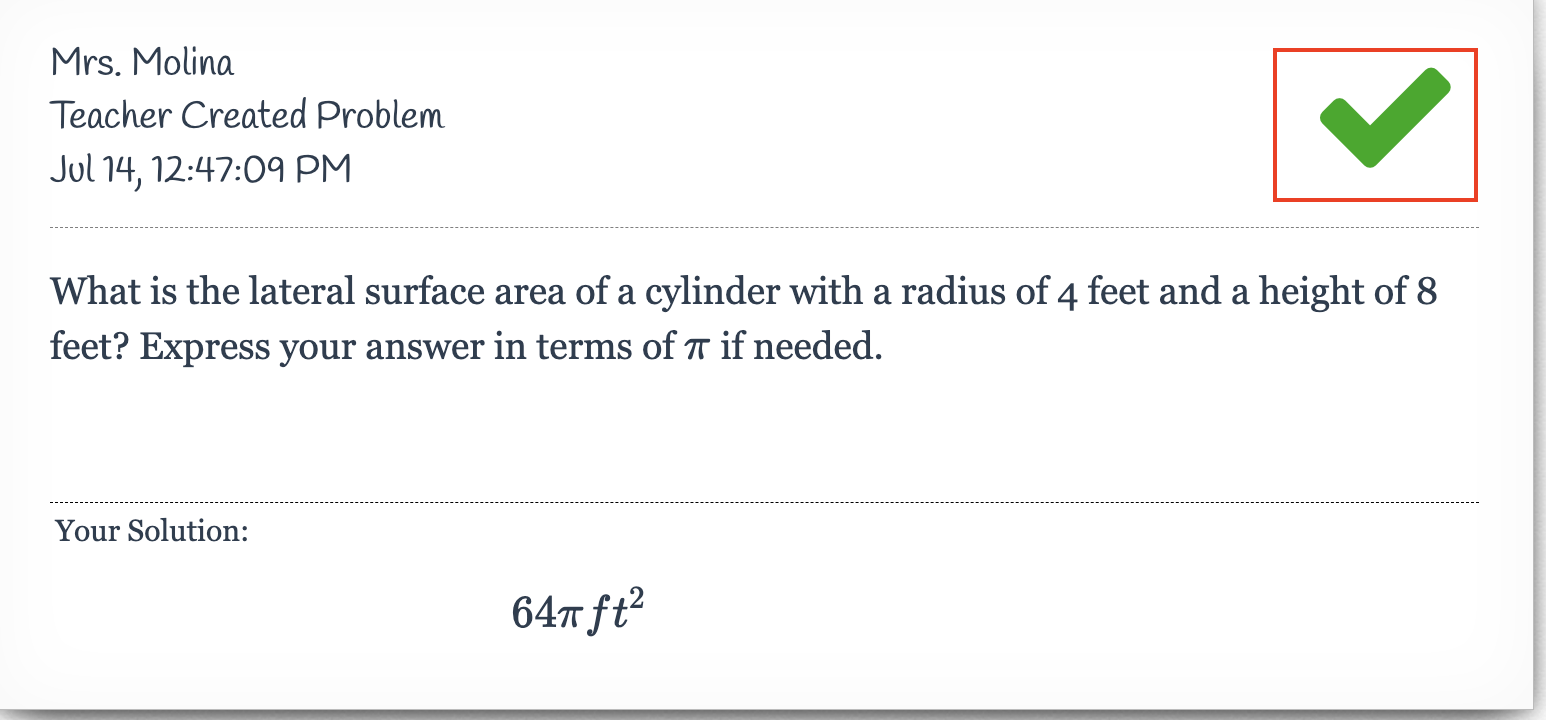
If you submit the correct answer, you should see a  icon. icon. |
 |
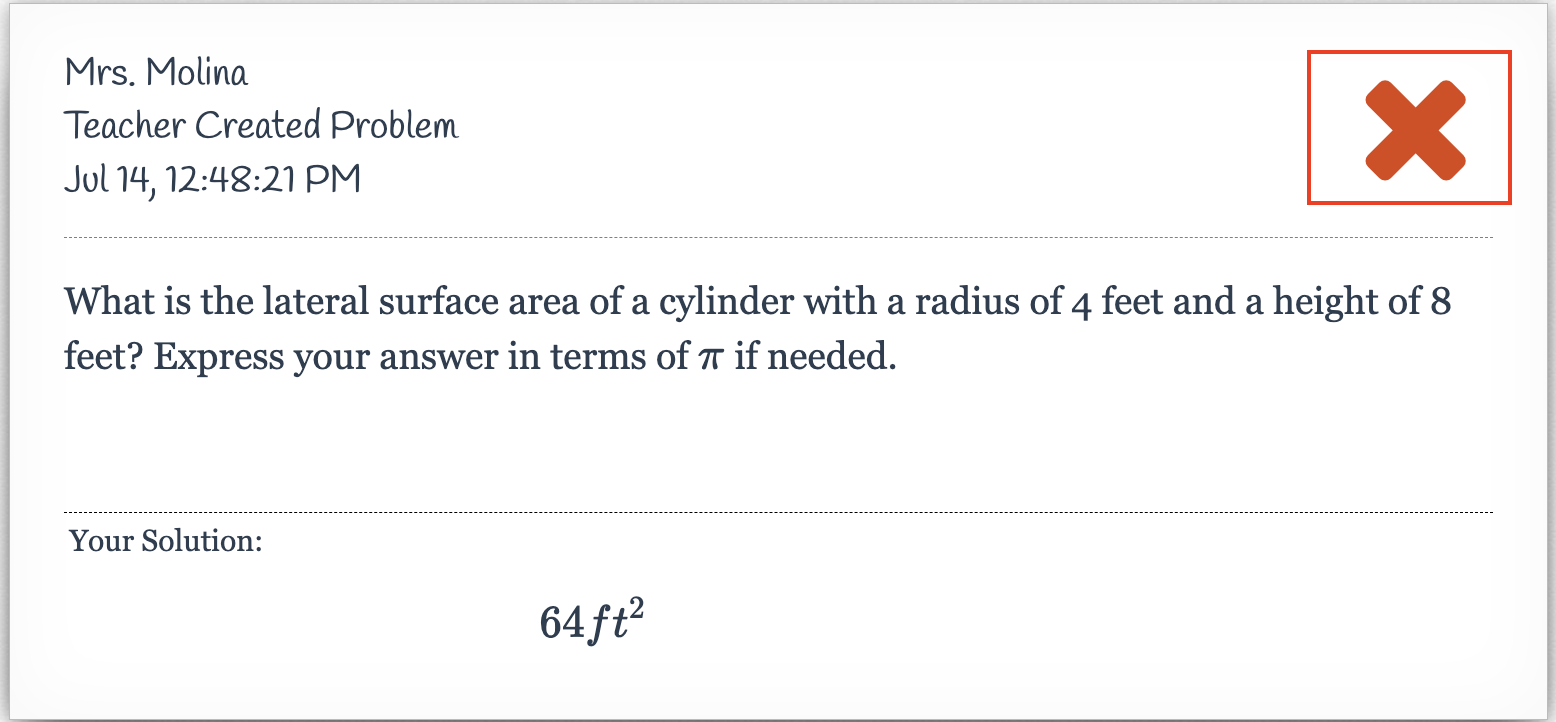
If you submit an incorrect answer, you should see an  icon. icon. |
 |
Grade a Standard Question
|
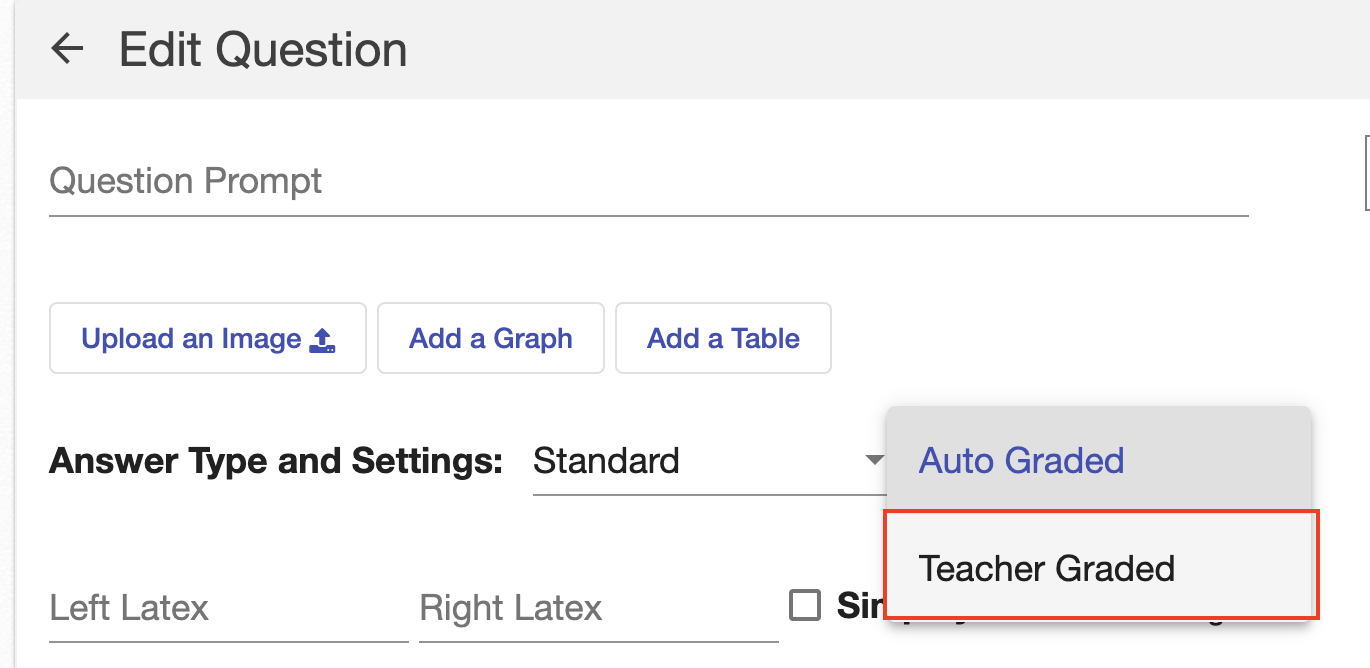
Standard questions are set to “Auto Graded” by default, which means they will be automatically graded using the answer provided by the teacher.
However, you can switch your grading to “Teacher Graded,” requiring you to individually grade student responses. |
 |
| From the student perspective, upon submitting an answer, they will not immediately see whether their response was correct or incorrect. Instead, they will see an icon indicating that this question is “Teacher Graded.” | 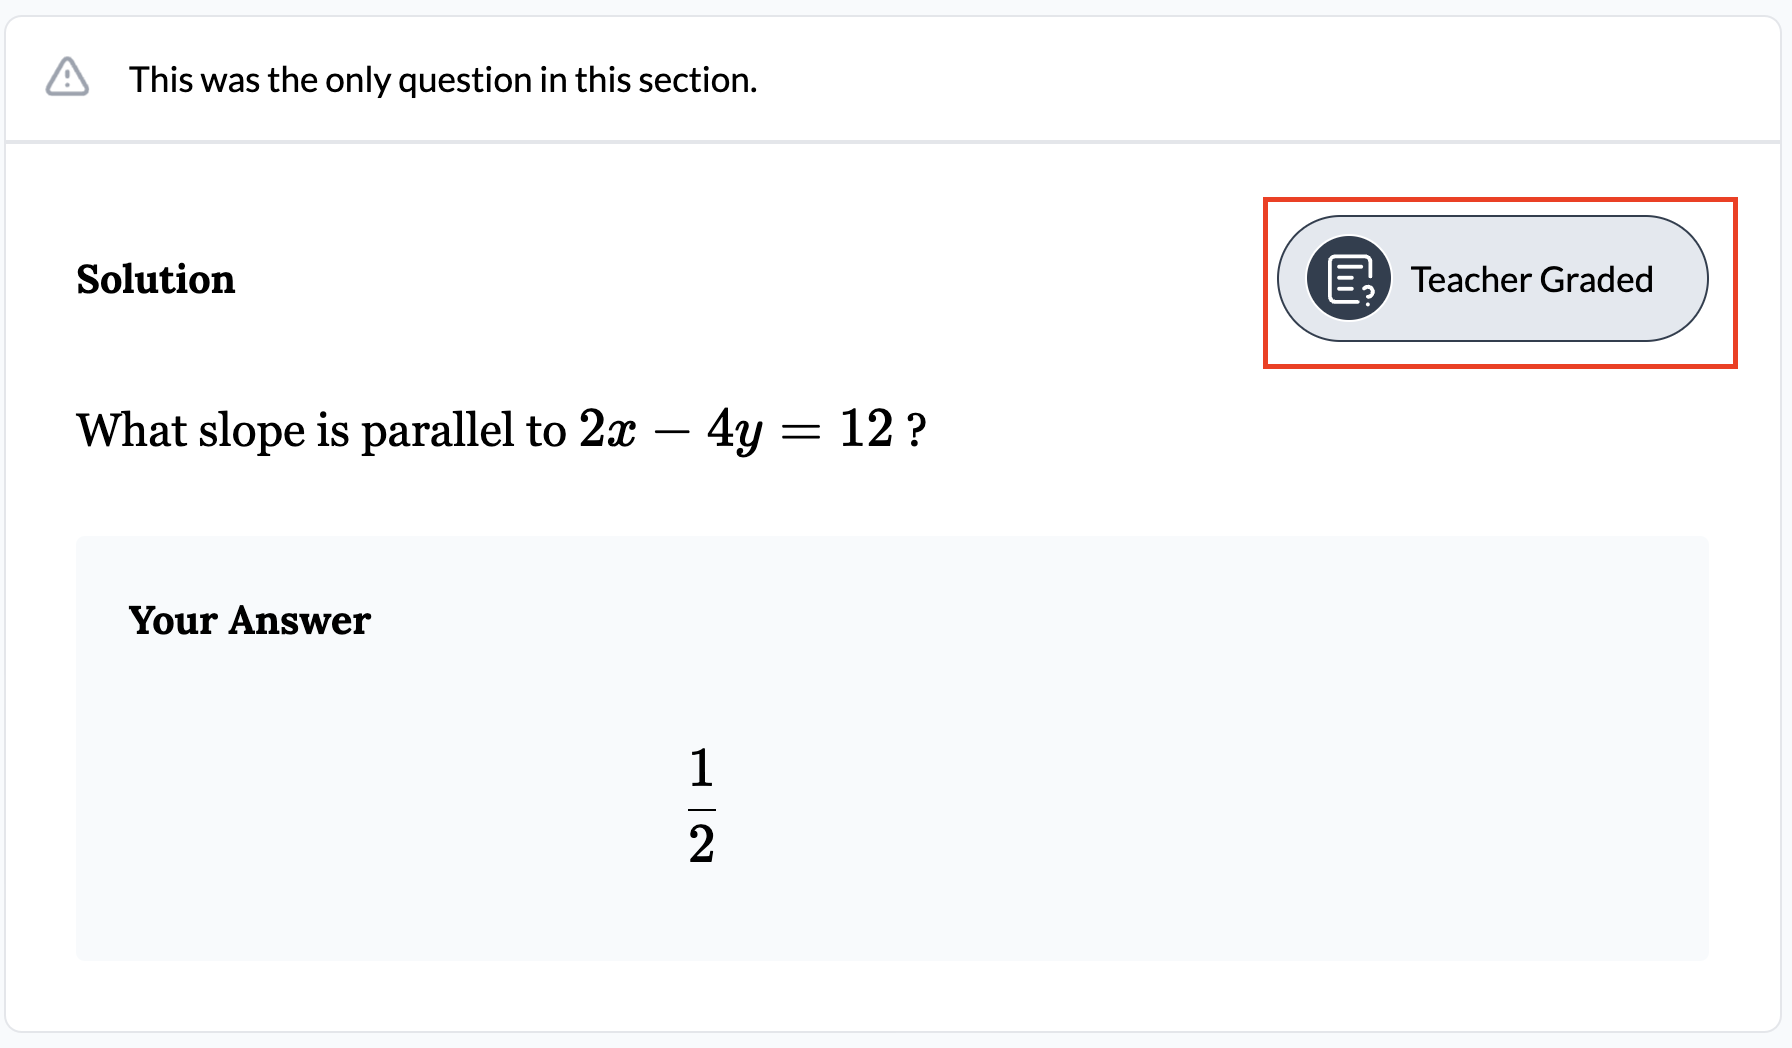 |
| To easily grade a teacher graded question, navigate to the assignment and select the name of the corresponding question above the column. | 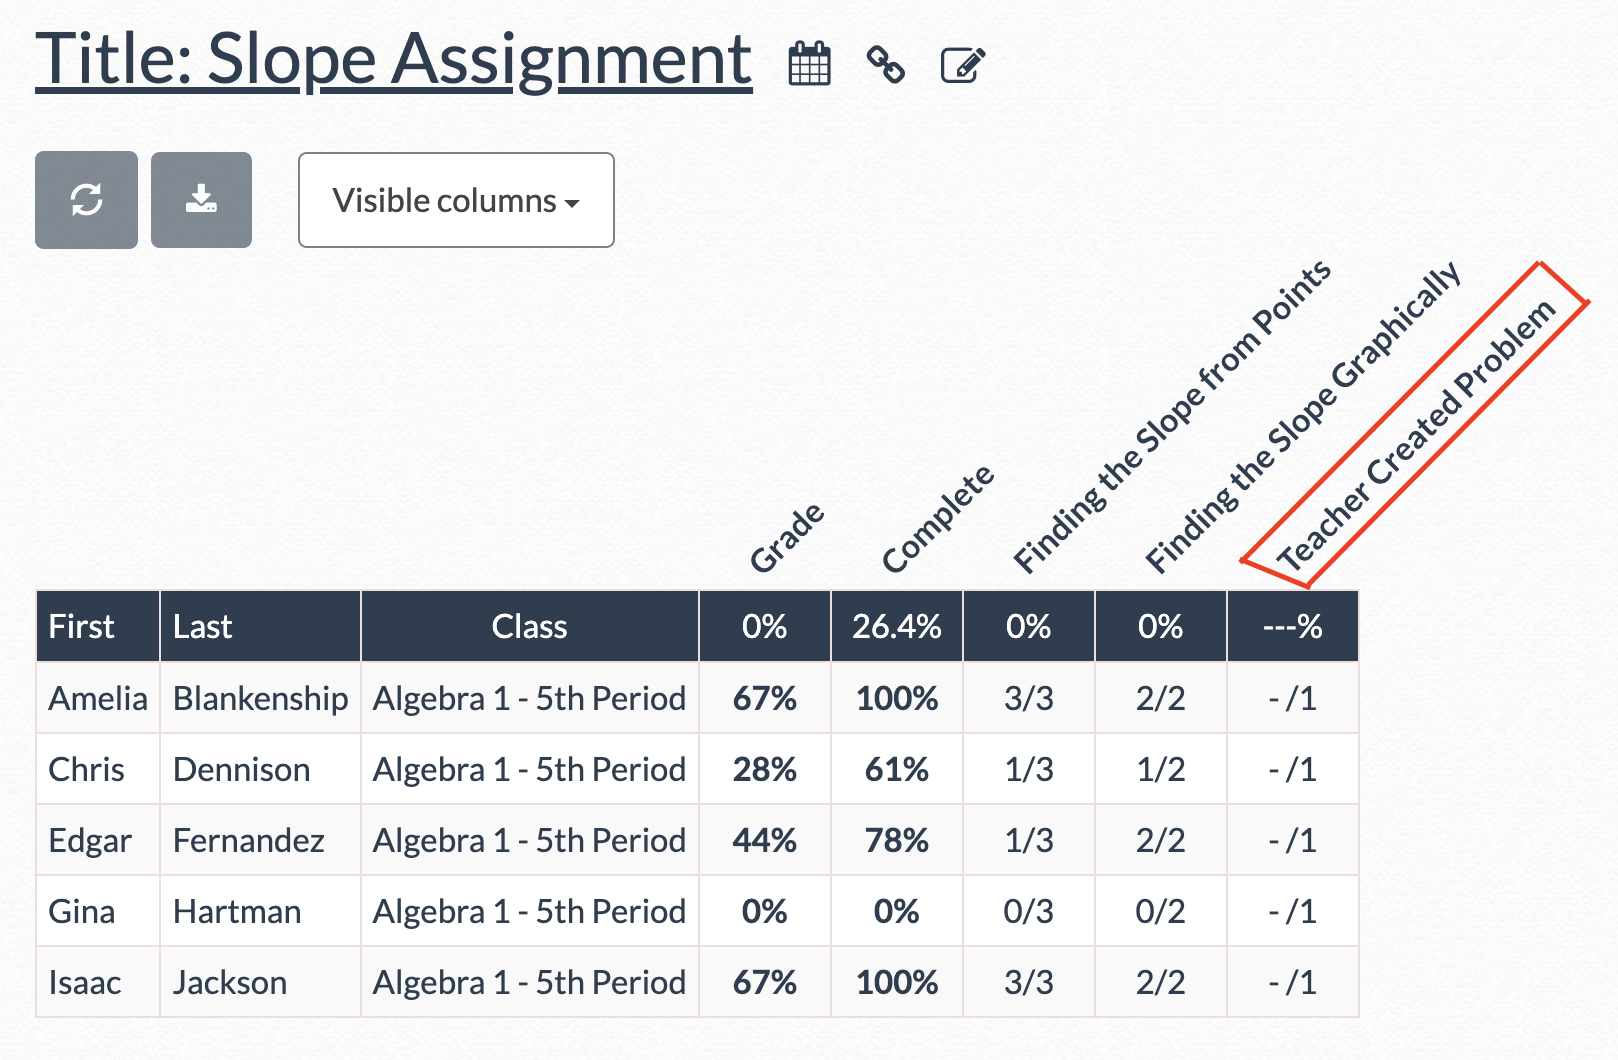 |
| From there, you will see the various answers students submitted for the question. | 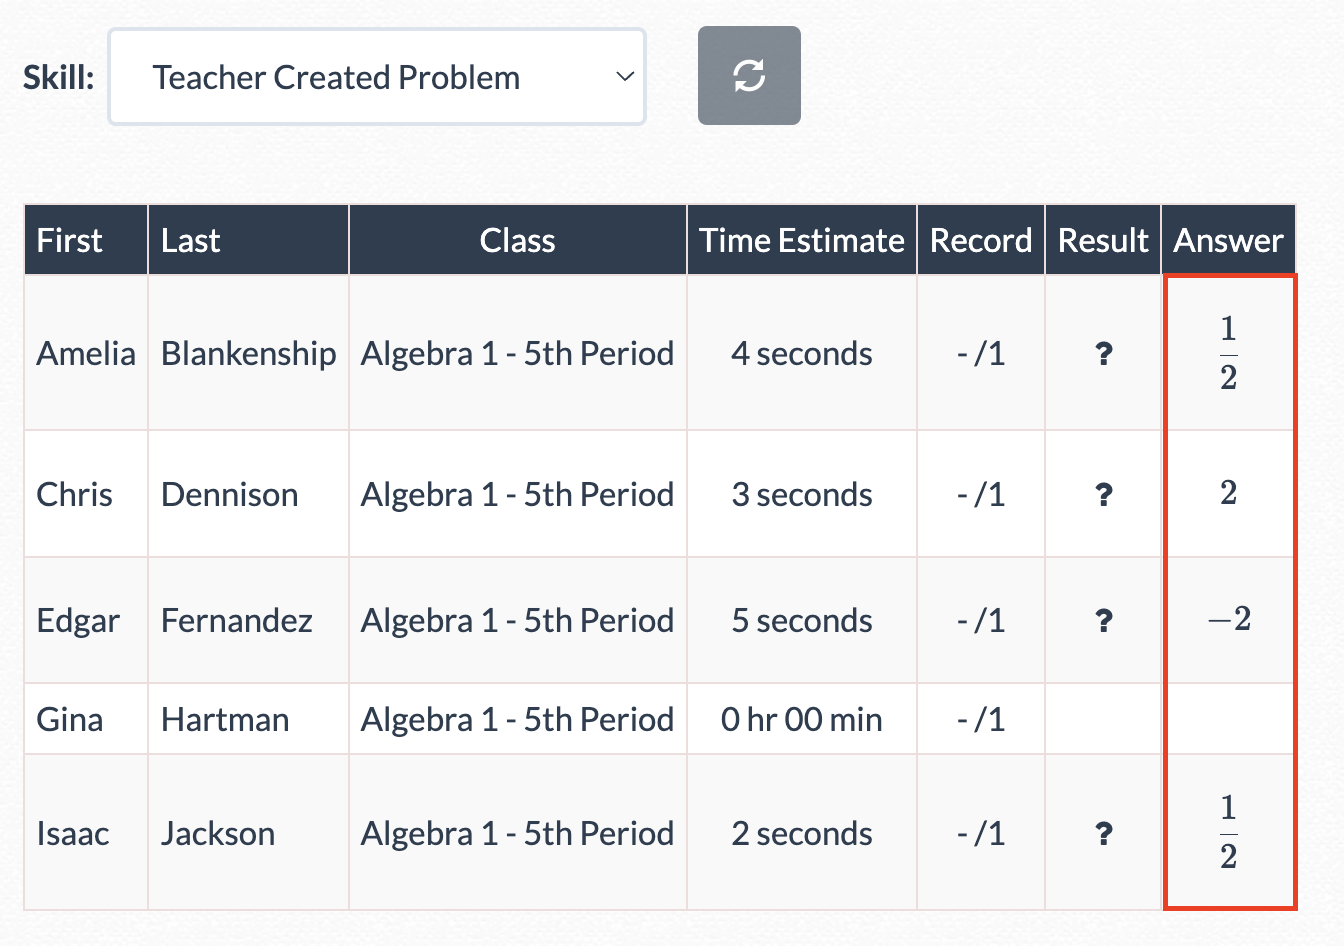 |
| Click on the “Record” column to assign full, partial, or no credit to each student for the question. | 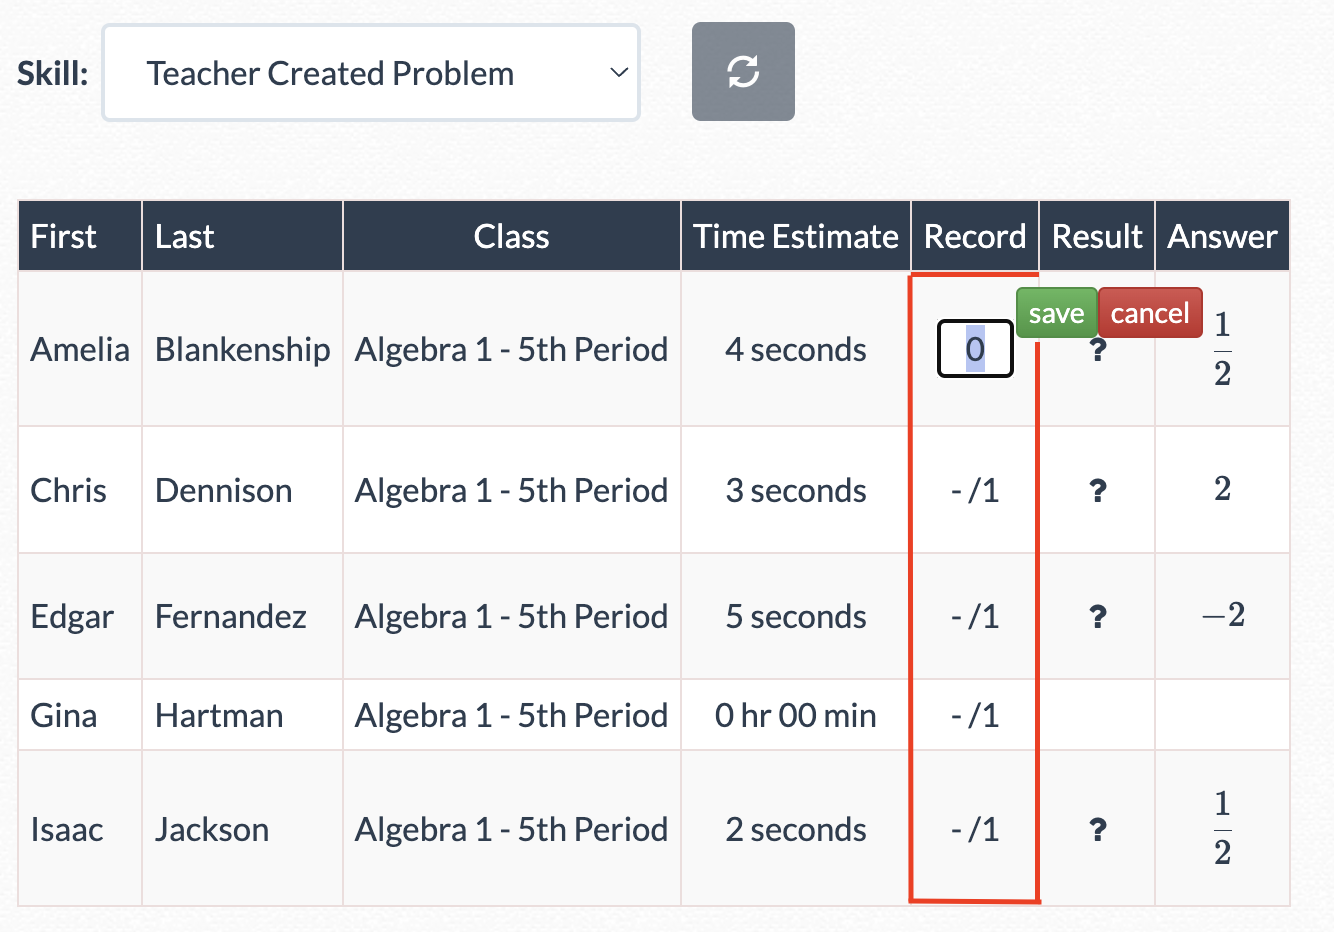 |
| Note: If you update the answer for an auto-graded question after students have begun the assignment, you will need to manually regrade any student who has already answered the question (where appropriate). |
- create
- standard questions
- standard
Was this article helpful?
